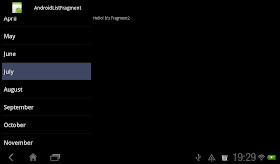
Create a new /res/layout/listfragment1.xml file, it's the layout of out ListFragment.
(If the list is empty, the TextView empty will be shown.)
<?xml version="1.0" encoding="utf-8"?>
 <LinearLayout xmlns:android="http://schemas.android.com/apk/res/android"
         android:orientation="vertical"
         android:layout_width="match_parent"
         android:layout_height="match_parent"
         android:paddingLeft="8dp"
         android:paddingRight="8dp">

     <ListView android:id="@id/android:list"
               android:layout_width="match_parent"
               android:layout_height="match_parent"
               android:layout_weight="1"
               android:drawSelectorOnTop="false"/>

     <TextView android:id="@id/android:empty"
               android:layout_width="match_parent"
               android:layout_height="match_parent"
               android:text="No data"/>
 </LinearLayout>
Create a new MyListFragment1.java class, extends com.exercise.AndroidListFragment. Override onCreate(), onCreateView() and onListItemClick() methods.
package com.exercise.AndroidListFragment;

import android.app.ListFragment;
import android.os.Bundle;
import android.view.LayoutInflater;
import android.view.View;
import android.view.ViewGroup;
import android.widget.ArrayAdapter;
import android.widget.ListAdapter;
import android.widget.ListView;
import android.widget.Toast;

public class MyListFragment1 extends ListFragment {

 String[] month ={
   "January",
   "February",
   "March",
   "April",
   "May",
   "June",
   "July",
   "August",
   "September",
   "October",
   "November",
   "December"
 };

 @Override
 public void onCreate(Bundle savedInstanceState) {
  super.onCreate(savedInstanceState);
  ListAdapter myListAdapter = new ArrayAdapter<String>(
    getActivity(),
    android.R.layout.simple_list_item_1,
    month);
  setListAdapter(myListAdapter);
 }

 @Override
 public View onCreateView(LayoutInflater inflater, ViewGroup container,
   Bundle savedInstanceState) {
  return inflater.inflate(R.layout.listfragment1, container, false);
 }

 @Override
 public void onListItemClick(ListView l, View v, int position, long id) {
  // TODO Auto-generated method stub
  Toast.makeText(
    getActivity(),
    getListView().getItemAtPosition(position).toString(),
    Toast.LENGTH_LONG).show();
 }
}
Add another dummy Fragment.
Create a new /res/layout/fragment2.xml, the layout of the second Fragment.
<?xml version="1.0" encoding="utf-8"?>
<LinearLayout xmlns:android="http://schemas.android.com/apk/res/android"
    android:layout_width="match_parent"
    android:layout_height="match_parent"
    android:orientation="vertical" >

    <TextView
        android:id="@+id/fragment2text"
        android:layout_width="match_parent"
        android:layout_height="wrap_content"
        android:text="Hello! It's Fragment2" />
</LinearLayout>
Fragment2.java, extends android.app.Fragment. Override onCreateView() method.
package com.exercise.AndroidListFragment;

import android.app.Fragment;
import android.os.Bundle;
import android.view.LayoutInflater;
import android.view.View;
import android.view.ViewGroup;

public class Fragment2 extends Fragment {

 @Override
 public View onCreateView(LayoutInflater inflater, ViewGroup container,
   Bundle savedInstanceState) {
  // TODO Auto-generated method stub
  return inflater.inflate(R.layout.fragment2, container, false);
 }

}
Modify main.xml to include both Fragments
<?xml version="1.0" encoding="utf-8"?>
<LinearLayout xmlns:android="http://schemas.android.com/apk/res/android"
    android:layout_width="fill_parent"
    android:layout_height="fill_parent"
    android:orientation="horizontal" >

  <fragment
      android:name="com.exercise.AndroidListFragment.MyListFragment1"
      android:id="@+id/fragment1"
      android:layout_weight="1"
      android:layout_width="0px"
      android:layout_height="match_parent" />
  <fragment
      android:name="com.exercise.AndroidListFragment.Fragment2"
      android:id="@+id/fragment2"
      android:layout_weight="2"
      android:layout_width="0px"
      android:layout_height="match_parent" />

</LinearLayout>Next:
- Implement custom ArrayAdapter to display icon on ListFragment
- ListFragment with multiple choice
thanks a lot!, very clear! to the point ;)
ReplyDeleteThank you... you saved my day!
ReplyDeleteI just have the same code, but the fragment is supposed to be inside another fragment which is inside a TAB (API 14). It does not seem to work for me.
ReplyDeleteERROR: "You must have a list view whose id attribute is 'andorid.R.id.list'"
Hi,
ReplyDeleteIs it possible to add new rows to the String list that appears on the left hand frag,
Thanks
Thank you! very helpful!
ReplyDeleteSaved my life! I was searching for an entire day a good example of ListFragment without success.
ReplyDeleteHow to make this list with icon. so the result is different icon for different array list. just like your activity tutorial. but i dont know how to implement it in listfragment
ReplyDeletehello Kantong Kresek,
ReplyDeletePlease read Implement custom ArrayAdapter to display icon on ListFragment.
you don't need to create a view listfragment1.xml for ListFragment. There is already a default view created internally.
ReplyDeletehow to create list with multiselect option in above code??
ReplyDeletehello Go,
ReplyDeletePlease read ListFragment with multiple choice.
Thank you very much. I can just find out my mistake with the help of this tutorial. Really a awesome one. Simple and clear. Great :)
ReplyDeletebrother my code didnt work......it just crashed :(
ReplyDeleteHOW TO DISPLAY SD FILE TO LISTFRAGMENT
ReplyDeletehow can I pass data file to fragment2 when I click on list item??
ReplyDeletethanks