Friday, May 29, 2015

Android example: Thread, Handler and Looper

Example to run task on background thread using Thread, Handler and Looper:


com.example.androidthreadlooperhandler.MainActivity
package com.example.androidthreadlooperhandler;

import android.os.Bundle;
import android.os.Handler;
import android.os.Looper;
import android.os.Message;
import android.support.v7.app.ActionBarActivity;
import android.view.View;
import android.widget.Button;
import android.widget.TextView;

public class MainActivity extends ActionBarActivity {

    Button btn1, btn2;
    TextView textInfo;

    MyThread myThread;

    @Override
    protected void onCreate(Bundle savedInstanceState) {
        super.onCreate(savedInstanceState);
        setContentView(R.layout.activity_main);
        btn1 = (Button)findViewById(R.id.button1);
        btn2 = (Button)findViewById(R.id.button2);
        textInfo = (TextView)findViewById(R.id.info);

        btn1.setOnClickListener(btnOnClickListener);
        btn2.setOnClickListener(btnOnClickListener);

        myThread = new MyThread();
        myThread.start();
    }

    @Override
    protected void onDestroy() {
        super.onDestroy();

        //stop and quit the background Thread
        myThread.handler.getLooper().quit();
    }

    View.OnClickListener btnOnClickListener =
        new View.OnClickListener(){

            @Override
            public void onClick(View v) {
                if(myThread.handler != null){
                    Message message;
                    if(v==btn1){
                        message = myThread.handler.obtainMessage(MyThread.MSG1);
                    }else{
                        message = myThread.handler.obtainMessage(MyThread.MSG2);
                    }
                    myThread.handler.sendMessage(message);
                }
            }
        };

    private class MyThread extends Thread{

        static final int MSG1 = 1;
        static final int MSG2 = 2;

        public Handler handler;

        public void run(){
            Looper.prepare();
            handler = new MyHandler();
            Looper.loop();
        }

        private class MyHandler extends Handler{
            @Override
            public void handleMessage(Message msg) {
                // ...Run in background

                int what = msg.what;
                switch (what){
                    case MSG1:

                        //doing something...
                        try {
                            Thread.sleep(2000);
                        } catch (InterruptedException e) {
                            e.printStackTrace();
                        }

                        runOnUiThread(new Runnable() {
                            @Override
                            public void run() {
                                textInfo.setText("Message 1");
                            }
                        });

                        break;
                    case MSG2:

                        //doing something...
                        try {
                            Thread.sleep(2000);
                        } catch (InterruptedException e) {
                            e.printStackTrace();
                        }

                        runOnUiThread(new Runnable() {
                            @Override
                            public void run() {
                                textInfo.setText("Message 2");
                            }
                        });

                        break;

                }
            }
        }
    }
}


layout/activity_main.xml
<LinearLayout xmlns:android="http://schemas.android.com/apk/res/android"
    xmlns:tools="http://schemas.android.com/tools"
    android:layout_width="match_parent"
    android:layout_height="match_parent"
    android:paddingLeft="10dp"
    android:paddingRight="10dp"
    android:paddingTop="10dp"
    android:paddingBottom="10dp"
    android:orientation="vertical"
    tools:context=".MainActivity">

    <TextView
        android:layout_width="wrap_content"
        android:layout_height="wrap_content"
        android:layout_gravity="center_horizontal"
        android:autoLink="web"
        android:text="http://android-er.blogspot.com/"
        android:textStyle="bold" />

    <Button
        android:id="@+id/button1"
        android:layout_width="match_parent"
        android:layout_height="wrap_content"
        android:text="Button 1"/>

    <Button
        android:id="@+id/button2"
        android:layout_width="match_parent"
        android:layout_height="wrap_content"
        android:text="Button 2"/>

    <TextView
        android:id="@+id/info"
        android:layout_width="match_parent"
        android:layout_height="wrap_content"/>

</LinearLayout>


In this example, background thread update UI (TextView) via runOnUiThread(). It's modified in next example to implement Handlers in both UI and background thread, to pass data in both direction via Handler/Message.


Google officially announced its IoT platform, Project Brillo

Brillo extends the Android platform to all your connected devices, so they are easy to set up and work seamlessly with each other and your smartphone.

https://developers.google.com/brillo/


Thursday, May 28, 2015

SDK for Android M (preview) is available now

Android SDK for Android M (API 22, MNC Preview) is available. It can be installed in Android SDK Manager.


Android App to control Arduino+ESP8266 web connected LED

It's a Android app connect to Arduino Due + ESP8266 WiFi module web server (in my another blog arduino-er), control the Due on-board LED. Android have to join the AP of ESP8266 before send command.


com.example.arduinoesp.MainActivity
package com.example.arduinoesp;

import android.os.AsyncTask;
import android.os.Bundle;
import android.support.v7.app.ActionBarActivity;
import android.view.View;
import android.widget.Button;
import android.widget.EditText;
import android.widget.TextView;

import org.apache.http.HttpResponse;
import org.apache.http.client.ClientProtocolException;
import org.apache.http.client.HttpClient;
import org.apache.http.client.methods.HttpGet;
import org.apache.http.impl.client.DefaultHttpClient;

import java.io.BufferedReader;
import java.io.IOException;
import java.io.InputStream;
import java.io.InputStreamReader;
import java.net.URI;
import java.net.URISyntaxException;


public class MainActivity extends ActionBarActivity {

    EditText editIp;
    Button btnOn, btnOff;
    TextView textInfo1, textInfo2;

    @Override
    protected void onCreate(Bundle savedInstanceState) {
        super.onCreate(savedInstanceState);
        setContentView(R.layout.activity_main);
        editIp = (EditText)findViewById(R.id.ip);
        btnOn = (Button)findViewById(R.id.bon);
        btnOff = (Button)findViewById(R.id.boff);
        textInfo1 = (TextView)findViewById(R.id.info1);
        textInfo2 = (TextView)findViewById(R.id.info2);

        btnOn.setOnClickListener(btnOnOffClickListener);
        btnOff.setOnClickListener(btnOnOffClickListener);
    }

    View.OnClickListener btnOnOffClickListener = new View.OnClickListener(){
        @Override
        public void onClick(View v) {
            String onoff;
            if(v==btnOn){
                onoff="1";
            }else{
                onoff="0";
            }

            btnOn.setEnabled(false);
            btnOff.setEnabled(false);

            String serverIP = editIp.getText().toString()+":80";

            TaskEsp taskEsp = new TaskEsp(serverIP);
            taskEsp.execute(onoff);

        }
    };

    private class TaskEsp extends AsyncTask<String, Void, String> {

        String server;

        TaskEsp(String server){
            this.server = server;
        }

        @Override
        protected String doInBackground(String... params) {

            String val = params[0];
            final String p = "http://"+server+"?led="+val;

            runOnUiThread(new Runnable(){
                @Override
                public void run() {
                    textInfo1.setText(p);
                }
            });

            String serverResponse = "";
            HttpClient httpclient = new DefaultHttpClient();
            try {
                HttpGet httpGet = new HttpGet();
                httpGet.setURI(new URI(p));
                HttpResponse httpResponse = httpclient.execute(httpGet);

                InputStream inputStream = null;
                inputStream = httpResponse.getEntity().getContent();
                BufferedReader bufferedReader =
                        new BufferedReader(new InputStreamReader(inputStream));
                serverResponse = bufferedReader.readLine();

                inputStream.close();
            } catch (URISyntaxException e) {
                e.printStackTrace();
                serverResponse = e.getMessage();
            } catch (ClientProtocolException e) {
                e.printStackTrace();
                serverResponse = e.getMessage();
            } catch (IOException e) {
                e.printStackTrace();
                serverResponse = e.getMessage();
            }

            return serverResponse;
        }

        @Override
        protected void onPostExecute(String s) {
            textInfo2.setText(s);
            btnOn.setEnabled(true);
            btnOff.setEnabled(true);
        }
    }

}


layout/activity_main.xml
<LinearLayout xmlns:android="http://schemas.android.com/apk/res/android"
    xmlns:tools="http://schemas.android.com/tools"
    android:layout_width="match_parent"
    android:layout_height="match_parent"
    android:paddingLeft="@dimen/activity_horizontal_margin"
    android:paddingRight="@dimen/activity_horizontal_margin"
    android:paddingTop="@dimen/activity_vertical_margin"
    android:paddingBottom="@dimen/activity_vertical_margin"
    android:orientation="vertical"
    tools:context=".MainActivity">

    <TextView
        android:layout_width="wrap_content"
        android:layout_height="wrap_content"
        android:layout_gravity="center_horizontal"
        android:autoLink="web"
        android:text="http://android-er.blogspot.com/"
        android:textStyle="bold" />

    <EditText
        android:id="@+id/ip"
        android:layout_width="match_parent"
        android:layout_height="wrap_content"
        android:text="192.168.4.1" />

    <Button
        android:id="@+id/bon"
        android:layout_width="match_parent"
        android:layout_height="wrap_content"
        android:text="LED ON" />

    <Button
        android:id="@+id/boff"
        android:layout_width="match_parent"
        android:layout_height="wrap_content"
        android:text="LED OFF" />
    <TextView
        android:id="@+id/info1"
        android:layout_width="match_parent"
        android:layout_height="wrap_content"
        android:textStyle="italic"/>
    <TextView
        android:id="@+id/info2"
        android:layout_width="match_parent"
        android:layout_height="wrap_content"
        android:textStyle="bold"/>
</LinearLayout>


Make sure to add uses-permission of "android.permission.INTERNET" in src/main/AndroidManifest.xml
<?xml version="1.0" encoding="utf-8"?>
<manifest xmlns:android="http://schemas.android.com/apk/res/android"
    package="com.example.arduinoesp" >

    <uses-permission android:name="android.permission.INTERNET" />

    <application
        android:allowBackup="true"
        android:icon="@mipmap/ic_launcher"
        android:label="@string/app_name"
        android:theme="@style/AppTheme" >
        <activity
            android:name=".MainActivity"
            android:label="@string/app_name" >
            <intent-filter>
                <action android:name="android.intent.action.MAIN" />

                <category android:name="android.intent.category.LAUNCHER" />
            </intent-filter>
        </activity>
    </application>

</manifest>


download filesDownload the files (Android Studio Format).

Wednesday, May 27, 2015

Android custom touch view, with callback interface.

This example, implement custom view with touch function, and also callback interface. And also implement listener at activity side. Such that the view can pass touched information to activity.


com.example.androidtouchview.TouchView.java, custom view.
package com.example.androidtouchview;

import android.content.Context;
import android.graphics.Canvas;
import android.graphics.Color;
import android.graphics.Paint;
import android.util.AttributeSet;
import android.view.MotionEvent;
import android.view.View;

public class TouchView extends View {

    private Paint paint, touchPaint;
    private boolean touched;
    private float touchX, touchY;
    private float touchMajor, touchMinor;

    public TouchView(Context context) {
        super(context);
        init(null, 0);
    }

    public TouchView(Context context, AttributeSet attrs) {
        super(context, attrs);
        init(attrs, 0);
    }

    public TouchView(Context context, AttributeSet attrs, int defStyleAttr) {
        super(context, attrs, defStyleAttr);
        init(attrs, defStyleAttr);
    }

    private void init(AttributeSet attrs, int defStyle) {
        paint = new Paint(Paint.ANTI_ALIAS_FLAG);
        paint.setColor(Color.BLUE);
        paint.setStyle(Paint.Style.STROKE);
        paint.setStrokeWidth(1);

        touchPaint = new Paint(Paint.ANTI_ALIAS_FLAG);
        touchPaint.setColor(Color.RED);
        touchPaint.setStyle(Paint.Style.FILL_AND_STROKE);
        touchPaint.setStrokeWidth(1);

        touched = false;
    }

    @Override
    protected void onDraw(Canvas canvas) {
        super.onDraw(canvas);

        int paddingLeft = getPaddingLeft();
        int paddingTop = getPaddingTop();
        int paddingRight = getPaddingRight();
        int paddingBottom = getPaddingBottom();

        canvas.drawRect(
                0,
                0,
                getWidth(),
                getHeight(),
                paint);
        canvas.drawRect(
                paddingLeft,
                paddingTop,
                getWidth()- paddingRight,
                getHeight()- paddingBottom,
                paint);

        if(touched){
            canvas.drawCircle(touchX, touchY, touchMinor, touchPaint);
            canvas.drawCircle(touchX, touchY, touchMajor, paint);
        }
    }

    @Override
    public boolean onTouchEvent(MotionEvent event) {
        switch(event.getAction()){
            case MotionEvent.ACTION_MOVE:
            case MotionEvent.ACTION_DOWN:
                touchX = event.getX();
                touchY = event.getY();
                touchMajor = event.getTouchMajor();
                touchMinor = event.getTouchMinor();
                touched = true;
                break;
            default:
                touched = false;
        }

        onViewTouchedListener.OnViewTouched(touchX, touchY, touched);

        invalidate();
        return true;
    }

    /*
    Set up callback function
     */
    private OnViewTouchedListener onViewTouchedListener;
    public interface OnViewTouchedListener {
        public void OnViewTouched(float x, float y, boolean touched);
    }

    public void setOnViewTouchedListener(OnViewTouchedListener listener) {
        onViewTouchedListener = listener;
    }
}


layout/activity_main.xml
<LinearLayout xmlns:android="http://schemas.android.com/apk/res/android"
    xmlns:tools="http://schemas.android.com/tools"
    android:layout_width="match_parent"
    android:layout_height="match_parent"
    android:paddingLeft="@dimen/activity_horizontal_margin"
    android:paddingRight="@dimen/activity_horizontal_margin"
    android:paddingTop="@dimen/activity_vertical_margin"
    android:paddingBottom="@dimen/activity_vertical_margin"
    tools:context=".MainActivity"
    android:orientation="vertical">

    <TextView
        android:layout_width="wrap_content"
        android:layout_height="wrap_content"
        android:layout_gravity="center_horizontal"
        android:autoLink="web"
        android:text="http://android-er.blogspot.com/"
        android:textStyle="bold" />

    <TextView
        android:id="@+id/touchedInfo"
        android:layout_width="match_parent"
        android:layout_height="wrap_content"
        android:layout_gravity="center_horizontal"/>

    <LinearLayout
        android:layout_width="match_parent"
        android:layout_height="match_parent"
        android:background="#E0E0E0">
        <com.example.androidtouchview.TouchView
            android:id="@+id/myTouchView"
            android:layout_width="match_parent"
            android:layout_height="match_parent"
            android:paddingLeft="50dp"
            android:paddingRight="50dp"
            android:paddingTop="50dp"
            android:paddingBottom="50dp" />
    </LinearLayout>


</LinearLayout>

com.example.androidtouchview.MainActivity
package com.example.androidtouchview;

import android.os.Bundle;
import android.support.v7.app.ActionBarActivity;
import android.widget.TextView;

public class MainActivity extends ActionBarActivity {

    TextView touchedInfo;
    TouchView touchView;

    @Override
    protected void onCreate(Bundle savedInstanceState) {
        super.onCreate(savedInstanceState);
        setContentView(R.layout.activity_main);
        touchedInfo = (TextView)findViewById(R.id.touchedInfo);
        touchView = (TouchView)findViewById(R.id.myTouchView);
        touchView.setOnViewTouchedListener(new TouchView.OnViewTouchedListener() {
            @Override
            public void OnViewTouched(float x, float y, boolean touched) {
                touchedInfo.setText(
                        "Touched: " + touched + "\n" +
                        "x: " + x + "\n" + "y: " + y);
            }
        });

    }

}


download filesDownload the files (Android Studio Format).

Create custom view with touch detection

Here we implement a custom view with touch detection, to show touched area.


com.example.androidtouchview.TouchView.java, our custom view.
package com.example.androidtouchview;

import android.content.Context;
import android.graphics.Canvas;
import android.graphics.Color;
import android.graphics.Paint;
import android.util.AttributeSet;
import android.view.MotionEvent;
import android.view.View;

public class TouchView extends View {

    private Paint paint, touchPaint;
    private boolean touched;
    private float touchX, touchY;
    private float touchMajor, touchMinor;

    public TouchView(Context context) {
        super(context);
        init(null, 0);
    }

    public TouchView(Context context, AttributeSet attrs) {
        super(context, attrs);
        init(attrs, 0);
    }

    public TouchView(Context context, AttributeSet attrs, int defStyleAttr) {
        super(context, attrs, defStyleAttr);
        init(attrs, defStyleAttr);
    }

    private void init(AttributeSet attrs, int defStyle) {
        paint = new Paint(Paint.ANTI_ALIAS_FLAG);
        paint.setColor(Color.BLUE);
        paint.setStyle(Paint.Style.STROKE);
        paint.setStrokeWidth(1);

        touchPaint = new Paint(Paint.ANTI_ALIAS_FLAG);
        touchPaint.setColor(Color.RED);
        touchPaint.setStyle(Paint.Style.FILL_AND_STROKE);
        touchPaint.setStrokeWidth(1);

        touched = false;
    }

    @Override
    protected void onDraw(Canvas canvas) {
        super.onDraw(canvas);

        int paddingLeft = getPaddingLeft();
        int paddingTop = getPaddingTop();
        int paddingRight = getPaddingRight();
        int paddingBottom = getPaddingBottom();

        canvas.drawRect(
                0,
                0,
                getWidth(),
                getHeight(),
                paint);
        canvas.drawRect(
                paddingLeft,
                paddingTop,
                getWidth()- paddingRight,
                getHeight()- paddingBottom,
                paint);

        if(touched){
            canvas.drawCircle(touchX, touchY, touchMinor, touchPaint);
            canvas.drawCircle(touchX, touchY, touchMajor, paint);
        }
    }

    @Override
    public boolean onTouchEvent(MotionEvent event) {
        switch(event.getAction()){
            case MotionEvent.ACTION_MOVE:
            case MotionEvent.ACTION_DOWN:
                touchX = event.getX();
                touchY = event.getY();
                touchMajor = event.getTouchMajor();
                touchMinor = event.getTouchMinor();
                touched = true;
                break;
            default:
                touched = false;
        }
        invalidate();
        return true;
    }
}


layout/activity_main.xml
<LinearLayout xmlns:android="http://schemas.android.com/apk/res/android"
    xmlns:tools="http://schemas.android.com/tools"
    android:layout_width="match_parent"
    android:layout_height="match_parent"
    android:paddingLeft="@dimen/activity_horizontal_margin"
    android:paddingRight="@dimen/activity_horizontal_margin"
    android:paddingTop="@dimen/activity_vertical_margin"
    android:paddingBottom="@dimen/activity_vertical_margin"
    tools:context=".MainActivity"
    android:orientation="vertical">

    <TextView
        android:layout_width="wrap_content"
        android:layout_height="wrap_content"
        android:layout_gravity="center_horizontal"
        android:autoLink="web"
        android:text="http://android-er.blogspot.com/"
        android:textStyle="bold" />

    <LinearLayout
        android:layout_width="match_parent"
        android:layout_height="match_parent"
        android:background="#E0E0E0">
        <com.example.androidtouchview.TouchView
            android:layout_width="match_parent"
            android:layout_height="match_parent"
            android:paddingLeft="50dp"
            android:paddingRight="50dp"
            android:paddingTop="50dp"
            android:paddingBottom="50dp" />
    </LinearLayout>


</LinearLayout>


download filesDownload the files (Android Studio Format).

Android custom touch view, with callback interface.

Monday, May 25, 2015

Learn Android Studio: Build Android Apps Quickly and Effectively

Learn Android Studio: Build Android Apps Quickly and Effectively

Learn Android Studio covers Android Studio and its rich tools ecosystem, including Git and Gradle: this book covers how Android Studio works seamlessly with Git, for source control, and Gradle, a build and test tool. In addition, this book demonstrates how to develop/collaborate with remote Git web-hosting services such as GitHub and Bitbucket. Four complete Android projects accompany this volume and are available for download from a public Git repository.

With this book, you learn the latest and most productive tools in the Android tools ecosystem, and the best practices for Android app development. You will be able to take away the labs' code as templates or frameworks to re-use and customize for your own similar apps.

Android Studio is an intuitive, feature-rich, and extremely forgiving Integrated Development Environment (IDE). This IDE is more productive and easier to use for your Android app creations than Eclipse. With this book you will quickly master Android Studio and maximize your Android development time. Source code on the remote web-hosting service is targeted to the latest Android Studio release, version 1.2.

What you’ll learn
  • How to get started with the Android Studio IDE
  • How to navigate and use Android Studio
  • How to do version control with Git
  • How to use Gradle
  • How to use the new Android Wear framework
  • How to debug your code using Android Studio
  • How to manage your app projects
  • How to test your apps
  • How to analyze and refactor your code
  • How to customize Android Studio
Who this book is for
This book is for Android app developers new to this IDE tool.

Table of Contents
1. Introducing Android Studio
2. Navigating
3. Programming
4. Refactoring
5. Reminders Lab: Part 1
6. Reminders Lab: Part 2
7. Git
8. Layouts
9. Currencies Lab: Part 1
10. Currencies Lab: Part 2
11. Testing and Analyzing
12. Debugging
13. Gradle
14. More SDK Tools
15. Wear
16. Customizing Android Studio

List supported media codec using MediaCodecList

This example list media codec available on the device, using MediaCodecList, to enumerate available codecs, each specified as a MediaCodecInfo object, find a codec supporting a given format and query the capabilities of a given codec.


MainActivity.java
package com.example.androidmediacodec;

import android.annotation.TargetApi;
import android.media.MediaCodecInfo;
import android.media.MediaCodecList;
import android.os.Build;
import android.support.v7.app.ActionBarActivity;
import android.os.Bundle;
import android.view.View;
import android.widget.AdapterView;
import android.widget.ArrayAdapter;
import android.widget.ListView;
import android.widget.Spinner;
import android.widget.TextView;


public class MainActivity extends ActionBarActivity {

    TextView textInfo;
    TextView textCodecCount;
    Spinner spinnerMediaCodec;

    TextView textCodecname;
    TextView textIsEncoder;
    Spinner spinnerSupportedType;

    MediaCodecInfo[] mediaCodecInfo;
    String[] mediaCodecName;
    ArrayAdapter<String> mediaCodecAdapter;

    String[] supportedType;
    ArrayAdapter<String> supportedTypeAdapter;

    TextView textCapabilities;

    @Override
    protected void onCreate(Bundle savedInstanceState) {
        super.onCreate(savedInstanceState);
        setContentView(R.layout.activity_main);

        textInfo = (TextView) findViewById(R.id.textinfo);
        textCodecCount = (TextView) findViewById(R.id.textcodeccount);
        spinnerMediaCodec = (Spinner) findViewById(R.id.spMediaCodec);
        textCodecname = (TextView) findViewById(R.id.textcodecname);
        textIsEncoder = (TextView) findViewById(R.id.textisEncoder);
        spinnerSupportedType = (Spinner) findViewById(R.id.spsupportedType);
        textCapabilities = (TextView)findViewById(R.id.textcapabilities);

        if (Build.VERSION.SDK_INT >= Build.VERSION_CODES.LOLLIPOP) {
            getCodecInfo_21();
        }else{
            getCodecInfo_16();
        }

        mediaCodecName = new String[mediaCodecInfo.length];
        for(int i = 0; i < mediaCodecInfo.length; i++){
            mediaCodecName[i] = mediaCodecInfo[i].getName();
        }

        mediaCodecAdapter = new ArrayAdapter<String>(this,
                android.R.layout.simple_spinner_item,
                mediaCodecName);
        mediaCodecAdapter.setDropDownViewResource(android.R.layout.simple_spinner_dropdown_item);
        spinnerMediaCodec.setAdapter(mediaCodecAdapter);
        spinnerMediaCodec.setOnItemSelectedListener(mediaCodecOnItemSelectedListener);

    }

    AdapterView.OnItemSelectedListener mediaCodecOnItemSelectedListener =
            new AdapterView.OnItemSelectedListener(){

                @Override
                public void onItemSelected(AdapterView<?> parent, View view, int position, long id) {
                    final MediaCodecInfo selMediaCodecInfo = mediaCodecInfo[position];
                    textCodecname.setText(selMediaCodecInfo.getName());
                    textIsEncoder.setText("isEncoder: " + selMediaCodecInfo.isEncoder());

                    supportedType = selMediaCodecInfo.getSupportedTypes();
                    supportedTypeAdapter = new ArrayAdapter<String>(MainActivity.this,
                            android.R.layout.simple_spinner_item,
                            supportedType);
                    supportedTypeAdapter.setDropDownViewResource(android.R.layout.simple_spinner_dropdown_item);
                    spinnerSupportedType.setAdapter(supportedTypeAdapter);

                    spinnerSupportedType.setOnItemSelectedListener(new AdapterView.OnItemSelectedListener(){
                        @Override
                        public void onItemSelected(AdapterView<?> parent, View view, int position, long id) {
                            String type = (String) parent.getItemAtPosition(position);

                            //...you can get more details from codecCapabilities
                            MediaCodecInfo.CodecCapabilities codecCapabilities = selMediaCodecInfo.getCapabilitiesForType(type);

                            textCapabilities.setText(codecCapabilities.toString());

                            if (Build.VERSION.SDK_INT >= Build.VERSION_CODES.LOLLIPOP) {
                                textCapabilities.append("\n" + "MimeType: " + codecCapabilities.getMimeType());
                                textCapabilities.append("\n" + "DefaultFormat: " + codecCapabilities.getDefaultFormat().toString());
                            }

                        }

                        @Override
                        public void onNothingSelected(AdapterView<?> parent) {}
                    });
                }

                @Override
                public void onNothingSelected(AdapterView<?> parent) {}
            };

    //Added in API level 16
    //deprecated in API level 21
    //ref:
    //http://developer.android.com/reference/android/media/MediaCodecInfo.html
    private void getCodecInfo_16(){
        textInfo.setText("API < 21");
        int numCodecs = MediaCodecList.getCodecCount();
        mediaCodecInfo = new MediaCodecInfo[numCodecs];

        for (int i = 0; i < numCodecs; i++) {
            MediaCodecInfo codecInfo = MediaCodecList.getCodecInfoAt(i);
            mediaCodecInfo[i] = codecInfo;
        }

        textCodecCount.setText("Number of Codec: " + numCodecs);

    }

    @TargetApi(Build.VERSION_CODES.LOLLIPOP)
    private void getCodecInfo_21() {
        textInfo.setText("API >= 21");
        MediaCodecList mediaCodecList = new MediaCodecList(MediaCodecList.ALL_CODECS);
        //MediaCodecList mediaCodecList = new MediaCodecList(MediaCodecList.REGULAR_CODECS);
        mediaCodecInfo = mediaCodecList.getCodecInfos();

        textCodecCount.setText("Number of Codec: " + mediaCodecInfo.length);
    }
}


layout/activity_main.xml
<LinearLayout xmlns:android="http://schemas.android.com/apk/res/android"
    xmlns:tools="http://schemas.android.com/tools"
    android:layout_width="match_parent"
    android:layout_height="match_parent"
    android:paddingLeft="16dp"
    android:paddingRight="16dp"
    android:paddingTop="16dp"
    android:paddingBottom="16dp"
    android:orientation="vertical"
    tools:context=".MainActivity">

    <TextView
        android:layout_width="wrap_content"
        android:layout_height="wrap_content"
        android:layout_gravity="center_horizontal"
        android:autoLink="web"
        android:text="http://android-er.blogspot.com/"
        android:textStyle="bold" />
    <TextView
        android:id="@+id/textinfo"
        android:layout_width="wrap_content"
        android:layout_height="wrap_content" />
    <TextView
        android:id="@+id/textcodeccount"
        android:layout_width="wrap_content"
        android:layout_height="wrap_content" />

    <Spinner
        android:id="@+id/spMediaCodec"
        android:layout_width="match_parent"
        android:layout_height="wrap_content" />

    <TextView
        android:id="@+id/textcodecname"
        android:layout_width="wrap_content"
        android:layout_height="wrap_content"
        android:textStyle="bold"/>
    <TextView
        android:id="@+id/textisEncoder"
        android:layout_width="wrap_content"
        android:layout_height="wrap_content"
        android:textStyle="italic"/>
    <Spinner
        android:id="@+id/spsupportedType"
        android:layout_width="match_parent"
        android:layout_height="wrap_content"
        android:background="#B0B0B0"/>

    <TextView
        android:id="@+id/textcapabilities"
        android:layout_width="wrap_content"
        android:layout_height="wrap_content"
        android:textStyle="italic"/>

</LinearLayout>


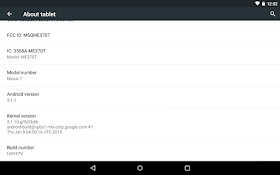
Test on Nexus 7 running Android 5.1.1

Test on Redmi 2 running Android 4.4.4

download filesDownload the files (Android Studio Format).

download filesDownload the APK to test on your device.

Android Studio - too slow!!!
I try to force myself to switch to Android Studio. A suppose one hour example using Eclipse, now use up to 5 hours using Android Studio!

Create signed APK in Android Studio

To create signed APK in Android Studio: with your project opened, click Build on the menu, and Generate Signed APK..., then follow the steps:


Sunday, May 24, 2015

Android Application Development with Maven

Android Application Development with Maven

Android is an open source operating system used for smartphones and tablet computers. The Android market is one of the biggest and fastest growing platforms for application developers, with over a million apps uploaded every day.

Right from the beginning, this book will cover how to set up your Maven development environment and integrate it with your favorite IDE. By sequentially working through the steps in each chapter, you will quickly master the plugins you need for every phase of the Android development process. You will learn how to use Maven to manage and build your project and dependencies, automate your Android application testing plans, and develop and maintain several versions of your application in parallel. Most significantly, you will learn how to integrate your project into a complete factory.

Tuesday, May 19, 2015

New UI Component of Custom View in Android Studio


In Android Studio, you can easily create custom view:
> File > New > UI Component > Custom View

Android Studio will create a almost full feature custom view for you, also provide a sample xml to show how to add it in your layout xml.

Free eBook - HTTP/2: A New Excerpt from High Performance Browser Networking

HTTP/2: A New Excerpt from High Performance Browser Networking
By Ilya Grigorik
Publisher: O'Reilly Media
Final Release Date: May 2015

The new HTTP/2 standard is finally here. Approved earlier this year, HTTP/2 adds a new binary framing layer that will help make applications faster, simpler, and more robust. This chapter from the new release of High Performance Browser Networking provides a brief look at this updated protocol and explains how it will reduce latency, minimize protocol overhead, and add support for request prioritization and server push.

In this excerpt, author Ilya Grigorik takes you through HTTP/2's design and technical goals, and explains how Google's SPDY played a critical role in the protocol's development. You'll also learn what's required for upgrading a multitude of servers and clients to HTTP/2.

This excerpt covers:

  • HTTP/2's binary framing layer
  • Streams, messages, and frames
  • Request and response multiplexing
  • Stream prioritization
  • One connection per origin
  • Flow control
  • Server push
  • Header compression

Visit: http://shop.oreilly.com/product/0636920042587.do


Sunday, May 17, 2015

Microsoft Hyperlapse Mobile for Android Preview

Introducing Microsoft Hyperlapse, available for download at http://aka.ms/hyperlapse. Microsoft Hyperlapse lets you creates smooth and stabilized time lapses, distilling your experiences into beautiful, shareable videos. Show off footage from your hike, or let your friends experience how it felt to fly down the mountain on skis. Hyperlapse is available as an app for Android or Windows Phone, as well as a pro version in preview for enthusiasts or professionals who want to hyperlapse video from a GoPro or other camera.


Joining the Microsoft Hyperlapse Mobile for Android community, you will get access to pre-release versions of the Microsoft Hyperlapse Mobile for Android application. You can give feedback, submit issues, receive the most current information on the apps and interact with product team members.

Currently this app works on the following devices, running Android 4.4 or later:
- Samsung Galaxy S5, S6, S6 Edge, Note 4
- Google Nexus 5 & 6, Nexus 9 tablet
- HTC One M8 and M9
- Sony Xperia Z3 & Z3 Compact
- OnePlusOne
- LG G3

*My first try of Microsoft Hyperlapse Mobile.

CalendarView example

A simple example of CalendarView (added in API level 11), a calendar widget for displaying and selecting dates. The range of dates supported by this calendar is configurable. A user can select a date by taping on it and can scroll and fling the calendar to a desired date.


<LinearLayout xmlns:android="http://schemas.android.com/apk/res/android"
    xmlns:tools="http://schemas.android.com/tools"
    android:layout_width="match_parent"
    android:layout_height="match_parent"
    android:paddingBottom="@dimen/activity_vertical_margin"
    android:paddingLeft="@dimen/activity_horizontal_margin"
    android:paddingRight="@dimen/activity_horizontal_margin"
    android:paddingTop="@dimen/activity_vertical_margin"
    android:orientation="vertical"
    tools:context="com.example.androidcalendarview.MainActivity" >

    <TextView
        android:layout_width="wrap_content"
        android:layout_height="wrap_content"
        android:layout_gravity="center_horizontal"
        android:autoLink="web"
        android:text="http://android-er.blogspot.com/"
        android:textStyle="bold" />
    
    <CalendarView
        android:id="@+id/calendar"
        android:layout_width="match_parent"
        android:layout_height="match_parent" />

</LinearLayout>

package com.example.androidcalendarview;

import android.support.v7.app.ActionBarActivity;
import android.os.Bundle;
import android.widget.CalendarView;
import android.widget.CalendarView.OnDateChangeListener;
import android.widget.Toast;


public class MainActivity extends ActionBarActivity {
 
 CalendarView myCalendarView;

    @Override
    protected void onCreate(Bundle savedInstanceState) {
        super.onCreate(savedInstanceState);
        setContentView(R.layout.activity_main);
        myCalendarView = (CalendarView)findViewById(R.id.calendar);
        
        myCalendarView.setOnDateChangeListener(new OnDateChangeListener(){

   @Override
   public void onSelectedDayChange(CalendarView view, int year,
     int month, int dayOfMonth) {
    Toast.makeText(getApplicationContext(), 
           "Year: " + year + "\n" +
           "Month: " + month + "\n" +
           "Day of Month: " + dayOfMonth, 
           Toast.LENGTH_LONG).show();
   }});
    }

}


Speed up Gradle build time by enabling the Gradle Daemon

Gradle is the new build system for Android projects on Android Studio.

The Gradle Daemon is a background process that does the heavy lifting of running builds, then stays alive between builds waiting for the next build. This allows data and code that is likely to be required in the next build to be kept in memory, ready to go. This dramatically improves the performance of subsequent builds. Enabling the Gradle Daemon is an extremely cheap way to decrease build times.https://gradle.org/docs/current/userguide/gradle_daemon.html

To enable Gradle Daemon, create a file "gradle.properties" in Gradle directory:
on Linux
/home/<username>/.gradle/
on Mac
/Users/<username>/.gradle/
on Windows
C:\Users\<username>\.gradle

Add the following lines to the file:
org.gradle.parallel=true
org.gradle.daemon=true

In Android Studio
> File > Settings > Gradle then enable “Offline work”

Restart Android Studio.

reference:
https://extremegtx.wordpress.com/2015/01/08/android-studio-speed-up-studio-and-gradle/
https://plus.google.com/+AndroidDevelopers/posts/ECrb9VQW9XP

Friday, May 15, 2015

Google I/O 2015 official app

The official Google I/O 2015 app was built to be your co-pilot to navigate the conference, whether you’re attending in-person or remotely.

-- Explore the conference agenda, with details on themes, topics and speakers
-- Add events to a personalized schedule
-- Get reminders before events in “My schedule” start
-- Watch the keynote and sessions live stream
-- Sync your schedule between all of your devices and the I/O website
-- Guide yourself using the vector-based conference map
-- Follow public social I/O related conversations on Google+ and Twitter
-- See I/O content from previous years in the Video screen
-- Use the Widget to check your upcoming events directly from your home screen

*Exclusive for In person attendees:*
-- Take advantage of facilitated pre-event WiFi configuration
This app is optimized for phones and tablets of all shapes and sizes.
Source code for the app will be available soon after I/O.


Android Studio Error:The supplied javaHome seems to be invalid. I cannot find the java executable.

If your Android Studio report Gradle Error of "The supplied javaHome seems to be invalid. I cannot find the java executable. Tried location: .../Android/Sdk/bin/java". Even I set JAVA_HOME correctly.


You can manually set JDK location for your project:
> File
> Project Structure
> JDK location box: enter and browse to your Java JDK.


Or, set JDK location for Android Studio:
> On Android Studio Welcome Page
> Configure
> Project Defaults
> Project Structure
> JDK location box: enter and browse to your Java JDK.

Wednesday, May 13, 2015

How to enable Developer Options on Xiaomi Redmi 2


To enable Developer Options on Xiaomi Redmi 2 (紅米手機2), running Android 4.4.4:
> Settings
> About phone
> Tap on "MIUI version" 7 times to enable Developer Options.

Once enabled, to access Developer Options:
> Settings
> Additional settings
> Developer options


Monday, May 11, 2015

Wednesday, May 6, 2015

FREE ebook - C++ Today: The Beast is Back

Download for free - C++ Today:  The Beast is Back, by Jon Kalb and Gašper Ažman.
Compliments of JetBrains, available at PDF, EPUB and MOBI formats.


Now that software development is shifting primarily toward mobile and cloud computing, the venerable C++ programming language is returning to the dominant position it held during the object-oriented boom of the 1990s. In this O′Reilly report, you′ll learn why C++ is once again the preferred choice across several diverse industries, after taking a backseat to Java during the 2000s.

Visit: http://www.jetbrains.com/cpp-today-oreilly/


Play stream video (from Raspberry Pi) on VideoView

This exercise play stream video from network on VideoView. (with APK download on bottom of this post)


- Prepare stream video from Raspberry Pi with Camera Module. Refer to my another blog post about Raspberry Pi "Stream Raspberry Pi Camera Module video using raspivid and vlc".


- Once stream video is playing, run this example, enter the IP of Raspberry Pi and assigned port.


activity_main.xml
<LinearLayout xmlns:android="http://schemas.android.com/apk/res/android"
    xmlns:tools="http://schemas.android.com/tools"
    android:layout_width="match_parent"
    android:layout_height="match_parent"
    android:paddingBottom="@dimen/activity_vertical_margin"
    android:paddingLeft="@dimen/activity_horizontal_margin"
    android:paddingRight="@dimen/activity_horizontal_margin"
    android:paddingTop="@dimen/activity_vertical_margin"
    android:orientation="vertical"
    tools:context="com.example.androidmediaplayer.MainActivity" >

    <TextView
        android:layout_width="wrap_content"
        android:layout_height="wrap_content"
        android:layout_gravity="center_horizontal"
        android:autoLink="web"
        android:text="http://android-er.blogspot.com/"
        android:textStyle="bold" />
    <EditText
        android:id="@+id/addr"
        android:layout_width="match_parent"
        android:layout_height="wrap_content"
        android:text="http://192.168.xxx.xxx:8090" />
    <Button
        android:id="@+id/connect"
        android:layout_width="match_parent"
        android:layout_height="wrap_content"
        android:text="Connect" />
    <VideoView
        android:id="@+id/streamview"
        android:layout_width="match_parent"
        android:layout_height="match_parent" />

</LinearLayout>

MainActivity.java
package com.example.androidmediaplayer;

import android.support.v7.app.ActionBarActivity;
import android.view.View;
import android.view.View.OnClickListener;
import android.widget.Button;
import android.widget.EditText;
import android.widget.MediaController;
import android.widget.Toast;
import android.widget.VideoView;
import android.net.Uri;
import android.os.Bundle;

public class MainActivity extends ActionBarActivity {

 EditText addrField;
 Button btnConnect;
 VideoView streamView;
 MediaController mediaController;

    @Override
    protected void onCreate(Bundle savedInstanceState) {
        super.onCreate(savedInstanceState);
        setContentView(R.layout.activity_main);
        
        addrField = (EditText)findViewById(R.id.addr);
        btnConnect = (Button)findViewById(R.id.connect);
        streamView = (VideoView)findViewById(R.id.streamview);
        
        btnConnect.setOnClickListener(new OnClickListener(){

   @Override
   public void onClick(View v) {
    String s = addrField.getEditableText().toString();
    playStream(s);
   }});
        
    }
    
    private void playStream(String src){
     Uri UriSrc = Uri.parse(src);
        if(UriSrc == null){
         Toast.makeText(MainActivity.this, 
          "UriSrc == null", Toast.LENGTH_LONG).show();
        }else{
         streamView.setVideoURI(UriSrc);
            mediaController = new MediaController(this);
            streamView.setMediaController(mediaController);
            streamView.start();
            
            Toast.makeText(MainActivity.this, 
             "Connect: " + src, 
             Toast.LENGTH_LONG).show();
        }
    }

 @Override
 protected void onDestroy() {
  super.onDestroy();
  streamView.stopPlayback();
 }

}

Permission of "android.permission.INTERNET" is needed in AndroidManifest.xml.
<?xml version="1.0" encoding="utf-8"?>
<manifest xmlns:android="http://schemas.android.com/apk/res/android"
    package="com.example.androidmediaplayer"
    android:versionCode="1"
    android:versionName="1.0" >

    <uses-sdk
        android:minSdkVersion="8"
        android:targetSdkVersion="22" />
    <uses-permission android:name="android.permission.INTERNET"/>

    <application
        android:allowBackup="true"
        android:icon="@drawable/ic_launcher"
        android:label="@string/app_name"
        android:theme="@style/AppTheme" >
        <activity
            android:name=".MainActivity"
            android:label="@string/app_name" >
            <intent-filter>
                <action android:name="android.intent.action.MAIN" />

                <category android:name="android.intent.category.LAUNCHER" />
            </intent-filter>
        </activity>
    </application>

</manifest>


download filesDownload the files.

Or try the APK Here.

Updated@2016-07-06:
- Re-test on Raspberry Pi 3 + Camera Module V2 NoIR + Raspbian Jessie, play in Windows 10 + VLC Media Player and Android App with VideoView (with APK download).


Monday, May 4, 2015

Set requirement of JobScheduler, I am confused!

Last exercise show a "Simple example using JobScheduler to run JobService repeatly". I think I can create a JobScheduler to run JobService repeatly only when power-pluged and connected to WiFi, by intuition. But it seem not the case.

The official document of JobInfo.Builder explain not so clear!

Here is my exercise to test it, with various combination of requirements. You can try it and correct me if I'm wrong.


MainActivity.java
package com.example.androidjobscheduler;

import java.util.List;

import android.support.v7.app.ActionBarActivity;
import android.app.job.JobInfo;
import android.app.job.JobScheduler;
import android.content.ComponentName;
import android.os.Bundle;
import android.os.SystemClock;
import android.view.View;
import android.view.View.OnClickListener;
import android.widget.Button;
import android.widget.CheckBox;
import android.widget.Chronometer;
import android.widget.RadioButton;
import android.widget.Toast;


public class MainActivity extends ActionBarActivity {
 
 Chronometer chronometer;
 Button btnStartJob, btnCancelJobs;
 
 JobScheduler jobScheduler;
 private static final int MYJOBID = 1;
 
 RadioButton optDeadline;
 RadioButton optPeriodic;
 CheckBox optIsPersisted;
 RadioButton optNetworkTypeANY;
 RadioButton optNetworkTypeNONE;
 RadioButton optNetworkTypeUNMETERED;
 CheckBox optRequiresCharging;
 CheckBox optRequiresDeviceIdle;

    @Override
    protected void onCreate(Bundle savedInstanceState) {
        super.onCreate(savedInstanceState);
        setContentView(R.layout.activity_main);
        
        optDeadline = (RadioButton)findViewById(R.id.optDeadline);
        optPeriodic = (RadioButton)findViewById(R.id.optPeriodic);
        optIsPersisted = (CheckBox)findViewById(R.id.isPersisted);
        optNetworkTypeANY = (RadioButton)findViewById(R.id.optNETWORK_TYPE_ANY);
        optNetworkTypeNONE = (RadioButton)findViewById(R.id.optNETWORK_TYPE_NONE);
        optNetworkTypeUNMETERED = (RadioButton)findViewById(R.id.optNETWORK_TYPE_UNMETERED);
        optRequiresCharging = (CheckBox)findViewById(R.id.requiresCharging);
        optRequiresDeviceIdle = (CheckBox)findViewById(R.id.requiresDeviceIdle);
        
        chronometer = (Chronometer)findViewById(R.id.chronometer);
        btnStartJob = (Button)findViewById(R.id.startjob);
        btnCancelJobs =  (Button)findViewById(R.id.canceljobs);

        jobScheduler = (JobScheduler)getSystemService(JOB_SCHEDULER_SERVICE);
        
        btnStartJob.setOnClickListener(new OnClickListener(){

   @Override
   public void onClick(View v) {
    chronometer.setBase(SystemClock.elapsedRealtime());
    chronometer.start();

    ComponentName jobService = 
     new ComponentName(getPackageName(), MyJobService.class.getName());
    
    JobInfo.Builder builder = new JobInfo.Builder(MYJOBID, jobService);
    
    if(optDeadline.isChecked()){
     builder.setMinimumLatency(5000);
     builder.setOverrideDeadline(7000);
    }else{
     builder.setPeriodic(10000);
    }

    /*setPersisted only have an effect if your application 
     * holds the permission RECEIVE_BOOT_COMPLETED. 
     * Otherwise an exception will be thrown.
     */
    builder.setPersisted(optIsPersisted.isChecked());

    if(optNetworkTypeANY.isChecked()){
     builder.setRequiredNetworkType(JobInfo.NETWORK_TYPE_ANY);
    }else if(optNetworkTypeUNMETERED.isChecked()){
     builder.setRequiredNetworkType(JobInfo.NETWORK_TYPE_UNMETERED);
    }else{
     //can skip, it's default
     builder.setRequiredNetworkType(JobInfo.NETWORK_TYPE_NONE);
    }
    
    builder.setRequiresCharging(optRequiresCharging.isChecked());
    builder.setRequiresDeviceIdle(optRequiresDeviceIdle.isChecked());

    JobInfo jobInfo = builder.build();

    int jobId = jobScheduler.schedule(jobInfo);
    if(jobScheduler.schedule(jobInfo)>0){
     Toast.makeText(MainActivity.this, 
      "Successfully scheduled job: " + jobId +
      "\ngetId(): " + jobInfo.getId() +
      "\nisPeriodic(): " + jobInfo.isPeriodic() +
      "\nisPersisted(): " + jobInfo.isPersisted() +
      "\ngetNetworkType(): " + jobInfo.getNetworkType() +
      "\nisRequireCharging(): " + jobInfo.isRequireCharging() +
      "\nisRequireDeviceIdle(): " + jobInfo.isRequireDeviceIdle(),
      Toast.LENGTH_LONG).show();
    }else{
     Toast.makeText(MainActivity.this, 
       "RESULT_FAILURE: " + jobId, 
       Toast.LENGTH_SHORT).show();
    }
       
   }});
        
        btnCancelJobs.setOnClickListener(new OnClickListener(){

   @Override
   public void onClick(View v) {
    chronometer.stop();
    
    List<JobInfo> allPendingJobs = jobScheduler.getAllPendingJobs();
    String s = "";
    for(JobInfo j : allPendingJobs){
     int jId = j.getId();
     jobScheduler.cancel(jId);
     s += "jobScheduler.cancel(" + jId + " )";
    }
    Toast.makeText(MainActivity.this, 
      s, 
      Toast.LENGTH_SHORT).show();
    
    //or
    //jobScheduler.cancelAll();
    
    
   }});
    }


}

activity_main.xml
<LinearLayout xmlns:android="http://schemas.android.com/apk/res/android"
    xmlns:tools="http://schemas.android.com/tools"
    android:layout_width="match_parent"
    android:layout_height="match_parent"
    android:orientation="vertical"
    android:paddingBottom="@dimen/activity_vertical_margin"
    android:paddingLeft="@dimen/activity_horizontal_margin"
    android:paddingRight="@dimen/activity_horizontal_margin"
    android:paddingTop="@dimen/activity_vertical_margin"
    tools:context="com.example.androidjobscheduler.MainActivity" >

    <TextView
        android:layout_width="wrap_content"
        android:layout_height="wrap_content"
        android:layout_gravity="center_horizontal"
        android:autoLink="web"
        android:text="http://android-er.blogspot.com/"
        android:textStyle="bold" />

    <Chronometer
        android:id="@+id/chronometer"
        android:layout_width="fill_parent"
        android:layout_height="wrap_content"
        android:layout_gravity="center_horizontal" />
    
    <RadioGroup
        android:layout_width="wrap_content"
        android:layout_height="wrap_content"
        android:background="#A0A0A0" >
        <RadioButton
            android:id="@+id/optDeadline"
            android:layout_width="wrap_content"
            android:layout_height="wrap_content"
            android:text="setMinimumLatency(5000ms)/setOverrideDeadline(7000ms)" />
        <RadioButton
            android:id="@+id/optPeriodic"
            android:layout_width="wrap_content"
            android:layout_height="wrap_content"
            android:text="setPeriodic(10000)" 
            android:checked="true" />

    </RadioGroup>
    
    <CheckBox 
        android:id="@+id/isPersisted"
        android:layout_width="fill_parent"
        android:layout_height="wrap_content"
        android:text="isPersisted across device reboots" />
    
    <RadioGroup
        android:layout_width="wrap_content"
        android:layout_height="wrap_content"
        android:background="#C0C0C0" >
        <RadioButton
            android:id="@+id/optNETWORK_TYPE_NONE"
            android:layout_width="wrap_content"
            android:layout_height="wrap_content"
            android:text="NETWORK_TYPE_NONE" 
            android:checked="true" />
        <RadioButton
            android:id="@+id/optNETWORK_TYPE_ANY"
            android:layout_width="wrap_content"
            android:layout_height="wrap_content"
            android:text="NETWORK_TYPE_ANY" />
        <RadioButton
            android:id="@+id/optNETWORK_TYPE_UNMETERED"
            android:layout_width="wrap_content"
            android:layout_height="wrap_content"
            android:text="NETWORK_TYPE_UNMETERED" />
    </RadioGroup>
    
    <CheckBox 
        android:id="@+id/requiresCharging"
        android:layout_width="fill_parent"
        android:layout_height="wrap_content"
        android:text="requiresCharging" />
    
    <CheckBox 
        android:id="@+id/requiresDeviceIdle"
        android:layout_width="fill_parent"
        android:layout_height="wrap_content"
        android:text="requiresDeviceIdle" />

    <Button
        android:id="@+id/startjob"
        android:layout_width="match_parent"
        android:layout_height="wrap_content"
        android:text="Start a Job" />
    
    <Button
        android:id="@+id/canceljobs"
        android:layout_width="match_parent"
        android:layout_height="wrap_content"
        android:text="Cancel all Jobs" />

</LinearLayout>

MyJobService.java
package com.example.androidjobscheduler;

import android.app.job.JobParameters;
import android.app.job.JobService;
import android.widget.Toast;

//Require API Level 21
public class MyJobService extends JobService {

 public MyJobService() {
 }

 @Override
 public boolean onStartJob(JobParameters params) {
  Toast.makeText(this, 
    "MyJobService.onStartJob() - " + 
    params.getJobId(), 
    Toast.LENGTH_SHORT).show();
  /*
   * True - if your service needs to process 
   * the work (on a separate thread). 
   * False - if there's no more work to be done for this job.
   */
  return false;
 }

 @Override
 public boolean onStopJob(JobParameters params) {
  Toast.makeText(this, 
    "MyJobService.onStopJob() - " + 
    params.getJobId(), 
    Toast.LENGTH_SHORT).show();
  return false;
 }

}

uses-permission of "android.permission.RECEIVE_BOOT_COMPLETED" and service of ".MyJobService" are needed in AndroidManifest.xml, for builder.setPersisted().
<?xml version="1.0" encoding="utf-8"?>
<manifest xmlns:android="http://schemas.android.com/apk/res/android"
    package="com.example.androidjobscheduler"
    android:versionCode="1"
    android:versionName="1.0" >

    <uses-sdk
        android:minSdkVersion="21"
        android:targetSdkVersion="22" />
    <uses-permission android:name="android.permission.RECEIVE_BOOT_COMPLETED"/>

    <application
        android:allowBackup="true"
        android:icon="@drawable/ic_launcher"
        android:label="@string/app_name"
        android:theme="@style/AppTheme" >
        <activity
            android:name=".MainActivity"
            android:label="@string/app_name" >
            <intent-filter>
                <action android:name="android.intent.action.MAIN" />

                <category android:name="android.intent.category.LAUNCHER" />
            </intent-filter>
            
        </activity>
        <service android:name=".MyJobService"
            android:permission="android.permission.BIND_JOB_SERVICE" />
    </application>

</manifest>


download filesDownload the files.

Sky: will it be the new programming framework for Android development?

Sky is an experimental open-source framework for writing mobile applications in Dart. Sky brings continuous deployment, fast development cycles, and designed-for-small-screen 60Hz user experiences to Dart developers on Android. Presented by Eric Seidel.

Friday, May 1, 2015

Example of JobScheduler and JobService

Android 5.0 provides a new JobScheduler API that lets developers optimize battery life by defining jobs for the system to run asynchronously at a later time or under specified conditions. Here is a example to use JobScheduler to run JobService repeatly in every 10 seconds.


Create MyJobService.java extends JobService
package com.example.androidjobscheduler;

import android.app.job.JobParameters;
import android.app.job.JobService;
import android.widget.Toast;

//Require API Level 21
public class MyJobService extends JobService {

 public MyJobService() {
 }

 @Override
 public boolean onStartJob(JobParameters params) {
  Toast.makeText(this, 
   "MyJobService.onStartJob()", 
   Toast.LENGTH_SHORT).show();
  /*
   * True - if your service needs to process 
   * the work (on a separate thread). 
   * False - if there's no more work to be done for this job.
   */
  return false;
 }

 @Override
 public boolean onStopJob(JobParameters params) {
  Toast.makeText(this, 
    "MyJobService.onStopJob()", 
    Toast.LENGTH_SHORT).show();
  return false;
 }

}

Edit AndroidManifest.xml, specify <service> of ".MyJobService", with "android.permission.BIND_JOB_SERVICE". And also set android:minSdkVersion="21".
<?xml version="1.0" encoding="utf-8"?>
<manifest xmlns:android="http://schemas.android.com/apk/res/android"
    package="com.example.androidjobscheduler"
    android:versionCode="1"
    android:versionName="1.0" >

    <uses-sdk
        android:minSdkVersion="21"
        android:targetSdkVersion="22" />

    <application
        android:allowBackup="true"
        android:icon="@drawable/ic_launcher"
        android:label="@string/app_name"
        android:theme="@style/AppTheme" >
        <activity
            android:name=".MainActivity"
            android:label="@string/app_name" >
            <intent-filter>
                <action android:name="android.intent.action.MAIN" />

                <category android:name="android.intent.category.LAUNCHER" />
            </intent-filter>
            
        </activity>
        <service android:name=".MyJobService"
            android:permission="android.permission.BIND_JOB_SERVICE" />
    </application>

</manifest>

MainActivity.java
package com.example.androidjobscheduler;

import java.util.List;

import android.support.v7.app.ActionBarActivity;
import android.app.job.JobInfo;
import android.app.job.JobScheduler;
import android.content.ComponentName;
import android.os.Bundle;
import android.os.SystemClock;
import android.view.View;
import android.view.View.OnClickListener;
import android.widget.Button;
import android.widget.Chronometer;
import android.widget.Toast;


public class MainActivity extends ActionBarActivity {
 
 Chronometer chronometer;
 Button btnStartJob, btnCancelJobs;
 
 JobScheduler jobScheduler;
 private static final int MYJOBID = 1;

    @Override
    protected void onCreate(Bundle savedInstanceState) {
        super.onCreate(savedInstanceState);

        setContentView(R.layout.activity_main);
        chronometer = (Chronometer)findViewById(R.id.chronometer);
        btnStartJob = (Button)findViewById(R.id.startjob);
        btnCancelJobs =  (Button)findViewById(R.id.canceljobs);

        jobScheduler = (JobScheduler)getSystemService(JOB_SCHEDULER_SERVICE);
        
        btnStartJob.setOnClickListener(new OnClickListener(){

   @Override
   public void onClick(View v) {
    chronometer.setBase(SystemClock.elapsedRealtime());
    chronometer.start();
         
    
    ComponentName jobService = 
     new ComponentName(getPackageName(), MyJobService.class.getName());
    JobInfo jobInfo = 
     new JobInfo.Builder(MYJOBID, jobService).setPeriodic(10000).build();
    /*
     * setPeriodic(long intervalMillis)
     * Specify that this job should recur with the provided interval, 
     * not more than once per period.
     */
    
    int jobId = jobScheduler.schedule(jobInfo);
    if(jobScheduler.schedule(jobInfo)>0){
     Toast.makeText(MainActivity.this, 
      "Successfully scheduled job: " + jobId, 
      Toast.LENGTH_SHORT).show();
    }else{
     Toast.makeText(MainActivity.this, 
       "RESULT_FAILURE: " + jobId, 
       Toast.LENGTH_SHORT).show();
    }
       
   }});
        
        btnCancelJobs.setOnClickListener(new OnClickListener(){

   @Override
   public void onClick(View v) {
    chronometer.stop();
    
    List<JobInfo> allPendingJobs = jobScheduler.getAllPendingJobs();
    String s = "";
    for(JobInfo j : allPendingJobs){
     int jId = j.getId();
     jobScheduler.cancel(jId);
     s += "jobScheduler.cancel(" + jId + " )";
    }
    Toast.makeText(MainActivity.this, 
      s, 
      Toast.LENGTH_SHORT).show();
    
    //or
    //jobScheduler.cancelAll();
    
    
   }});
    }


}

activity_main.xml
<LinearLayout xmlns:android="http://schemas.android.com/apk/res/android"
    xmlns:tools="http://schemas.android.com/tools"
    android:layout_width="match_parent"
    android:layout_height="match_parent"
    android:orientation="vertical"
    android:paddingBottom="@dimen/activity_vertical_margin"
    android:paddingLeft="@dimen/activity_horizontal_margin"
    android:paddingRight="@dimen/activity_horizontal_margin"
    android:paddingTop="@dimen/activity_vertical_margin"
    tools:context="com.example.androidjobscheduler.MainActivity" >

    <TextView
        android:layout_width="wrap_content"
        android:layout_height="wrap_content"
        android:layout_gravity="center_horizontal"
        android:autoLink="web"
        android:text="http://android-er.blogspot.com/"
        android:textStyle="bold" />

    <Chronometer
        android:id="@+id/chronometer"
        android:layout_width="fill_parent"
        android:layout_height="wrap_content"
        android:layout_gravity="center_horizontal" />

    <Button
        android:id="@+id/startjob"
        android:layout_width="match_parent"
        android:layout_height="wrap_content"
        android:text="Start a Job" />
    
    <Button
        android:id="@+id/canceljobs"
        android:layout_width="match_parent"
        android:layout_height="wrap_content"
        android:text="Cancel all Jobs" />

</LinearLayout>


download filesDownload the files.