In my case, I develope on Eclipse 3.6 under Ubuntu 10.04. A HTC Wildfire have been purchased recently, so I can develope my exercises using real phone.
To setup the system, the phone and the code, refer to Google document "Developing on a Device".
If you are going to run/debug a project which have been setup to run on emulator, may be you have to unselect the preferred Android Virtual Device.
- In Eclipse, right click on the project, -> Run As -> Run Configurations...
- Select the configuration under Android Application on left, and Target on Right, un-select the preferred Android Virtual Device, and click Apply.
Monday, July 26, 2010
Play mp3 in SD Card, using Android's MediaPlayer
In the exercise "Android MediaPlayer", the application play mp3 file in /res/raw folder. In this exercise, it will be modified to play a mp3 file, named music.mp3, in SD Card.
First of all, copy a mp3 file (music.mp3) to SD Card. Refer to the article "Create SD Card in Android Emulator and copy files into, in Eclipse, Emulator and DDMS" to copy mp3 file to SD Card.
main.xm have no change, refer to the exercise "Android MediaPlayer".
AndroidMediaPlayer.java
Download the files.
Updated@2016-06-18:
- Open mp3 using Intent.ACTION_OPEN_DOCUMENT, ACTION_GET_CONTENT and ACTION_PICK, with checking and requesting permission at runtime.
First of all, copy a mp3 file (music.mp3) to SD Card. Refer to the article "Create SD Card in Android Emulator and copy files into, in Eclipse, Emulator and DDMS" to copy mp3 file to SD Card.
main.xm have no change, refer to the exercise "Android MediaPlayer".
AndroidMediaPlayer.java
package com.exercise.AndroidMediaPlayer;
import java.io.IOException;
import android.app.Activity;
import android.media.MediaPlayer;
import android.os.Bundle;
import android.view.View;
import android.widget.Button;
import android.widget.TextView;
import android.widget.Toast;
public class AndroidMediaPlayer extends Activity {
MediaPlayer mediaPlayer;
Button buttonPlayPause, buttonQuit;
TextView textState;
private int stateMediaPlayer;
private final int stateMP_Error = 0;
private final int stateMP_NotStarter = 1;
private final int stateMP_Playing = 2;
private final int stateMP_Pausing = 3;
/** Called when the activity is first created. */
@Override
public void onCreate(Bundle savedInstanceState) {
super.onCreate(savedInstanceState);
setContentView(R.layout.main);
buttonPlayPause = (Button)findViewById(R.id.playpause);
buttonQuit = (Button)findViewById(R.id.quit);
textState = (TextView)findViewById(R.id.state);
buttonPlayPause.setOnClickListener(buttonPlayPauseOnClickListener);
buttonQuit.setOnClickListener(buttonQuitOnClickListener);
initMediaPlayer();
}
private void initMediaPlayer()
{
String PATH_TO_FILE = "/sdcard/music.mp3";
mediaPlayer = new MediaPlayer();
try {
mediaPlayer.setDataSource(PATH_TO_FILE);
mediaPlayer.prepare();
Toast.makeText(this, PATH_TO_FILE, Toast.LENGTH_LONG).show();
stateMediaPlayer = stateMP_NotStarter;
textState.setText("- IDLE -");
} catch (IllegalArgumentException e) {
// TODO Auto-generated catch block
e.printStackTrace();
Toast.makeText(this, e.toString(), Toast.LENGTH_LONG).show();
stateMediaPlayer = stateMP_Error;
textState.setText("- ERROR!!! -");
} catch (IllegalStateException e) {
// TODO Auto-generated catch block
e.printStackTrace();
Toast.makeText(this, e.toString(), Toast.LENGTH_LONG).show();
stateMediaPlayer = stateMP_Error;
textState.setText("- ERROR!!! -");
} catch (IOException e) {
// TODO Auto-generated catch block
e.printStackTrace();
Toast.makeText(this, e.toString(), Toast.LENGTH_LONG).show();
stateMediaPlayer = stateMP_Error;
textState.setText("- ERROR!!! -");
}
}
Button.OnClickListener buttonPlayPauseOnClickListener
= new Button.OnClickListener(){
@Override
public void onClick(View v) {
// TODO Auto-generated method stub
switch(stateMediaPlayer){
case stateMP_Error:
break;
case stateMP_NotStarter:
mediaPlayer.start();
buttonPlayPause.setText("Pause");
textState.setText("- PLAYING -");
stateMediaPlayer = stateMP_Playing;
break;
case stateMP_Playing:
mediaPlayer.pause();
buttonPlayPause.setText("Play");
textState.setText("- PAUSING -");
stateMediaPlayer = stateMP_Pausing;
break;
case stateMP_Pausing:
mediaPlayer.start();
buttonPlayPause.setText("Pause");
textState.setText("- PLAYING -");
stateMediaPlayer = stateMP_Playing;
break;
}
}
};
Button.OnClickListener buttonQuitOnClickListener
= new Button.OnClickListener(){
@Override
public void onClick(View v) {
// TODO Auto-generated method stub
mediaPlayer.stop();
mediaPlayer.release();
finish();
}
};
}
Download the files.
Updated@2016-06-18:
- Open mp3 using Intent.ACTION_OPEN_DOCUMENT, ACTION_GET_CONTENT and ACTION_PICK, with checking and requesting permission at runtime.
Saturday, July 24, 2010
Instance two object from the same custom view class
In the exercise "Custom View with User Interaction", ONE custom view was instanced to engage the whole screen (Activity). Here, I try to instance two object from the same customer view, in the same screen.
Only change the code in onCreate() of AndroidViewUI.java
Download the files.
Only change the code in onCreate() of AndroidViewUI.java
package com.exercise.AndroidViewUI;
import android.app.Activity;
import android.content.Context;
import android.graphics.Canvas;
import android.graphics.Color;
import android.graphics.Paint;
import android.os.Bundle;
import android.util.AttributeSet;
import android.view.MotionEvent;
import android.view.View;
import android.view.ViewGroup.LayoutParams;
import android.widget.LinearLayout;
public class AndroidViewUI extends Activity {
public class MyView extends View {
private Paint paint = new Paint(Paint.ANTI_ALIAS_FLAG);
private float initX, initY, radius;
private boolean drawing = false;
public MyView(Context context) {
super(context);
// TODO Auto-generated constructor stub
init();
}
public MyView(Context context, AttributeSet attrs) {
super(context, attrs);
// TODO Auto-generated constructor stub
init();
}
public MyView(Context context, AttributeSet attrs, int defStyle) {
super(context, attrs, defStyle);
// TODO Auto-generated constructor stub
init();
}
private void init(){
paint.setStyle(Paint.Style.STROKE);
paint.setStrokeWidth(3);
paint.setColor(Color.WHITE);
}
@Override
protected void onMeasure(int widthMeasureSpec, int heightMeasureSpec) {
// TODO Auto-generated method stub
setMeasuredDimension(MeasureSpec.getSize(widthMeasureSpec),
MeasureSpec.getSize(heightMeasureSpec));
}
@Override
protected void onDraw(Canvas canvas) {
// TODO Auto-generated method stub
if(drawing){
canvas.drawCircle(initX, initY, radius, paint);
}
}
@Override
public boolean onTouchEvent(MotionEvent event) {
// TODO Auto-generated method stub
int action = event.getAction();
if (action==MotionEvent.ACTION_MOVE){
float x = event.getX();
float y = event.getY();
radius = (float) Math.sqrt(Math.pow(x-initX, 2) + Math.pow(y-initY, 2));
}
else if (action==MotionEvent.ACTION_DOWN){
initX = event.getX();
initY = event.getY();
radius = 1;
drawing = true;
}
else if (action==MotionEvent.ACTION_UP){
drawing = false;
}
invalidate();
return true;
}
}
/** Called when the activity is first created. */
@Override
public void onCreate(Bundle savedInstanceState) {
super.onCreate(savedInstanceState);
//setContentView(R.layout.main);
LinearLayout mainLayout = new LinearLayout(this);
mainLayout.setOrientation(LinearLayout.VERTICAL);
MyView myView1 = new MyView(this);
LayoutParams myView1Params = new LayoutParams(200, 200);
myView1.setLayoutParams(myView1Params);
myView1.setBackgroundColor(Color.GREEN);
MyView myView2 = new MyView(this);
LayoutParams myView2Params = new LayoutParams(300, 200);
myView2.setLayoutParams(myView2Params);
myView2.setBackgroundColor(Color.BLUE);
mainLayout.addView(myView1);
mainLayout.addView(myView2);
setContentView(mainLayout);
}
}
Download the files.
Friday, July 23, 2010
Android MediaPlayer
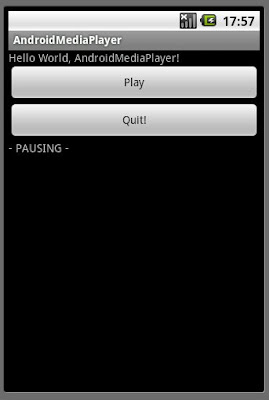
The exercise play, pause and stop a mp3 file in /res/raw folder, using android.media.MediaPlayer.
First of all, copy a mp3 file in /res/raw folder.
(You have to create the folder "raw" under "res", and copy a mp3 file named "music.mp3" into it.)
main.xml
AndroidMediaPlayer.java
Download the files.
next: Play mp3 in SD Card, using Android's MediaPlayer
Updated@2016-06-18:
- Open mp3 using Intent.ACTION_OPEN_DOCUMENT, ACTION_GET_CONTENT and ACTION_PICK, with checking and requesting permission at runtime.
First of all, copy a mp3 file in /res/raw folder.
(You have to create the folder "raw" under "res", and copy a mp3 file named "music.mp3" into it.)
main.xml
<?xml version="1.0" encoding="utf-8"?>
<LinearLayout xmlns:android="http://schemas.android.com/apk/res/android"
android:orientation="vertical"
android:layout_width="fill_parent"
android:layout_height="fill_parent"
>
<TextView
android:layout_width="fill_parent"
android:layout_height="wrap_content"
android:text="@string/hello"
/>
<Button
android:id="@+id/playpause"
android:layout_width="fill_parent"
android:layout_height="wrap_content"
android:text="Play"
/>
<Button
android:id="@+id/quit"
android:layout_width="fill_parent"
android:layout_height="wrap_content"
android:text="Quit!"
/>
<TextView
android:id="@+id/state"
android:layout_width="fill_parent"
android:layout_height="wrap_content"
/>
</LinearLayout>
AndroidMediaPlayer.java
package com.exercise.AndroidMediaPlayer;
import android.app.Activity;
import android.media.MediaPlayer;
import android.os.Bundle;
import android.view.View;
import android.widget.Button;
import android.widget.TextView;
public class AndroidMediaPlayer extends Activity {
MediaPlayer mediaPlayer;
Button buttonPlayPause, buttonQuit;
TextView textState;
private int stateMediaPlayer;
private final int stateMP_NotStarter = 0;
private final int stateMP_Playing = 1;
private final int stateMP_Pausing = 2;
/** Called when the activity is first created. */
@Override
public void onCreate(Bundle savedInstanceState) {
super.onCreate(savedInstanceState);
setContentView(R.layout.main);
buttonPlayPause = (Button)findViewById(R.id.playpause);
buttonQuit = (Button)findViewById(R.id.quit);
textState = (TextView)findViewById(R.id.state);
buttonPlayPause.setOnClickListener(buttonPlayPauseOnClickListener);
buttonQuit.setOnClickListener(buttonQuitOnClickListener);
initMediaPlayer();
}
private void initMediaPlayer()
{
mediaPlayer = new MediaPlayer();
mediaPlayer = MediaPlayer.create(AndroidMediaPlayer.this, R.raw.music);
stateMediaPlayer = stateMP_NotStarter;
textState.setText("- IDLE -");
}
Button.OnClickListener buttonPlayPauseOnClickListener
= new Button.OnClickListener(){
@Override
public void onClick(View v) {
// TODO Auto-generated method stub
switch(stateMediaPlayer){
case stateMP_NotStarter:
mediaPlayer.start();
buttonPlayPause.setText("Pause");
textState.setText("- PLAYING -");
stateMediaPlayer = stateMP_Playing;
break;
case stateMP_Playing:
mediaPlayer.pause();
buttonPlayPause.setText("Play");
textState.setText("- PAUSING -");
stateMediaPlayer = stateMP_Pausing;
break;
case stateMP_Pausing:
mediaPlayer.start();
buttonPlayPause.setText("Pause");
textState.setText("- PLAYING -");
stateMediaPlayer = stateMP_Playing;
break;
}
}
};
Button.OnClickListener buttonQuitOnClickListener
= new Button.OnClickListener(){
@Override
public void onClick(View v) {
// TODO Auto-generated method stub
mediaPlayer.stop();
mediaPlayer.release();
finish();
}
};
}
Download the files.
next: Play mp3 in SD Card, using Android's MediaPlayer
Updated@2016-06-18:
- Open mp3 using Intent.ACTION_OPEN_DOCUMENT, ACTION_GET_CONTENT and ACTION_PICK, with checking and requesting permission at runtime.
Thursday, July 22, 2010
More on Generate a mirror image using Matrix.postConcat()
More function of mirror image, such as mirror about X axis, mirror about center, will be as in this exercise; base on the last exercise "Generate a mirror image using Matrix.postConcat()".
main.xml
AndroidMirrorImage.java
Download the files.
main.xml
<?xml version="1.0" encoding="utf-8"?>
<LinearLayout xmlns:android="http://schemas.android.com/apk/res/android"
android:orientation="vertical"
android:layout_width="fill_parent"
android:layout_height="fill_parent"
>
<TextView
android:layout_width="fill_parent"
android:layout_height="wrap_content"
android:text="@string/hello"
/>
<Spinner
android:id="@+id/mirrorselection"
android:layout_width="fill_parent"
android:layout_height="wrap_content"
/>
<ImageView
android:id="@+id/imageview"
android:layout_gravity="center"
android:layout_width="fill_parent"
android:layout_height="fill_parent"
android:scaleType="center"
/>
</LinearLayout>
AndroidMirrorImage.java
package com.exercise.AndroidMirrorImage;
import android.app.Activity;
import android.graphics.Bitmap;
import android.graphics.BitmapFactory;
import android.graphics.Matrix;
import android.os.Bundle;
import android.view.View;
import android.widget.AdapterView;
import android.widget.ArrayAdapter;
import android.widget.ImageView;
import android.widget.Spinner;
public class AndroidMirrorImage extends Activity {
private final String imageInSD = "/sdcard/google.png";
private static final String[] optionMirror =
{"Normal", "Mirror about X", "Mirror about Y", "Mirror about Center"};
private ArrayAdapter<String> adapter;
Spinner mirrorSelection;
ImageView myImageView;
Bitmap bitmap;
int bmpWidth, bmpHeight;
Matrix matrixMirrorNormal, matrixMirrorX, matrixMirrorY, matrixMirrorC;
/** Called when the activity is first created. */
@Override
public void onCreate(Bundle savedInstanceState) {
super.onCreate(savedInstanceState);
setContentView(R.layout.main);
myImageView = (ImageView)findViewById(R.id.imageview);
mirrorSelection = (Spinner)findViewById(R.id.mirrorselection);
adapter = new ArrayAdapter<String>(this,
android.R.layout.simple_spinner_item, optionMirror);
adapter.setDropDownViewResource(android.R.layout.simple_spinner_dropdown_item);
mirrorSelection.setAdapter(adapter);
mirrorSelection.setSelection(0);
mirrorSelection.setOnItemSelectedListener(new Spinner.OnItemSelectedListener(){
@Override
public void onItemSelected(AdapterView<?> arg0, View arg1,
int arg2, long arg3) {
// TODO Auto-generated method stub
drawMatrix();
}
@Override
public void onNothingSelected(AdapterView<?> arg0) {
// TODO Auto-generated method stub
mirrorSelection.setSelection(0);
}});
bitmap = BitmapFactory.decodeFile(imageInSD);
bmpWidth = bitmap.getWidth();
bmpHeight = bitmap.getHeight();
initMirrorMatrix();
drawMatrix();
}
private void initMirrorMatrix()
{
float[] mirrorNormal =
{ 1, 0, 0,
0, 1, 0,
0, 0, 1
};
float[] mirrorX =
{ 1, 0, 0,
0, -1, 0,
0, 0, 1
};
float[] mirrorY =
{ -1, 0, 0,
0, 1, 0,
0, 0, 1
};
float[] mirrorC =
{ -1, 0, 0,
0, -1, 0,
0, 0, 1
};
matrixMirrorNormal = new Matrix();
matrixMirrorNormal.setValues(mirrorNormal);
matrixMirrorX = new Matrix();
matrixMirrorX.setValues(mirrorX);
matrixMirrorY = new Matrix();
matrixMirrorY.setValues(mirrorY);
matrixMirrorC = new Matrix();
matrixMirrorC.setValues(mirrorC);
}
private void drawMatrix()
{
Matrix matrix = new Matrix();
switch (mirrorSelection.getSelectedItemPosition()){
case 0: //Normal
matrix.postConcat(matrixMirrorNormal);
break;
case 1: //Mirror about X
matrix.postConcat(matrixMirrorX);
break;
case 2: //Mirror about Y
matrix.postConcat(matrixMirrorY);
break;
case 3: //Mirror about Center
matrix.postConcat(matrixMirrorC);
break;
}
Bitmap mirrorBitmap = Bitmap.createBitmap(bitmap, 0, 0, bmpWidth, bmpHeight, matrix, true);
myImageView.setImageBitmap(mirrorBitmap);
}
}
Download the files.
Tuesday, July 20, 2010
Generate a mirror image using Matrix.postConcat()
We can use the matrix below, with the Matrix.postConcat() to generate a mirror image about Y axis.
{ -1, 0, 0,
0, 1, 0,
0, 0, 1
};
main.xml
AndroidMirrorImage.java
Download the files.
previous: Skew bitmap image, using Matrix
We can use the matrix below, with the Matrix.postConcat() to generate a mirror image about Y axis.
{ -1, 0, 0,
0, 1, 0,
0, 0, 1
};
main.xml
<?xml version="1.0" encoding="utf-8"?>
<LinearLayout xmlns:android="http://schemas.android.com/apk/res/android"
android:orientation="vertical"
android:layout_width="fill_parent"
android:layout_height="fill_parent"
>
<TextView
android:layout_width="fill_parent"
android:layout_height="wrap_content"
android:text="@string/hello"
/>
<CheckBox
android:id="@+id/enablemirror"
android:layout_width="fill_parent"
android:layout_height="wrap_content"
android:text="Mirror Image"
/>
<ImageView
android:id="@+id/imageview"
android:layout_gravity="center"
android:layout_width="fill_parent"
android:layout_height="fill_parent"
android:scaleType="center"
/>
</LinearLayout>
AndroidMirrorImage.java
package com.exercise.AndroidMirrorImage;
import android.app.Activity;
import android.graphics.Bitmap;
import android.graphics.BitmapFactory;
import android.graphics.Matrix;
import android.os.Bundle;
import android.widget.CheckBox;
import android.widget.CompoundButton;
import android.widget.ImageView;
public class AndroidMirrorImage extends Activity {
private final String imageInSD = "/sdcard/google.png";
CheckBox enableMirror;
ImageView myImageView;
Bitmap bitmap;
int bmpWidth, bmpHeight;
Matrix matrixMirrorY;
/** Called when the activity is first created. */
@Override
public void onCreate(Bundle savedInstanceState) {
super.onCreate(savedInstanceState);
setContentView(R.layout.main);
enableMirror = (CheckBox)findViewById(R.id.enablemirror);
myImageView = (ImageView)findViewById(R.id.imageview);
enableMirror.setOnCheckedChangeListener(new CheckBox.OnCheckedChangeListener(){
@Override
public void onCheckedChanged(CompoundButton buttonView,
boolean isChecked) {
// TODO Auto-generated method stub
drawMatrix();
}});
bitmap = BitmapFactory.decodeFile(imageInSD);
bmpWidth = bitmap.getWidth();
bmpHeight = bitmap.getHeight();
initMirrorMatrix();
drawMatrix();
}
private void initMirrorMatrix()
{
float[] mirrorY =
{ -1, 0, 0,
0, 1, 0,
0, 0, 1
};
matrixMirrorY = new Matrix();
matrixMirrorY.setValues(mirrorY);
}
private void drawMatrix()
{
if(enableMirror.isChecked())
{
Matrix matrix = new Matrix();
matrix.postConcat(matrixMirrorY);
Bitmap mirrorBitmap = Bitmap.createBitmap(bitmap, 0, 0, bmpWidth, bmpHeight, matrix, true);
myImageView.setImageBitmap(mirrorBitmap);
}
else{
myImageView.setImageBitmap(bitmap);
}
}
}
Download the files.
previous: Skew bitmap image, using Matrix
Monday, July 19, 2010
Skew bitmap image, using Matrix
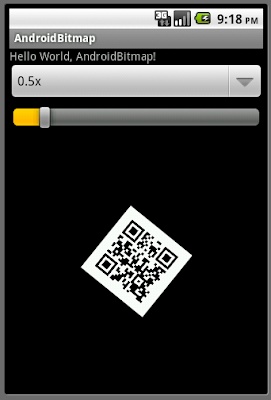
To generate a skewed bitmap, Matrix.postSkew() can be used.
Extend the last exercisse "Rotate bitmap image, using Matrix".
Modify main.xml to add two SeekBar to set the skew for x and y.
AndroidBitmap.java
Download the files.
next: Generate a mirror image using Matrix.postConcat()
Extend the last exercisse "Rotate bitmap image, using Matrix".
Modify main.xml to add two SeekBar to set the skew for x and y.
<?xml version="1.0" encoding="utf-8"?>
<LinearLayout xmlns:android="http://schemas.android.com/apk/res/android"
android:orientation="vertical"
android:layout_width="fill_parent"
android:layout_height="fill_parent"
>
<TextView
android:layout_width="fill_parent"
android:layout_height="wrap_content"
android:text="@string/hello"
/>
<Spinner
android:id="@+id/scale"
android:layout_width="fill_parent"
android:layout_height="wrap_content"
/>
<SeekBar
android:id="@+id/rotate"
android:layout_width="fill_parent"
android:layout_height="wrap_content"
android:layout_margin="5px"
android:max="360"
android:progress="0"
/>
<LinearLayout
android:orientation="horizontal"
android:layout_width="fill_parent"
android:layout_height="wrap_content"
>
<LinearLayout
android:orientation="vertical"
android:layout_height="wrap_content"
android:layout_width="0dip"
android:layout_weight="1"
android:layout_margin="5px"
>
<TextView
android:id="@+id/textskewx"
android:layout_height="wrap_content"
android:layout_width="fill_parent"
android:textSize="10px"
android:text="Skew-X: 0"
/>
<SeekBar
android:id="@+id/skewx"
android:layout_height="wrap_content"
android:layout_width="fill_parent"
android:max="200"
android:progress="100"
/>
</LinearLayout>
<LinearLayout
android:orientation="vertical"
android:layout_height="wrap_content"
android:layout_width="0dip"
android:layout_weight="1"
android:layout_margin="5px"
>
<TextView
android:id="@+id/textskewy"
android:layout_height="wrap_content"
android:layout_width="fill_parent"
android:textSize="10px"
android:text="Skew-Y: 0"
/>
<SeekBar
android:id="@+id/skewy"
android:layout_height="wrap_content"
android:layout_width="fill_parent"
android:max="200"
android:progress="100"
/>
</LinearLayout>
</LinearLayout>
<ImageView
android:id="@+id/imageview"
android:layout_gravity="center"
android:layout_width="fill_parent"
android:layout_height="fill_parent"
android:scaleType="center"
/>
</LinearLayout>
AndroidBitmap.java
package com.exercise.AndroidBitmap;
import android.app.Activity;
import android.graphics.Bitmap;
import android.graphics.BitmapFactory;
import android.graphics.Matrix;
import android.os.Bundle;
import android.view.View;
import android.widget.AdapterView;
import android.widget.ArrayAdapter;
import android.widget.ImageView;
import android.widget.SeekBar;
import android.widget.Spinner;
import android.widget.TextView;
public class AndroidBitmap extends Activity {
private final String imageInSD = "/sdcard/er.PNG";
ImageView myImageView;
Spinner spinnerScale;
SeekBar seekbarRotate;
SeekBar seekbarSkewX, seekbarSkewY;
TextView textSkewX, textSkewY;
private static final String[] strScale
= {"0.2x", "0.5x", "1.0x", "2.0x", "5.0x"};
private static final Float[] floatScale
= {0.2F, 0.5F, 1F, 2F, 5F};
private final int defaultSpinnerScaleSelection = 2;
private ArrayAdapter<String> adapterScale;
private float curScale = 1F;
private float curRotate = 0F;
private float curSkewX = 0F;
private float curSkewY = 0F;
Bitmap bitmap;
int bmpWidth, bmpHeight;
/** Called when the activity is first created. */
@Override
public void onCreate(Bundle savedInstanceState) {
super.onCreate(savedInstanceState);
setContentView(R.layout.main);
myImageView = (ImageView)findViewById(R.id.imageview);
spinnerScale = (Spinner)findViewById(R.id.scale);
seekbarRotate = (SeekBar)findViewById(R.id.rotate);
seekbarSkewX = (SeekBar)findViewById(R.id.skewx);
seekbarSkewY = (SeekBar)findViewById(R.id.skewy);
textSkewX = (TextView)findViewById(R.id.textskewx);
textSkewY = (TextView)findViewById(R.id.textskewy);
adapterScale = new ArrayAdapter<String>(this,
android.R.layout.simple_spinner_item, strScale);
adapterScale.setDropDownViewResource(android.R.layout.simple_spinner_dropdown_item);
spinnerScale.setAdapter(adapterScale);
spinnerScale.setSelection(defaultSpinnerScaleSelection);
curScale = floatScale[defaultSpinnerScaleSelection];
bitmap = BitmapFactory.decodeFile(imageInSD);
bmpWidth = bitmap.getWidth();
bmpHeight = bitmap.getHeight();
drawMatrix();
spinnerScale.setOnItemSelectedListener(spinnerScaleOnItemSelectedListener);
seekbarRotate.setOnSeekBarChangeListener(seekbarRotateSeekBarChangeListener);
seekbarSkewX.setOnSeekBarChangeListener(seekbarSkewXSeekBarChangeListener);
seekbarSkewY.setOnSeekBarChangeListener(seekbarSkewYSeekBarChangeListener);
}
private void drawMatrix(){
Matrix matrix = new Matrix();
matrix.postScale(curScale, curScale);
matrix.postRotate(curRotate);
matrix.postSkew(curSkewX, curSkewY);
Bitmap resizedBitmap = Bitmap.createBitmap(bitmap, 0, 0, bmpWidth, bmpHeight, matrix, true);
myImageView.setImageBitmap(resizedBitmap);
}
private SeekBar.OnSeekBarChangeListener seekbarSkewYSeekBarChangeListener
= new SeekBar.OnSeekBarChangeListener() {
@Override
public void onStopTrackingTouch(SeekBar seekBar) {
// TODO Auto-generated method stub
}
@Override
public void onStartTrackingTouch(SeekBar seekBar) {
// TODO Auto-generated method stub
}
@Override
public void onProgressChanged(SeekBar seekBar, int progress,
boolean fromUser) {
// TODO Auto-generated method stub
curSkewY = (float)(progress-100)/100;
textSkewY.setText("Skew-Y: " + String.valueOf(curSkewY));
drawMatrix();
}
};
private SeekBar.OnSeekBarChangeListener seekbarSkewXSeekBarChangeListener
= new SeekBar.OnSeekBarChangeListener(){
@Override
public void onProgressChanged(SeekBar seekBar, int progress,
boolean fromUser) {
// TODO Auto-generated method stub
curSkewX = (float)(progress-100)/100;
textSkewX.setText("Skew-X: " + String.valueOf(curSkewX));
drawMatrix();
}
@Override
public void onStartTrackingTouch(SeekBar seekBar) {
// TODO Auto-generated method stub
}
@Override
public void onStopTrackingTouch(SeekBar seekBar) {
// TODO Auto-generated method stub
}};
private SeekBar.OnSeekBarChangeListener seekbarRotateSeekBarChangeListener
= new SeekBar.OnSeekBarChangeListener(){
@Override
public void onProgressChanged(SeekBar seekBar, int progress,
boolean fromUser) {
// TODO Auto-generated method stub
curRotate = (float)progress;
drawMatrix();
}
@Override
public void onStartTrackingTouch(SeekBar seekBar) {
// TODO Auto-generated method stub
}
@Override
public void onStopTrackingTouch(SeekBar seekBar) {
// TODO Auto-generated method stub
}};
private Spinner.OnItemSelectedListener spinnerScaleOnItemSelectedListener
= new Spinner.OnItemSelectedListener(){
@Override
public void onItemSelected(AdapterView<?> arg0, View arg1,
int arg2, long arg3) {
// TODO Auto-generated method stub
curScale = floatScale[arg2];
drawMatrix();
}
@Override
public void onNothingSelected(AdapterView<?> arg0) {
// TODO Auto-generated method stub
spinnerScale.setSelection(defaultSpinnerScaleSelection);
curScale = floatScale[defaultSpinnerScaleSelection];
}};
}
Download the files.
next: Generate a mirror image using Matrix.postConcat()
Sunday, July 18, 2010
Rotate bitmap image, using Matrix
Here Rotating function is going to be added on the last exercise "Scale bitmap image, using Matrix". It's a SeekBar on the screen to change the degree to rotate the bitmap, by using of Matrix.postRotate().
main.xml
AndroidBitmap.java
Download the files.
next: Skew bitmap image, using Matrix
main.xml
<?xml version="1.0" encoding="utf-8"?>
<LinearLayout xmlns:android="http://schemas.android.com/apk/res/android"
android:orientation="vertical"
android:layout_width="fill_parent"
android:layout_height="fill_parent"
>
<TextView
android:layout_width="fill_parent"
android:layout_height="wrap_content"
android:text="@string/hello"
/>
<Spinner
android:id="@+id/scale"
android:layout_width="fill_parent"
android:layout_height="wrap_content"
/>
<SeekBar
android:id="@+id/rotate"
android:layout_width="fill_parent"
android:layout_height="wrap_content"
android:layout_margin="5px"
android:max="360"
android:progress="0"
/>
<ImageView
android:id="@+id/imageview"
android:layout_gravity="center"
android:layout_width="fill_parent"
android:layout_height="fill_parent"
android:scaleType="center"
/>
</LinearLayout>
AndroidBitmap.java
package com.exercise.AndroidBitmap;
import android.app.Activity;
import android.graphics.Bitmap;
import android.graphics.BitmapFactory;
import android.graphics.Matrix;
import android.os.Bundle;
import android.view.View;
import android.widget.AdapterView;
import android.widget.ArrayAdapter;
import android.widget.ImageView;
import android.widget.SeekBar;
import android.widget.Spinner;
public class AndroidBitmap extends Activity {
private final String imageInSD = "/sdcard/er.PNG";
ImageView myImageView;
Spinner spinnerScale;
SeekBar seekbarRotate;
private static final String[] strScale
= {"0.2x", "0.5x", "1.0x", "2.0x", "5.0x"};
private static final Float[] floatScale
= {0.2F, 0.5F, 1F, 2F, 5F};
private final int defaultSpinnerScaleSelection = 2;
private ArrayAdapter<String> adapterScale;
private float curScale = 1F;
private float curRotate = 0F;
Bitmap bitmap;
int bmpWidth, bmpHeight;
/** Called when the activity is first created. */
@Override
public void onCreate(Bundle savedInstanceState) {
super.onCreate(savedInstanceState);
setContentView(R.layout.main);
myImageView = (ImageView)findViewById(R.id.imageview);
spinnerScale = (Spinner)findViewById(R.id.scale);
seekbarRotate = (SeekBar)findViewById(R.id.rotate);
adapterScale = new ArrayAdapter<String>(this,
android.R.layout.simple_spinner_item, strScale);
adapterScale.setDropDownViewResource(android.R.layout.simple_spinner_dropdown_item);
spinnerScale.setAdapter(adapterScale);
spinnerScale.setSelection(defaultSpinnerScaleSelection);
curScale = floatScale[defaultSpinnerScaleSelection];
bitmap = BitmapFactory.decodeFile(imageInSD);
bmpWidth = bitmap.getWidth();
bmpHeight = bitmap.getHeight();
drawMatrix();
spinnerScale.setOnItemSelectedListener(spinnerScaleOnItemSelectedListener);
seekbarRotate.setOnSeekBarChangeListener(seekbarRotateSeekBarChangeListener);
}
private void drawMatrix(){
Matrix matrix = new Matrix();
matrix.postScale(curScale, curScale);
matrix.postRotate(curRotate);
Bitmap resizedBitmap = Bitmap.createBitmap(bitmap, 0, 0, bmpWidth, bmpHeight, matrix, true);
myImageView.setImageBitmap(resizedBitmap);
}
private SeekBar.OnSeekBarChangeListener seekbarRotateSeekBarChangeListener
= new SeekBar.OnSeekBarChangeListener(){
@Override
public void onProgressChanged(SeekBar seekBar, int progress,
boolean fromUser) {
// TODO Auto-generated method stub
curRotate = (float)progress;
drawMatrix();
}
@Override
public void onStartTrackingTouch(SeekBar seekBar) {
// TODO Auto-generated method stub
}
@Override
public void onStopTrackingTouch(SeekBar seekBar) {
// TODO Auto-generated method stub
}};
private Spinner.OnItemSelectedListener spinnerScaleOnItemSelectedListener
= new Spinner.OnItemSelectedListener(){
@Override
public void onItemSelected(AdapterView<?> arg0, View arg1,
int arg2, long arg3) {
// TODO Auto-generated method stub
curScale = floatScale[arg2];
drawMatrix();
}
@Override
public void onNothingSelected(AdapterView<?> arg0) {
// TODO Auto-generated method stub
spinnerScale.setSelection(defaultSpinnerScaleSelection);
curScale = floatScale[defaultSpinnerScaleSelection];
}};
}
Download the files.
next: Skew bitmap image, using Matrix
Friday, July 16, 2010
Scale bitmap image, using Matrix
Modify the last exercise "Load bitmap file from SD Card", to implement function to post-scale the bitmap image using Matrix.
In order to create a new bitmap with selected scale: A new Matrix object have to be created, with postScale. Then create a new bitmap from the image in SD Card, using the matrix.
Modify main.xml
AndroidBitmap.java
Download the files.
next: Rotate bitmap image, using Matrix
In order to create a new bitmap with selected scale: A new Matrix object have to be created, with postScale. Then create a new bitmap from the image in SD Card, using the matrix.
Modify main.xml
<?xml version="1.0" encoding="utf-8"?>
<LinearLayout xmlns:android="http://schemas.android.com/apk/res/android"
android:orientation="vertical"
android:layout_width="fill_parent"
android:layout_height="fill_parent"
>
<TextView
android:layout_width="fill_parent"
android:layout_height="wrap_content"
android:text="@string/hello"
/>
<Spinner
android:id="@+id/scale"
android:layout_width="fill_parent"
android:layout_height="wrap_content"
/>
<ImageView
android:id="@+id/imageview"
android:layout_gravity="center"
android:layout_width="fill_parent"
android:layout_height="fill_parent"
android:scaleType="center"
/>
</LinearLayout>
AndroidBitmap.java
package com.exercise.AndroidBitmap;
import android.app.Activity;
import android.graphics.Bitmap;
import android.graphics.BitmapFactory;
import android.graphics.Matrix;
import android.os.Bundle;
import android.view.View;
import android.widget.AdapterView;
import android.widget.ArrayAdapter;
import android.widget.ImageView;
import android.widget.Spinner;
public class AndroidBitmap extends Activity {
private final String imageInSD = "/sdcard/er.PNG";
ImageView myImageView;
Spinner spinnerScale;
private static final String[] strScale
= {"0.2x", "0.5x", "1.0x", "2.0x", "5.0x"};
private static final Float[] floatScale
= {0.2F, 0.5F, 1F, 2F, 5F};
private final int defaultSpinnerScaleSelection = 2;
private ArrayAdapter<String> adapterScale;
private float curScale = 1F;
Bitmap bitmap;
int bmpWidth, bmpHeight;
/** Called when the activity is first created. */
@Override
public void onCreate(Bundle savedInstanceState) {
super.onCreate(savedInstanceState);
setContentView(R.layout.main);
myImageView = (ImageView)findViewById(R.id.imageview);
spinnerScale = (Spinner)findViewById(R.id.scale);
adapterScale = new ArrayAdapter<String>(this,
android.R.layout.simple_spinner_item, strScale);
adapterScale.setDropDownViewResource(android.R.layout.simple_spinner_dropdown_item);
spinnerScale.setAdapter(adapterScale);
spinnerScale.setSelection(defaultSpinnerScaleSelection);
curScale = floatScale[defaultSpinnerScaleSelection];
bitmap = BitmapFactory.decodeFile(imageInSD);
bmpWidth = bitmap.getWidth();
bmpHeight = bitmap.getHeight();
drawMatrix();
spinnerScale.setOnItemSelectedListener(spinnerScaleOnItemSelectedListener);
}
private void drawMatrix(){
Matrix matrix = new Matrix();
matrix.postScale(curScale, curScale);
Bitmap resizedBitmap = Bitmap.createBitmap(bitmap, 0, 0, bmpWidth, bmpHeight, matrix, true);
myImageView.setImageBitmap(resizedBitmap);
}
private Spinner.OnItemSelectedListener spinnerScaleOnItemSelectedListener
= new Spinner.OnItemSelectedListener(){
@Override
public void onItemSelected(AdapterView<?> arg0, View arg1,
int arg2, long arg3) {
// TODO Auto-generated method stub
curScale = floatScale[arg2];
drawMatrix();
}
@Override
public void onNothingSelected(AdapterView<?> arg0) {
// TODO Auto-generated method stub
spinnerScale.setSelection(defaultSpinnerScaleSelection);
curScale = floatScale[defaultSpinnerScaleSelection];
}};
}
Download the files.
next: Rotate bitmap image, using Matrix
Wednesday, July 14, 2010
Load bitmap file from SD Card
In last exercise "Save file to SD Card", a file have been saved in SD Card. In this exercise, the bitmap file in SD Card will be loaded, using BitmapFactory.
main.xml
AndroidBitmap.java
Download the files.
next: Scale bitmap image, using Matrix
main.xml
<?xml version="1.0" encoding="utf-8"?>
<LinearLayout xmlns:android="http://schemas.android.com/apk/res/android"
android:orientation="vertical"
android:layout_width="fill_parent"
android:layout_height="fill_parent"
>
<TextView
android:layout_width="fill_parent"
android:layout_height="wrap_content"
android:text="@string/hello"
/>
<ImageView
android:id="@+id/imageview"
android:layout_gravity="center"
android:layout_width="fill_parent"
android:layout_height="fill_parent"
android:scaleType="center"
/>
</LinearLayout>
AndroidBitmap.java
package com.exercise.AndroidBitmap;
import android.app.Activity;
import android.graphics.Bitmap;
import android.graphics.BitmapFactory;
import android.os.Bundle;
import android.widget.ImageView;
public class AndroidBitmap extends Activity {
private final String imageInSD = "/sdcard/er.PNG";
/** Called when the activity is first created. */
@Override
public void onCreate(Bundle savedInstanceState) {
super.onCreate(savedInstanceState);
setContentView(R.layout.main);
Bitmap bitmap = BitmapFactory.decodeFile(imageInSD);
ImageView myImageView = (ImageView)findViewById(R.id.imageview);
myImageView.setImageBitmap(bitmap);
}
}
Download the files.
next: Scale bitmap image, using Matrix
Save file to SD Card
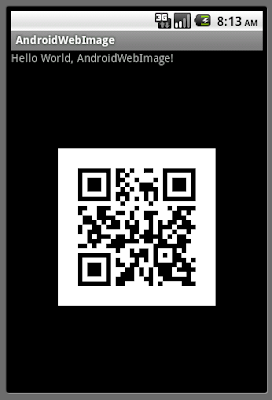
In the previous exercises "Load ImageView with bitmap from internet" and "Generate QR code using Google Chart API", images were downloaded from internet for display only. Here, we are going to save the download image to SD Card.
The path to SD Card can be retrieved using
Environment.getExternalStorageDirectory();
Then compress and write to SD Card by:
outStream = new FileOutputStream(file);
bm.compress(Bitmap.CompressFormat.PNG, 100, outStream);
outStream.flush();
outStream.close();
In order to premit the App to access internet and write to SD Card, we need "android.permission.INTERNET" and "android.permission.WRITE_EXTERNAL_STORAGE".
Modify AndroidManifest.xml
main.xml
AndroidWebImage.java
Download the files.
next: Load bitmap file from SD Card
Related Article:
- How to create sub-folder in SD Card, using Java code
The path to SD Card can be retrieved using
Environment.getExternalStorageDirectory();
Then compress and write to SD Card by:
outStream = new FileOutputStream(file);
bm.compress(Bitmap.CompressFormat.PNG, 100, outStream);
outStream.flush();
outStream.close();
In order to premit the App to access internet and write to SD Card, we need "android.permission.INTERNET" and "android.permission.WRITE_EXTERNAL_STORAGE".
Modify AndroidManifest.xml
<?xml version="1.0" encoding="utf-8"?>
<manifest xmlns:android="http://schemas.android.com/apk/res/android"
package="com.exercise.AndroidWebImage"
android:versionCode="1"
android:versionName="1.0">
<application android:icon="@drawable/icon" android:label="@string/app_name">
<activity android:name=".AndroidWebImage"
android:label="@string/app_name">
<intent-filter>
<action android:name="android.intent.action.MAIN" />
<category android:name="android.intent.category.LAUNCHER" />
</intent-filter>
</activity>
</application>
<uses-sdk android:minSdkVersion="4" />
<uses-permission android:name="android.permission.INTERNET" />
<uses-permission android:name="android.permission.WRITE_EXTERNAL_STORAGE" />
</manifest>
main.xml
<?xml version="1.0" encoding="utf-8"?>
<LinearLayout xmlns:android="http://schemas.android.com/apk/res/android"
android:orientation="vertical"
android:layout_width="fill_parent"
android:layout_height="fill_parent"
>
<TextView
android:layout_width="fill_parent"
android:layout_height="wrap_content"
android:text="@string/hello"
/>
<Button
android:id="@+id/save"
android:layout_width="fill_parent"
android:layout_height="wrap_content"
android:text="Save"
/>
<ImageView
android:id="@+id/image"
android:scaleType="center"
android:layout_width="fill_parent"
android:layout_height="fill_parent"
/>
</LinearLayout>
AndroidWebImage.java
package com.exercise.AndroidWebImage;
import java.io.File;
import java.io.FileNotFoundException;
import java.io.FileOutputStream;
import java.io.IOException;
import java.io.InputStream;
import java.io.OutputStream;
import java.net.HttpURLConnection;
import java.net.URL;
import java.net.URLConnection;
import android.app.Activity;
import android.graphics.Bitmap;
import android.graphics.BitmapFactory;
import android.os.Bundle;
import android.os.Environment;
import android.view.View;
import android.widget.Button;
import android.widget.ImageView;
import android.widget.Toast;
public class AndroidWebImage extends Activity {
String image_URL=
"http://chart.apis.google.com/chart?chs=200x200&cht=qr&chl=http%3A%2F%2Fandroid-er.blogspot.com%2F";
String extStorageDirectory;
Bitmap bm;
/** Called when the activity is first created. */
@Override
public void onCreate(Bundle savedInstanceState) {
super.onCreate(savedInstanceState);
setContentView(R.layout.main);
Button buttonSave = (Button)findViewById(R.id.save);
ImageView bmImage = (ImageView)findViewById(R.id.image);
BitmapFactory.Options bmOptions;
bmOptions = new BitmapFactory.Options();
bmOptions.inSampleSize = 1;
bm = LoadImage(image_URL, bmOptions);
bmImage.setImageBitmap(bm);
extStorageDirectory = Environment.getExternalStorageDirectory().toString();
buttonSave.setText("Save to " + extStorageDirectory + "/qr.PNG");
buttonSave.setOnClickListener(buttonSaveOnClickListener);
}
private Bitmap LoadImage(String URL, BitmapFactory.Options options)
{
Bitmap bitmap = null;
InputStream in = null;
try {
in = OpenHttpConnection(URL);
bitmap = BitmapFactory.decodeStream(in, null, options);
in.close();
} catch (IOException e1) {
}
return bitmap;
}
private InputStream OpenHttpConnection(String strURL) throws IOException{
InputStream inputStream = null;
URL url = new URL(strURL);
URLConnection conn = url.openConnection();
try{
HttpURLConnection httpConn = (HttpURLConnection)conn;
httpConn.setRequestMethod("GET");
httpConn.connect();
if (httpConn.getResponseCode() == HttpURLConnection.HTTP_OK) {
inputStream = httpConn.getInputStream();
}
}
catch (Exception ex)
{
}
return inputStream;
}
Button.OnClickListener buttonSaveOnClickListener
= new Button.OnClickListener(){
@Override
public void onClick(View arg0) {
// TODO Auto-generated method stub
OutputStream outStream = null;
File file = new File(extStorageDirectory, "er.PNG");
try {
outStream = new FileOutputStream(file);
bm.compress(Bitmap.CompressFormat.PNG, 100, outStream);
outStream.flush();
outStream.close();
Toast.makeText(AndroidWebImage.this, "Saved", Toast.LENGTH_LONG).show();
} catch (FileNotFoundException e) {
// TODO Auto-generated catch block
e.printStackTrace();
Toast.makeText(AndroidWebImage.this, e.toString(), Toast.LENGTH_LONG).show();
} catch (IOException e) {
// TODO Auto-generated catch block
e.printStackTrace();
Toast.makeText(AndroidWebImage.this, e.toString(), Toast.LENGTH_LONG).show();
}
}
};
}
Download the files.
next: Load bitmap file from SD Card
Related Article:
- How to create sub-folder in SD Card, using Java code
Monday, July 12, 2010
App Inventor for Android - create mobile applications without having to write any code!
App Inventor is a new tool in Google Labs that makes it easy for anyone—programmers and non-programmers, professionals and students—to create mobile applications for Android-powered devices.
source: Official Google Blog: App Inventor for Android
A 60 second video showing an app being made with App inventor for Android.
source: Official Google Blog: App Inventor for Android
A 60 second video showing an app being made with App inventor for Android.
Sunday, July 11, 2010
Generate QR code using Google Chart API
The Google Chart API lets you dynamically generate charts with a URL string. You can embed these charts on your web page, or download the image for local or offline use.
QR codes are a popular type of two-dimensional barcode. They are also known as hardlinks or physical world hyperlinks. QR Codes store up to 4,296 alphanumeric characters of arbitrary text. This text can be anything, for example URL, contact information, a telephone number, even a poem! QR codes can be read by an optical device with the appropriate software. Such devices range from dedicated QR code readers to mobile phones.
With the previous exercise "Load ImageView with bitmap from internet", we can generate our own QR Code by changing of image_URL.
String image_URL="http://chart.apis.google.com/chart?chs=200x200&cht=qr&chl=http%3A%2F%2Fandroid-er.blogspot.com%2F";
You can try to use the Chart Wizard to generate the URL of your image charts.
Example of MultiAutoCompleteTextView
MultiAutoCompleteTextView is an editable text view, extending AutoCompleteTextView, that can show completion suggestions for the substring of the text where the user is typing instead of necessarily for the entire thing.
You must must provide a MultiAutoCompleteTextView.Tokenizer to distinguish the various substrings.
It can be comapred with "Example of AutoCompleteTextView".
main.xml
java main code
You must must provide a MultiAutoCompleteTextView.Tokenizer to distinguish the various substrings.
It can be comapred with "Example of AutoCompleteTextView".
main.xml
<?xml version="1.0" encoding="utf-8"?>
<LinearLayout xmlns:android="http://schemas.android.com/apk/res/android"
android:orientation="vertical"
android:layout_width="fill_parent"
android:layout_height="fill_parent"
>
<TextView
android:layout_width="fill_parent"
android:layout_height="wrap_content"
android:text="@string/hello"
/>
<MultiAutoCompleteTextView android:id="@+id/multiautocompletetextview"
android:layout_width="fill_parent"
android:layout_height="wrap_content"
android:completionThreshold="1"
/>
</LinearLayout>
java main code
package com.exercise.AndroidMultiAutoCompleteTextView;
import android.app.Activity;
import android.os.Bundle;
import android.widget.ArrayAdapter;
import android.widget.MultiAutoCompleteTextView;
public class AndroidMultiAutoCompleteTextView extends Activity {
MultiAutoCompleteTextView myMultiAutoCompleteTextView;
String item[]={
"January", "February", "March", "April",
"May", "June", "July", "August",
"September", "October", "November", "December"
};
/** Called when the activity is first created. */
@Override
public void onCreate(Bundle savedInstanceState) {
super.onCreate(savedInstanceState);
setContentView(R.layout.main);
MultiAutoCompleteTextView myMultiAutoCompleteTextView
= (MultiAutoCompleteTextView)findViewById(
R.id.multiautocompletetextview);
myMultiAutoCompleteTextView.setAdapter(
new ArrayAdapter<String>(this,
android.R.layout.simple_dropdown_item_1line, item));
myMultiAutoCompleteTextView.setTokenizer(
new MultiAutoCompleteTextView.CommaTokenizer());
}
}
Friday, July 9, 2010
About Me: PackageInfo.versionName and PackageInfo.versionCode
PackageManager is a class for retrieving various kinds of information related to the application packages that are currently installed on the device. You can find this class through getPackageManager(). And PackageInfo hold the overall information about the contents of a package. This corresponds to all of the information collected from AndroidManifest.xml.
The information of android:versionCode and android:versionName in AndroidManifest.xml can be retrieved from PackageInfo.versionName and PackageInfo.versionCode.
main.xml
AndroidAboutMe.java
Download the files.
The information of android:versionCode and android:versionName in AndroidManifest.xml can be retrieved from PackageInfo.versionName and PackageInfo.versionCode.
main.xml
<?xml version="1.0" encoding="utf-8"?>
<LinearLayout xmlns:android="http://schemas.android.com/apk/res/android"
android:orientation="vertical"
android:layout_width="fill_parent"
android:layout_height="fill_parent"
>
<TextView
android:layout_width="fill_parent"
android:layout_height="wrap_content"
android:text="@string/hello"
/>
<LinearLayout
android:orientation="vertical"
android:gravity="bottom"
android:layout_width="fill_parent"
android:layout_height="fill_parent"
>
<Button
android:id="@+id/aboutme"
android:layout_gravity="center_horizontal"
android:layout_width="wrap_content"
android:layout_height="wrap_content"
android:text="- About Me -"
/>
</LinearLayout>
</LinearLayout>
AndroidAboutMe.java
package com.exercise.AndroidAboutMe;
import android.app.Activity;
import android.app.AlertDialog;
import android.content.DialogInterface;
import android.content.pm.PackageInfo;
import android.content.pm.PackageManager.NameNotFoundException;
import android.os.Bundle;
import android.view.View;
import android.widget.Button;
public class AndroidAboutMe extends Activity {
/** Called when the activity is first created. */
@Override
public void onCreate(Bundle savedInstanceState) {
super.onCreate(savedInstanceState);
setContentView(R.layout.main);
Button buttonAboutMe = (Button)findViewById(R.id.aboutme);
buttonAboutMe.setOnClickListener(new Button.OnClickListener(){
@Override
public void onClick(View v) {
// TODO Auto-generated method stub
String strVersion;
PackageInfo packageInfo;
try {
packageInfo = getPackageManager().getPackageInfo(getPackageName(), 0);
strVersion = "Version Name: " + packageInfo.versionName +"\n"
+ "Version Code: " + String.valueOf(packageInfo.versionCode);
} catch (NameNotFoundException e) {
// TODO Auto-generated catch block
e.printStackTrace();
strVersion = "Cannot load Version!";
}
new AlertDialog.Builder(AndroidAboutMe.this)
.setTitle("About Me!").setMessage(strVersion)
.setPositiveButton("OK",
new DialogInterface.OnClickListener() {
public void onClick(DialogInterface dialog, int which) {}
}).show();
}});
}
}
Download the files.
Thursday, July 8, 2010
Load ListView in background AsyncTask
Refer to the old exercise "ListView with icon loaded from internet", it's a time-consume task to load bitmap from internet. So the code is modified in this exercise, a AsyncTask is implemented to handle the ListView: the bitmap is loaded in background thread, and setListAdapter() in onPostExecute().
row.xml
AndroidList.java
please note that in order to permit the App to access to internet, we have to grand it permission of "android.permission.INTERNET"; refer to the last exercise "Load ImageView with bitmap from internet"
Download the files.
Related:
- Async load image from internet to ListView
row.xml
<?xml version="1.0" encoding="utf-8"?>
<LinearLayout xmlns:android="http://schemas.android.com/apk/res/android"
android:layout_width="fill_parent"
android:layout_height="wrap_content"
android:orientation="horizontal">
<ImageView
android:id="@+id/icon"
android:layout_width="wrap_content"
android:layout_height="wrap_content"
android:src="@drawable/icon"/>
<TextView
android:id="@+id/weekofday"
android:layout_width="wrap_content"
android:layout_height="wrap_content"/>
</LinearLayout>
AndroidList.java
package com.exercise.AndroidList;
import java.io.IOException;
import java.io.InputStream;
import java.net.HttpURLConnection;
import java.net.URL;
import java.net.URLConnection;
import android.app.ListActivity;
import android.content.Context;
import android.graphics.Bitmap;
import android.graphics.BitmapFactory;
import android.os.AsyncTask;
import android.os.Bundle;
import android.view.LayoutInflater;
import android.view.View;
import android.view.ViewGroup;
import android.widget.ArrayAdapter;
import android.widget.ImageView;
import android.widget.ListView;
import android.widget.TextView;
import android.widget.Toast;
public class AndroidList extends ListActivity {
public class backgroundLoadListView extends
AsyncTask<Void, Void, Void> {
@Override
protected void onPostExecute(Void result) {
// TODO Auto-generated method stub
setListAdapter(new MyCustomAdapter(AndroidList.this, R.layout.row, month));
Toast.makeText(AndroidList.this,
"onPostExecute \n: setListAdapter after bitmap preloaded",
Toast.LENGTH_LONG).show();
}
@Override
protected void onPreExecute() {
// TODO Auto-generated method stub
Toast.makeText(AndroidList.this,
"onPreExecute \n: preload bitmap in AsyncTask",
Toast.LENGTH_LONG).show();
}
@Override
protected Void doInBackground(Void... params) {
// TODO Auto-generated method stub
preLoadSrcBitmap();
return null;
}
}
String image_URL=
"https://blogger.googleusercontent.com/img/b/R29vZ2xl/AVvXsEhcEgpwOmfwpIOR0xnLXhb_-_jo3xworzj_yFYAPA3WbxMMSg6aVJ65aTZ-laab3WOsgEfsi1eN8FJ-l0lmZi7s-rben-6NPl3jQJrzuykfcFfy31JScNMpKUYfA9sgxB4cf0whQOqjP4nD/s1600-r/android.png";
public class MyCustomAdapter extends ArrayAdapter<String> {
Bitmap bm;
public MyCustomAdapter(Context context, int textViewResourceId,
String[] objects) {
super(context, textViewResourceId, objects);
// TODO Auto-generated constructor stub
bm = srcBitmap;
}
@Override
public View getView(int position, View convertView, ViewGroup parent) {
// TODO Auto-generated method stub
//return super.getView(position, convertView, parent);
View row = convertView;
if(row==null){
LayoutInflater inflater=getLayoutInflater();
row=inflater.inflate(R.layout.row, parent, false);
}
TextView label=(TextView)row.findViewById(R.id.weekofday);
label.setText(month[position]);
ImageView icon=(ImageView)row.findViewById(R.id.icon);
icon.setImageBitmap(bm);
return row;
}
}
Bitmap srcBitmap;
private void preLoadSrcBitmap(){
BitmapFactory.Options bmOptions;
bmOptions = new BitmapFactory.Options();
bmOptions.inSampleSize = 1;
srcBitmap = LoadImage(image_URL, bmOptions);
}
String[] month = {
"January", "February", "March", "April",
"May", "June", "July", "August",
"September", "October", "November", "December"
};
/** Called when the activity is first created. */
@Override
public void onCreate(Bundle savedInstanceState) {
super.onCreate(savedInstanceState);
//setContentView(R.layout.main);
/*setListAdapter(new ArrayAdapter<String>(this,
R.layout.row, R.id.weekofday, DayOfWeek));*/
new backgroundLoadListView().execute();
}
@Override
protected void onListItemClick(ListView l, View v, int position, long id) {
// TODO Auto-generated method stub
//super.onListItemClick(l, v, position, id);
String selection = l.getItemAtPosition(position).toString();
Toast.makeText(this, selection, Toast.LENGTH_LONG).show();
}
private Bitmap LoadImage(String URL, BitmapFactory.Options options)
{
Bitmap bitmap = null;
InputStream in = null;
try {
in = OpenHttpConnection(URL);
bitmap = BitmapFactory.decodeStream(in, null, options);
in.close();
} catch (IOException e1) {
}
return bitmap;
}
private InputStream OpenHttpConnection(String strURL) throws IOException{
InputStream inputStream = null;
URL url = new URL(strURL);
URLConnection conn = url.openConnection();
try{
HttpURLConnection httpConn = (HttpURLConnection)conn;
httpConn.setRequestMethod("GET");
httpConn.connect();
if (httpConn.getResponseCode() == HttpURLConnection.HTTP_OK) {
inputStream = httpConn.getInputStream();
}
}
catch (Exception ex){
}
return inputStream;
}
}
please note that in order to permit the App to access to internet, we have to grand it permission of "android.permission.INTERNET"; refer to the last exercise "Load ImageView with bitmap from internet"
Download the files.
Related:
- Async load image from internet to ListView
Wednesday, July 7, 2010
Read RSS in background, using AsyncTask
Here is a further work of the previous exercise "Simple RSS Reader, with Options Menu to reload RSS", with the help of "AsyncTask: perform background operations and publish results on the UI thread". The original readRss() method is broke into three section, preReadRss(), readRss() and displayRss(). and are called inside AsyncTask's onPreExecute() , doInBackground() and onPostExecute(). Such that the time-consume task can be moved to run in background.
AndroidRssReader.java
Download the files.
AndroidRssReader.java
package com.exercise.AndroidRssReader;
import java.io.IOException;
import java.net.MalformedURLException;
import java.net.URL;
import java.util.Calendar;
import java.util.List;
import javax.xml.parsers.ParserConfigurationException;
import javax.xml.parsers.SAXParser;
import javax.xml.parsers.SAXParserFactory;
import org.xml.sax.InputSource;
import org.xml.sax.SAXException;
import org.xml.sax.XMLReader;
import android.app.ListActivity;
import android.content.Context;
import android.content.Intent;
import android.os.AsyncTask;
import android.os.Bundle;
import android.view.LayoutInflater;
import android.view.Menu;
import android.view.MenuItem;
import android.view.View;
import android.view.ViewGroup;
import android.widget.ArrayAdapter;
import android.widget.ListView;
import android.widget.TextView;
import android.widget.Toast;
public class AndroidRssReader extends ListActivity {
public class RssLoadingTask extends AsyncTask<Void, Void, Void> {
@Override
protected void onPostExecute(Void result) {
// TODO Auto-generated method stub
displayRss();
}
@Override
protected void onPreExecute() {
// TODO Auto-generated method stub
preReadRss();
}
@Override
protected void onProgressUpdate(Void... values) {
// TODO Auto-generated method stub
//super.onProgressUpdate(values);
}
@Override
protected Void doInBackground(Void... arg0) {
// TODO Auto-generated method stub
readRss();
return null;
}
}
private RSSFeed myRssFeed = null;
TextView feedTitle;
TextView feedDescribtion;
TextView feedPubdate;
TextView feedLink;
public class MyCustomAdapter extends ArrayAdapter<RSSItem> {
public MyCustomAdapter(Context context, int textViewResourceId,
List<RSSItem> list) {
super(context, textViewResourceId, list);
}
@Override
public View getView(int position, View convertView, ViewGroup parent) {
// TODO Auto-generated method stub
//return super.getView(position, convertView, parent);
View row = convertView;
if(row==null){
LayoutInflater inflater=getLayoutInflater();
row=inflater.inflate(R.layout.row, parent, false);
}
TextView listTitle=(TextView)row.findViewById(R.id.listtitle);
listTitle.setText(myRssFeed.getList().get(position).getTitle());
TextView listPubdate=(TextView)row.findViewById(R.id.listpubdate);
listPubdate.setText(myRssFeed.getList().get(position).getPubdate());
if (position%2 == 0){
listTitle.setBackgroundColor(0xff101010);
listPubdate.setBackgroundColor(0xff101010);
}
else{
listTitle.setBackgroundColor(0xff080808);
listPubdate.setBackgroundColor(0xff080808);
}
return row;
}
}
/** Called when the activity is first created. */
@Override
public void onCreate(Bundle savedInstanceState) {
super.onCreate(savedInstanceState);
setContentView(R.layout.main);
feedTitle = (TextView)findViewById(R.id.feedtitle);
feedDescribtion = (TextView)findViewById(R.id.feeddescribtion);
feedPubdate = (TextView)findViewById(R.id.feedpubdate);
feedLink = (TextView)findViewById(R.id.feedlink);
startReadRss();
}
private void startReadRss(){
new RssLoadingTask().execute();
}
private void preReadRss()
{
feedTitle.setText("--- wait ---");
feedDescribtion.setText("");
feedPubdate.setText("");
feedLink.setText("");
setListAdapter(null);
Toast.makeText(this, "Reading RSS, Please wait.", Toast.LENGTH_LONG).show();
}
private void readRss(){
try {
URL rssUrl = new URL("http://www.gov.hk/en/about/rss/govhkrss.data.xml");
SAXParserFactory mySAXParserFactory = SAXParserFactory.newInstance();
SAXParser mySAXParser = mySAXParserFactory.newSAXParser();
XMLReader myXMLReader = mySAXParser.getXMLReader();
RSSHandler myRSSHandler = new RSSHandler();
myXMLReader.setContentHandler(myRSSHandler);
InputSource myInputSource = new InputSource(rssUrl.openStream());
myXMLReader.parse(myInputSource);
myRssFeed = myRSSHandler.getFeed();
} catch (MalformedURLException e) {
// TODO Auto-generated catch block
e.printStackTrace();
} catch (ParserConfigurationException e) {
// TODO Auto-generated catch block
e.printStackTrace();
} catch (SAXException e) {
// TODO Auto-generated catch block
e.printStackTrace();
} catch (IOException e) {
// TODO Auto-generated catch block
e.printStackTrace();
}
}
private void displayRss()
{
if (myRssFeed!=null)
{
Calendar c = Calendar.getInstance();
String strCurrentTiime = "\n(Time of Reading - "
+ c.get(Calendar.HOUR_OF_DAY)
+ " : "
+ c.get(Calendar.MINUTE) + ")\n";
feedTitle.setText(myRssFeed.getTitle() + strCurrentTiime);
feedDescribtion.setText(myRssFeed.getDescription());
feedPubdate.setText(myRssFeed.getPubdate());
feedLink.setText(myRssFeed.getLink());
MyCustomAdapter adapter =
new MyCustomAdapter(this, R.layout.row, myRssFeed.getList());
setListAdapter(adapter);
}
}
@Override
protected void onListItemClick(ListView l, View v, int position, long id) {
// TODO Auto-generated method stub
Intent intent = new Intent(this,ShowDetails.class);
Bundle bundle = new Bundle();
bundle.putString("keyTitle", myRssFeed.getItem(position).getTitle());
bundle.putString("keyDescription", myRssFeed.getItem(position).getDescription());
bundle.putString("keyLink", myRssFeed.getItem(position).getLink());
bundle.putString("keyPubdate", myRssFeed.getItem(position).getPubdate());
intent.putExtras(bundle);
startActivity(intent);
}
@Override
public boolean onCreateOptionsMenu(Menu menu) {
// TODO Auto-generated method stub
menu.add(0, 0, 0, "Reload");
return true;
}
@Override
public boolean onOptionsItemSelected(MenuItem item) {
// TODO Auto-generated method stub
switch(item.getItemId()){
case (0): startReadRss();
break;
default:
break;
}
return true;
}
}
Download the files.
Tuesday, July 6, 2010
AsyncTask: perform background operations and publish results on the UI thread
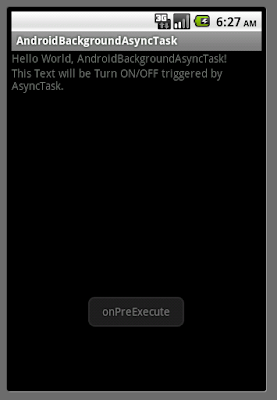
This exercise have the same effect of "Android background thread, by extending Thread" and "Android background thread, by implementing Thread object, provided with a Runnable object". It is implemented in AsyncTask instead of Thread.
AsyncTask enables proper and easy use of the UI thread. This class allows to perform background operations and publish results on the UI thread without having to manipulate threads and/or handlers.
An asynchronous task is defined by a computation that runs on a background thread and whose result is published on the UI thread. An asynchronous task is defined by 3 generic types, called Params, Progress and Result, and 4 steps, called begin, doInBackground, processProgress and end.
main.xml
AndroidBackgroundAsyncTask.java
Download the files.
Related Article: onPostExecute() of AsyncTask
AsyncTask enables proper and easy use of the UI thread. This class allows to perform background operations and publish results on the UI thread without having to manipulate threads and/or handlers.
An asynchronous task is defined by a computation that runs on a background thread and whose result is published on the UI thread. An asynchronous task is defined by 3 generic types, called Params, Progress and Result, and 4 steps, called begin, doInBackground, processProgress and end.
main.xml
<?xml version="1.0" encoding="utf-8"?>
<LinearLayout xmlns:android="http://schemas.android.com/apk/res/android"
android:orientation="vertical"
android:layout_width="fill_parent"
android:layout_height="fill_parent"
>
<TextView
android:layout_width="fill_parent"
android:layout_height="wrap_content"
android:text="@string/hello"
/>
<TextView
android:id="@+id/mytext"
android:layout_width="fill_parent"
android:layout_height="wrap_content"
android:text="This Text will be Turn ON/OFF triggered by AsyncTask."
/>
</LinearLayout>
AndroidBackgroundAsyncTask.java
package com.exercise.AndroidBackgroundAsyncTask;
import android.app.Activity;
import android.os.AsyncTask;
import android.os.Bundle;
import android.os.SystemClock;
import android.view.View;
import android.widget.TextView;
import android.widget.Toast;
public class AndroidBackgroundAsyncTask extends Activity {
TextView myText;
public class BackgroundAsyncTask extends
AsyncTask<Void, Boolean, Void> {
boolean myTextOn;
@Override
protected Void doInBackground(Void... params) {
// TODO Auto-generated method stub
while(true)
{
myTextOn = !myTextOn;
publishProgress(myTextOn);
SystemClock.sleep(1000);
}
//return null;
}
@Override
protected void onPostExecute(Void result) {
// TODO Auto-generated method stub
//it will never been shown in this exercise...
Toast.makeText(AndroidBackgroundAsyncTask.this,
"onPostExecute", Toast.LENGTH_LONG).show();
}
@Override
protected void onPreExecute() {
// TODO Auto-generated method stub
myTextOn = true;
Toast.makeText(AndroidBackgroundAsyncTask.this,
"onPreExecute", Toast.LENGTH_LONG).show();
}
@Override
protected void onProgressUpdate(Boolean... values) {
// TODO Auto-generated method stub
if (values[0]){
myText.setVisibility(View.GONE);
}
else{
myText.setVisibility(View.VISIBLE);
}
}
}
/** Called when the activity is first created. */
@Override
public void onCreate(Bundle savedInstanceState) {
super.onCreate(savedInstanceState);
setContentView(R.layout.main);
myText = (TextView)findViewById(R.id.mytext);
new BackgroundAsyncTask().execute();
}
}
Download the files.
Related Article: onPostExecute() of AsyncTask
Monday, July 5, 2010
Linkify
Linkify take a piece of text and a regular expression and turns all of the regex matches in the text into clickable links. This is particularly useful for matching things like email addresses, web urls, etc. and making them actionable. Alone with the pattern that is to be matched, a url scheme prefix is also required. Any pattern match that does not begin with the supplied scheme will have the scheme prepended to the matched text when the clickable url is created.
main.xml
AndroidLinkify.java
Download the files.
main.xml
<?xml version="1.0" encoding="utf-8"?>
<LinearLayout xmlns:android="http://schemas.android.com/apk/res/android"
android:orientation="vertical"
android:layout_width="fill_parent"
android:layout_height="fill_parent"
>
<TextView
android:layout_width="fill_parent"
android:layout_height="wrap_content"
android:text="@string/hello"
/>
<EditText
android:id="@+id/editfield"
android:layout_width="fill_parent"
android:layout_height="wrap_content"
/>
</LinearLayout>
AndroidLinkify.java
package com.exercise.AndroidLinkify;
import android.app.Activity;
import android.os.Bundle;
import android.text.util.Linkify;
import android.view.KeyEvent;
import android.view.View;
import android.widget.EditText;
public class AndroidLinkify extends Activity {
/** Called when the activity is first created. */
@Override
public void onCreate(Bundle savedInstanceState) {
super.onCreate(savedInstanceState);
setContentView(R.layout.main);
final EditText editField = (EditText)findViewById(R.id.editfield);
editField.setOnKeyListener(new EditText.OnKeyListener(){
@Override
public boolean onKey(View v, int keyCode, KeyEvent event) {
// TODO Auto-generated method stub
Linkify.addLinks(editField,
Linkify.EMAIL_ADDRESSES|
Linkify.MAP_ADDRESSES|
Linkify.PHONE_NUMBERS|
Linkify.WEB_URLS);
return false;
}});
}
}
Download the files.