For other cases in which you want to further customize your UI to differentiate between sizes such as 7” and 10” tablets, you can define additional smallest width layouts:
- res/layout/main_activity.xml:
# For handsets (smaller than 600dp available width) - res/layout-sw600dp/main_activity.xml:
# For 7” tablets (600dp wide and bigger) - res/layout-sw720dp/main_activity.xml:
# For 10” tablets (720dp wide and bigger)
Exercise:
Create a new Android Application Project with Minimum Required SDK of API 13: Android 3.2 (Honeycomb).
Modify /res/layout/activity_main.xml for normal device.
<LinearLayout xmlns:android="http://schemas.android.com/apk/res/android"
    xmlns:tools="http://schemas.android.com/tools"
    android:layout_width="match_parent"
    android:layout_height="match_parent"
    android:paddingBottom="@dimen/activity_vertical_margin"
    android:paddingLeft="@dimen/activity_horizontal_margin"
    android:paddingRight="@dimen/activity_horizontal_margin"
    android:paddingTop="@dimen/activity_vertical_margin"
    android:orientation="vertical"
    tools:context=".MainActivity" >

    <TextView
        android:layout_width="wrap_content"
        android:layout_height="wrap_content"
        android:text="Normal" />

</LinearLayout>
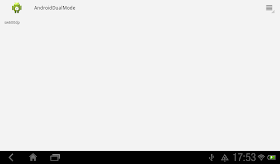
Create /res/layout-sw600dp/activity_main.xml to define layout for tablet.
<LinearLayout xmlns:android="http://schemas.android.com/apk/res/android"
    xmlns:tools="http://schemas.android.com/tools"
    android:layout_width="match_parent"
    android:layout_height="match_parent"
    android:paddingBottom="@dimen/activity_vertical_margin"
    android:paddingLeft="@dimen/activity_horizontal_margin"
    android:paddingRight="@dimen/activity_horizontal_margin"
    android:paddingTop="@dimen/activity_vertical_margin"
    android:orientation="vertical"
    tools:context=".MainActivity" >

    <TextView
        android:layout_width="wrap_content"
        android:layout_height="wrap_content"
        android:text="sw600dp" />

</LinearLayout>
More: Step-by-step to create dual mode app, single-pane for phone/dual-pane for tablet.
- Handle different layout for phone and tablet, load fragment in Java code vs XML
- Handle onListItemClick() of ListFragment, to pass data between fragment
- Allow navigate BACK through FragmentTransaction, by calling addToBackStack()
- Display UP icon on action bar and implement BACK navigation in Fragment Transaction
- implements OnBackStackChangedListener to display UP icon, automatically by getBackStackEntryCount()
- Implement animation in FragmentTransaction
Related:
- Replace Fragment dynamically


This is the best tutorial that I ever seen ! Excellent work ! thank you ...you made my day ! what a genius ...
ReplyDeletethanks again