Thursday, December 29, 2011

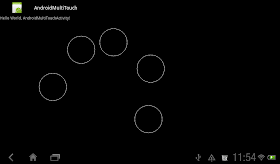
Detect multi-touch (for 10 pointers)

It's a example to detect multi-touch on screen. Logically it can detect 10 pointers.

Detect multi-touch

Implement the custom view to detect multi-touch, by overriding onTouchEvent().
package com.exercise.AndroidMultiTouch;

import android.content.Context;
import android.graphics.Canvas;
import android.graphics.Color;
import android.graphics.Paint;
import android.util.AttributeSet;
import android.view.MotionEvent;
import android.view.View;

public class MultiToucnView extends View {

private Paint paint = new Paint(Paint.ANTI_ALIAS_FLAG);

final int MAX_NUMBER_OF_POINT = 10;
float[] x = new float[MAX_NUMBER_OF_POINT];
float[] y = new float[MAX_NUMBER_OF_POINT];
boolean[] touching = new boolean[MAX_NUMBER_OF_POINT];

public MultiToucnView(Context context, AttributeSet attrs, int defStyle) {
super(context, attrs, defStyle);
init();
}

public MultiToucnView(Context context, AttributeSet attrs) {
super(context, attrs);
init();
}

public MultiToucnView(Context context) {
super(context);
init();
}

void init() {
paint.setStyle(Paint.Style.STROKE);
paint.setStrokeWidth(1);
paint.setColor(Color.WHITE);
}

@Override
protected void onDraw(Canvas canvas) {

for(int i = 0; i < MAX_NUMBER_OF_POINT; i++){
if(touching[i]){
canvas.drawCircle(x[i], y[i], 50f, paint);
}
}
}

@Override
protected void onMeasure(int widthMeasureSpec, int heightMeasureSpec) {
// TODO Auto-generated method stub
setMeasuredDimension(MeasureSpec.getSize(widthMeasureSpec),
MeasureSpec.getSize(heightMeasureSpec));
}

@Override
public boolean onTouchEvent(MotionEvent event) {
int action = (event.getAction() & MotionEvent.ACTION_MASK);
int pointCount = event.getPointerCount();

for (int i = 0; i < pointCount; i++) {
int id = event.getPointerId(i);

//Ignore pointer higher than our max.
if(id < MAX_NUMBER_OF_POINT){
x[id] = (int)event.getX(i);
y[id] = (int)event.getY(i);

if((action == MotionEvent.ACTION_DOWN)
||(action == MotionEvent.ACTION_POINTER_DOWN)
||(action == MotionEvent.ACTION_MOVE)){
touching[id] = true;
}else{
touching[id] = false;
}
}
}

invalidate();
return true;

}

}


Modify main.xml to include the custom view, com.exercise.AndroidMultiTouch.MultiToucnView.
<?xml version="1.0" encoding="utf-8"?>
<LinearLayout xmlns:android="http://schemas.android.com/apk/res/android"
android:layout_width="fill_parent"
android:layout_height="fill_parent"
android:orientation="vertical" >

<TextView
android:layout_width="fill_parent"
android:layout_height="wrap_content"
android:text="@string/hello" />
<com.exercise.AndroidMultiTouch.MultiToucnView
android:layout_width="fill_parent"
android:layout_height="fill_parent" />
</LinearLayout>

Download the files.


How to Compile Android from Source Code


Ever wonder how developers on XDA take the source code released to the AOSP and create ROMs? While creating software for your phone isn't as easy as this (you also need lots of drivers), the process for compiling Android isn't that difficult. In this video, Shen tells you about the process.

For the full steps, check out this link: http://bit.ly/sClp20

Tuesday, December 27, 2011

Backward compatibility using Android Support Package

Refer to the last exercise "Honeycomb's tab look of DatePicker", the app is created target API level 11. It can run on device with Android 3.0 or above only. If you want to make it run on early version, you can using Android Compatibility package (or named Android Support Package).

- Refer to the former article to Install and setup Compatibility Package.

- Modify AndroidManifest.xml to add minSdkVersion and targetSdkVersion.
<?xml version="1.0" encoding="utf-8"?>
<manifest xmlns:android="http://schemas.android.com/apk/res/android"
package="com.exercise.AndroidDatePicker"
android:versionCode="1"
android:versionName="1.0" >

<uses-sdk android:minSdkVersion="7" android:targetSdkVersion="11"/>

<application
android:icon="@drawable/ic_launcher"
android:label="@string/app_name" >
<activity
android:name=".AndroidDatePickerActivity"
android:label="@string/app_name" >
<intent-filter>
<action android:name="android.intent.action.MAIN" />

<category android:name="android.intent.category.LAUNCHER" />
</intent-filter>
</activity>
</application>

</manifest>


- Modify the main activity AndroidDatePickerActivity, to extends FragmentActivity. And import android.support.v4.app.FragmentActivity.
package com.exercise.AndroidDatePicker;

import android.os.Bundle;
import android.support.v4.app.FragmentActivity;

public class AndroidDatePickerActivity extends FragmentActivity {
/** Called when the activity is first created. */
@Override
public void onCreate(Bundle savedInstanceState) {
super.onCreate(savedInstanceState);
setContentView(R.layout.main);
}
}


- Keep no change on layout, main.xml
<?xml version="1.0" encoding="utf-8"?>
<LinearLayout xmlns:android="http://schemas.android.com/apk/res/android"
android:layout_width="fill_parent"
android:layout_height="fill_parent"
android:orientation="vertical" >

<TextView
android:layout_width="fill_parent"
android:layout_height="wrap_content"
android:text="@string/hello" />
<DatePicker
android:layout_width="fill_parent"
android:layout_height="fill_parent"/>
</LinearLayout>


- Now the app can run on device running Android 2.1 or above.

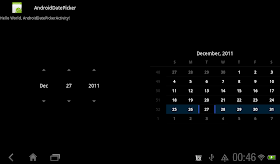
* Run on HTC Flyer running Android 3.2.1
Run on HTC Flyer running Android 3.2.1

* Run on Nexus One running Android 2.3.6
Run on Nexus One running Android 2.3.6

remark:
If you build the DatePicker exercise, target Android 2.2, API level 8. The app can run on both Android 2.3.6 and 3.2.1, and have traditional look.

* The app target API level8, run on HTC Flyer with Android 3.2.1
The app target API level8, run on HTC Flyer with Android 3.2.1

* The app target API level8, run on Nexus One with Android 2.3.6
The app target API level8, run on Nexus One with Android 2.3.6

Monday, December 26, 2011

Honeycomb's tab look of DatePicker

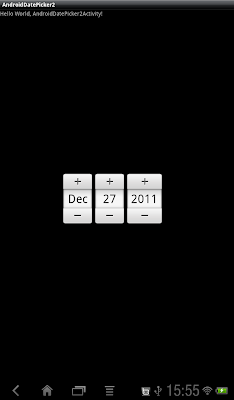
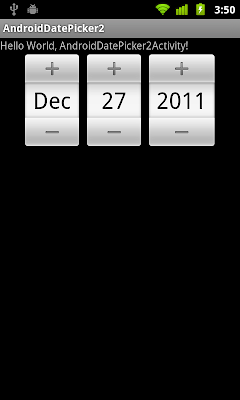
Honeycomb's tap look of DatePicker

Create a new Android Project target Android 3.0. Modify main.xml to add a DatePicker:
<?xml version="1.0" encoding="utf-8"?>
<LinearLayout xmlns:android="http://schemas.android.com/apk/res/android"
android:layout_width="fill_parent"
android:layout_height="fill_parent"
android:orientation="vertical" >

<TextView
android:layout_width="fill_parent"
android:layout_height="wrap_content"
android:text="@string/hello" />
<DatePicker
android:layout_width="fill_parent"
android:layout_height="fill_parent"/>
</LinearLayout>


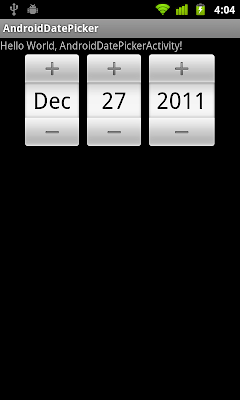
- Compare with traditional look of DatePicker on Phone.

Next:
- Backward compatibility using Android Support Package


Sunday, December 25, 2011

Targeting Android with Qt - video from Qt Developer Days 2011

In the last two years, Android has become one of the most popular smartphone platforms in the world. In the same time, Qt has developed an elegant and mature solution for creating mobile apps with Qt Quick. Necessitas is a community project that adds Android support to the Qt SDK. This talk will explain how you can deploy your Qt app to the Android Market using Necessitas.
Targeting Android with Qt - video from Qt Developer Days 2011

View the video: Targeting Android with Qt


Saturday, December 24, 2011

New standard of C Programming language published officially

The new C Programming language (informally known as C11, or C1x), ISO/IEC 9899:2011, officially published by ISO at 2011-12-08.

ISO/IEC 9899:2011 specifies the form and establishes the interpretation of programs written in the C programming language.It specifies

  • the representation of C programs;
  • the syntax and constraints of the C language;
  • the semantic rules for interpreting C programs;
  • the representation of input data to be processed by C programs;
  • the representation of output data produced by C programs;
  • the restrictions and limits imposed by a conforming implementation of C.

ISO/IEC 9899:2011 does not specify

  • the mechanism by which C programs are transformed for use by a data-processing system;
  • the mechanism by which C programs are invoked for use by a data-processing system;
  • the mechanism by which input data are transformed for use by a C program;
  • the mechanism by which output data are transformed after being produced by a C program;
  • the size or complexity of a program and its data that will exceed the capacity of any specific data-processing system or the capacity of a particular processor;
  • all minimal requirements of a data-processing system that is capable of supporting a conforming implementation.

ISO/IEC 9899:2011 is designed to promote the portability of C programs among a variety of data-processing systems. It is intended for use by implementers and programmers.


Reference: ISO/IEC 9899:2011

Thursday, December 22, 2011

Google Gives Back 2011

At Google, philanthropy is a core value. This year Google gave more than $100 million to various organizations around the world -- including $40 million in grants that celebrate the giving season by supporting four causes that is considered particularly important: science, technology, engineering and math (STEM) education; girls' education; empowerment through technology; and fighting human trafficking and modern-day slavery.

Google invite you to celebrate the giving season along with us by learning about these organizations, the great work they're doing, and how you can support them.

know more: http://www.google.com/intl/en/landing/givesback/2011/


Wednesday, December 21, 2011

Setup HTC Flyer for Android Development, on Ubuntu 11.10

You can develop and debug on real Android device (HTC Fly in this case) just as you would on the emulator. Before you can start, there are just a few things to do. Refer to Android document Using Hardware Devices. I will not repeat here. I describe how to add the file /etc/udev/rules.d/51-android.rules on Ubuntu 11.10 only.

- Start Terminal

- Switch to /etc/udev/rules.d/ directory
$cd /etc/udev/rules.d/

- In Ubuntu, create/open 51-android.rules as su.
$sudo gedit 51-android.rules

- Add the text in the file (for HTC), and save it:
SUBSYSTEM=="usb", ATTR{idVendor}=="0bb4", MODE="0666", GROUP="plugdev"

for other vendor ID, refer to USB Vendor IDs in the document Using Hardware Devices.

- execute :
$chmod a+r /etc/udev/rules.d/51-android.rules

- Finally, check if your device connected; run the command from your SDK platform-tools/ directory:
$./adb devices

Two devices connected.

Monday, December 19, 2011

HTML5 test - How well does your browser support HTML5?


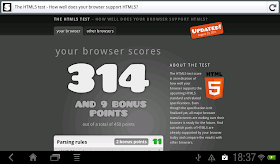
The HTML5 test score is an indication of how well your browser supports the upcoming HTML5 standard and related specifications. Even though the specification isn't finalized yet, all major browser manufacturers are making sure their browser is ready for the future. Find out which parts of HTML5 are already supported by your browser today and compare the results with other browsers.

Visit http://html5test.com/ to test your browser.

  • Tested on Build-in Browser at Nexus One running Android 2.3.6
    Tested on Build-in Browser at Nexus One running Android 2.3.6

  • Tested on Firefox 8.0 at Nexus One running Android 2.3.6
    Tested on Firefox 8.0 at Nexus One running Android 2.3.6

  • Tested on Opera Mobile 11.5.3 at Nexus One running Android 2.3.6
    Tested on Opera Mobile 11.5.3 at Nexus One running Android 2.3.6

  • Tested on Build-in Browser at HTC Flyer running Android 3.2.1
    Tested on Build-in Browser at HTC Flyer running Android 3.2.1

  • Tested on Firefox 8.0 at HTC Flyer running Android 3.2.1
    Tested on Firefox 8.0 at HTC Flyer running Android 3.2.1

  • Tested on Opera Mobile 11.5.3 at HTC Flyer running Android 3.2.1
    Tested on Opera Mobile 11.5.3 at HTC Flyer running Android 3.2.1

Sunday, December 18, 2011

Example of using Compatibility Package, implement Fragment on pre-Android 3.0 devices

In this exercise, we will modify from the article "Programmatically add fragment", using Compatibility Package. To make it run on both Android 3.0 device and older version device.

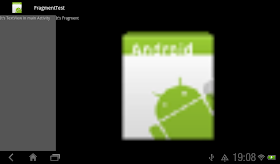
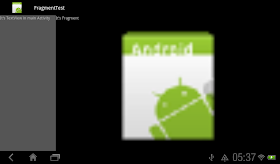
on Nexus One running Android 2.3.6:
Fragment on Nexus One running Android 2.3.6

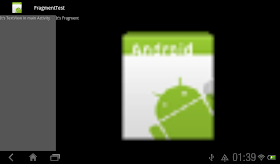
on HTC Flyer running Android 3.2.1:
Fragment on HTC Flyer running Android 3.2.1

- Create a new project with minSdkVersion="7" nd targetSdkVersion="11".
AndroidManifest.xml:
<?xml version="1.0" encoding="utf-8"?>
<manifest xmlns:android="http://schemas.android.com/apk/res/android"
 package="com.exercise.FragmentTest"
 android:versionCode="1"
 android:versionName="1.0" >

 <uses-sdk android:minSdkVersion="7" android:targetSdkVersion="11"/>

 <application
     android:icon="@drawable/ic_launcher"
     android:label="@string/app_name" >
     <activity
         android:name=".FragmentTestActivity"
         android:label="@string/app_name" >
         <intent-filter>
             <action android:name="android.intent.action.MAIN" />

             <category android:name="android.intent.category.LAUNCHER" />
         </intent-filter>
     </activity>
 </application>

</manifest>


- Follow the last article to "Install and setup Compatibility Package" on your project.

- Create /res/layout/fragmentlayout.xml to define the layout of our fragment.
<?xml version="1.0" encoding="utf-8"?>
<LinearLayout xmlns:android="http://schemas.android.com/apk/res/android"
android:layout_width="fill_parent"
android:layout_height="fill_parent"
android:orientation="vertical" >
<TextView
    android:layout_width="fill_parent"
    android:layout_height="wrap_content"
    android:text="It's Fragment" />
<ImageView
    android:layout_width="fill_parent"
    android:layout_height="fill_parent"
    android:src="@drawable/ic_launcher"/>
</LinearLayout>


- Implement our Fragment class MyFragment.java extends Fragment.
package com.exercise.FragmentTest;

import android.os.Bundle;
import android.support.v4.app.Fragment;
import android.view.LayoutInflater;
import android.view.View;
import android.view.ViewGroup;

public class MyFragment extends Fragment {

@Override
public View onCreateView(LayoutInflater inflater, ViewGroup container,
  Bundle savedInstanceState) {
 // TODO Auto-generated method stub
 View myFragmentView = inflater.inflate(R.layout.fragmentlayout, container, false);
 return myFragmentView;
}

}


- Modify main.xml to add a FrameLayout, it will be added with our fragment.
<?xml version="1.0" encoding="utf-8"?>
<LinearLayout xmlns:android="http://schemas.android.com/apk/res/android"
android:layout_width="fill_parent"
android:layout_height="fill_parent"
android:orientation="horizontal" >

<TextView
    android:layout_width="0px"
    android:layout_weight="1"
    android:layout_height="match_parent"
    android:text="It's TextView in main Activity"
    android:background="#555555"/>
<FrameLayout
    android:id="@+id/myfragment"
    android:layout_width="0px"
    android:layout_weight="4"
    android:layout_height="match_parent">
</FrameLayout>

</LinearLayout>


- Modify main activity, FragmentTestActivity extends FragmentActivity, to add our fragment in the FrameLayout.
package com.exercise.FragmentTest;

import android.os.Bundle;
import android.support.v4.app.FragmentActivity;
import android.support.v4.app.FragmentTransaction;

public class FragmentTestActivity extends FragmentActivity {
 /** Called when the activity is first created. */
 @Override
 public void onCreate(Bundle savedInstanceState) {
     super.onCreate(savedInstanceState);
     setContentView(R.layout.main);
  
     // get an instance of FragmentTransaction from your Activity
     FragmentTransaction fragmentTransaction = getSupportFragmentManager().beginTransaction();

     //add a fragment
     MyFragment myFragment = new MyFragment();
     fragmentTransaction.add(R.id.myfragment, myFragment);
     fragmentTransaction.commit();
 }
}


*** Please take a notice on the import statements.

in FragmentTestActivity.java:
import android.support.v4.app.FragmentActivity;
import android.support.v4.app.FragmentTransaction;

in MyFragment.java
import android.support.v4.app.Fragment;

They are imported from android.support.v4.app, not android.app. Otherwise, your app can run on Android 3.0 or above, but fail in pre-3.0 device.

Download the files.

Install and setup Compatibility Package


Update@2012-06-22

It seem no longer work!

Refer to another post: to know how to add Android Support Package.


Compatibility Package is a static library that exposes the same Fragments API from Android 3.0, so that applications compatible with Android 1.6 or later can use fragments to create tablet-compatible user interfaces.

Before you can apply Compatibility Package on your project, you have to prepare something first:

- First of all, make sure you have installed Compatibility Package:
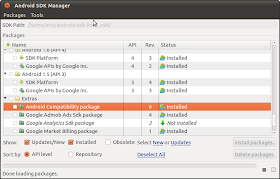
In Eclipse, click Window -> Android SDK Manager, scroll down to Extras, install Android Compatibility package.
install Android Compatibility package

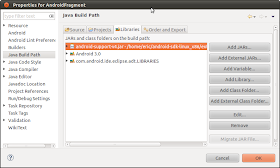
- Include Compatibility Package in your Build Path:
Right click on your project in Package Explorer, -> Properties.
Select Java Build Path tab on the left.
Click Add External JARS button on the right.
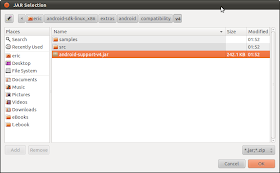
Browse to select your instaled android-support-v4.jar, and click OK.
Add android-support-v4.jar

Now you should have android-support-v4.jar in your Java Build Path, click OK.
Java Build Path


updated@2011-12-27:

It's called Android Support Package now, in /android-sdks/extras/android/support/v4/android-support-v4.jar
Android Support Package


next:
- Example of using Compatibility Package, implement Fragment on pre-Android 3.0 devices

Friday, December 16, 2011

Android 4.0.3 released and SDK tools updated


Android 4.0.3, an incremental release of the Android 4.0 (Ice Cream Sandwich) platform, announced. The new release includes a variety of optimizations and bug fixes for phones and tablets, as well as a small number of new APIs for developers. The new API level is 15.

For a complete overview of what’s new in the platform, see the Android 4.0.3 API Overview.

Android 4.0.3 will be the base version of Ice Cream Sandwich. The new platform will be rolling out to production phones and tablets in the weeks ahead.

Also updated include new version of the SDK Tools (r16), Eclipse plug-in (ADT 16.0.1) and NDK r7.

Visit the Android Developers site for more information about Android 4.0.3 and other platform versions. To get started developing or testing on the new platform, you can download it into your SDK using the Android SDK Manager.

Android Training announced :)


Google just announced the beta launch of Android Training — a collection of classes that will help Android Developer to build better Android apps.

These classes are designed to demonstrate best practices for solving common Android development problems. Each class explains the steps required to solve a problem, or implement a feature, with plenty of code snippets and sample code for you to use within your own apps.

Source: Android Developers Blog - Introducing Android Training

Thursday, December 15, 2011

Access View inside Fragment from Activity

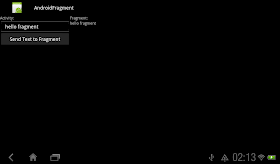
In this exercise, TextView inside Fragment can be accessed from Activity.

Access View inside Fragment from Activity

Main Layout:
<?xml version="1.0" encoding="utf-8"?>
<LinearLayout xmlns:android="http://schemas.android.com/apk/res/android"
android:layout_width="fill_parent"
android:layout_height="fill_parent"
android:orientation="horizontal" >

<LinearLayout
android:layout_width="0px"
android:layout_weight="1"
android:layout_height="match_parent"
android:orientation="vertical" >
<TextView
android:layout_width="match_parent"
android:layout_height="wrap_content"
android:text="Activity:" />
<EditText
android:id="@+id/activitytext"
android:layout_width="match_parent"
android:layout_height="wrap_content" />
<Button
android:id="@+id/sendtofragment"
android:layout_width="match_parent"
android:layout_height="wrap_content"
android:text="Send Text to Fragment" />
</LinearLayout>
<LinearLayout
android:id="@+id/myfragment"
android:layout_width="0px"
android:layout_weight="3"
android:layout_height="match_parent" />

</LinearLayout>

Main Activity:
package com.exercise.AndroidFragment;

import android.app.Activity;
import android.app.FragmentManager;
import android.app.FragmentTransaction;
import android.os.Bundle;
import android.view.View;
import android.view.View.OnClickListener;
import android.widget.Button;
import android.widget.EditText;
import android.widget.TextView;

public class AndroidFragmentActivity extends Activity {

EditText textActivity;
Button buttonSendToFragment;
MyFragment myFragment;

/** Called when the activity is first created. */
@Override
public void onCreate(Bundle savedInstanceState) {
super.onCreate(savedInstanceState);
setContentView(R.layout.main);

textActivity = (EditText)findViewById(R.id.activitytext);
buttonSendToFragment = (Button)findViewById(R.id.sendtofragment);

// get an instance of FragmentTransaction from your Activity
FragmentManager fragmentManager = getFragmentManager();
FragmentTransaction fragmentTransaction = fragmentManager.beginTransaction();

//add a fragment
myFragment = new MyFragment();
fragmentTransaction.add(R.id.myfragment, myFragment);
fragmentTransaction.commit();

buttonSendToFragment.setOnClickListener(new OnClickListener(){

@Override
public void onClick(View arg0) {
// TODO Auto-generated method stub
String text = textActivity.getText().toString();
TextView textFragment = (TextView)findViewById(R.id.fragmenttext);
textFragment.setText(text);
}});
}
}


Fragment Layout:
<?xml version="1.0" encoding="utf-8"?>
<LinearLayout xmlns:android="http://schemas.android.com/apk/res/android"
android:layout_width="fill_parent"
android:layout_height="fill_parent"
android:orientation="vertical" >
<TextView
android:layout_width="match_parent"
android:layout_height="wrap_content"
android:text="Fragment:" />
<TextView
android:id="@+id/fragmenttext"
android:layout_width="match_parent"
android:layout_height="wrap_content" />
</LinearLayout>


Fragment:
package com.exercise.AndroidFragment;

import android.app.Fragment;
import android.os.Bundle;
import android.view.LayoutInflater;
import android.view.View;
import android.view.ViewGroup;

public class MyFragment extends Fragment {

@Override
public View onCreateView(LayoutInflater inflater, ViewGroup container,
Bundle savedInstanceState) {
// TODO Auto-generated method stub
View myFragmentView = inflater.inflate(R.layout.fragmentlayout, container, false);
return myFragmentView;
}

}


Download the files.


Introducing Android Development with Ice Cream Sandwich


The Android platform continues to aggressively grow in market share against competing mobile platforms, such as Apple iOS and BlackBerry. Android's latest major platform update, Android 4.0, frequently called by its code-name, Ice Cream Sandwich or just ICS merges the smartphone-centric Android 2.3.x (Gingerbread) and the tablet-centric Android 3.x (Honeycomb) platform editions into a single SDK for all smart-devices, be they phones, tablets, televisions, or toasters.

This short e-book provides an overview from the authors on the importance of Ice Cream Sandwich as well as key preview content from the upcoming book, "Android Wireless Application Development, Third Edition, Volume I." This preview content provides some essential references, updated for Android SDK 4.0, for those interested in jumping into Android application development at this exciting time. To use this e-book most effectively, you need to download the Android development SDK and tools, install them on your development machine, and configure them using the development environment of your choice. You can find instructions for installing and configuring your computer for Android software development on the Android Developer website at http://d.android.com/sdk/.


Wednesday, December 14, 2011

Lifecycle of Fragment: onCreate(), onCreateView() and onPause().

A fragment can be thinked as a modular section of an activity, which has its own lifecycle, receives its own input events, and which you can add or remove while the activity is running (sort of like a "sub activity" that you can reuse in different activities).

A fragment must always be embedded in an activity and the fragment's lifecycle is directly affected by the host activity's lifecycle. For example, when the activity is paused, so are all fragments in it, and when the activity is destroyed, so are all fragments. However, while an activity is running (it is in the resumed lifecycle state), you can manipulate each fragment independently, such as add or remove them.

Usually, you should implement at least the following lifecycle methods:
  • onCreate()
    The system calls this when creating the fragment. Within your implementation, you should initialize essential components of the fragment that you want to retain when the fragment is paused or stopped, then resumed.
  • onCreateView()
    The system calls this when it's time for the fragment to draw its user interface for the first time. To draw a UI for your fragment, you must return a View from this method that is the root of your fragment's layout. You can return null if the fragment does not provide a UI.
  • onPause()
    The system calls this method as the first indication that the user is leaving the fragment (though it does not always mean the fragment is being destroyed). This is usually where you should commit any changes that should be persisted beyond the current user session (because the user might not come back).


Lifecycle of Fragment

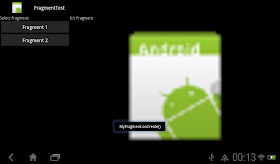
Here, modify from the last exercise "Dynamic change fragment using Java code"; implement(modify) onCreate(), onCreateView() and onPause() methods of MyFragment.java and MyFragment2.java, display a Toast to check the lifecycle of fragment.

MyFragment.java
package com.exercise.FragmentTest;

import android.app.Fragment;
import android.os.Bundle;
import android.view.LayoutInflater;
import android.view.View;
import android.view.ViewGroup;
import android.widget.Toast;

public class MyFragment extends Fragment {

@Override
public View onCreateView(LayoutInflater inflater, ViewGroup container,
Bundle savedInstanceState) {
// TODO Auto-generated method stub
View myFragmentView = inflater.inflate(R.layout.fragmentlayout, container, false);

Toast.makeText(getActivity(),
"MyFragment.onCreateView()",
Toast.LENGTH_LONG).show();

return myFragmentView;
}

@Override
public void onCreate(Bundle savedInstanceState) {
// TODO Auto-generated method stub
super.onCreate(savedInstanceState);

Toast.makeText(getActivity(),
"MyFragment.onCreate()",
Toast.LENGTH_LONG).show();
}

@Override
public void onPause() {
// TODO Auto-generated method stub
super.onPause();

Toast.makeText(getActivity(),
"MyFragment.onPause()",
Toast.LENGTH_LONG).show();
}

}


MyFragment2.java
package com.exercise.FragmentTest;

import android.app.Fragment;
import android.os.Bundle;
import android.view.LayoutInflater;
import android.view.View;
import android.view.ViewGroup;
import android.widget.Toast;

public class MyFragment2 extends Fragment {

@Override
public View onCreateView(LayoutInflater inflater, ViewGroup container,
Bundle savedInstanceState) {
// TODO Auto-generated method stub
View myFragmentView = inflater.inflate(R.layout.fragmentlayout2, container, false);

Toast.makeText(getActivity(),
"MyFragment2.onCreateView()",
Toast.LENGTH_LONG).show();

return myFragmentView;
}

@Override
public void onCreate(Bundle savedInstanceState) {
// TODO Auto-generated method stub
super.onCreate(savedInstanceState);

Toast.makeText(getActivity(),
"MyFragment2.onCreate()",
Toast.LENGTH_LONG).show();
}

@Override
public void onPause() {
// TODO Auto-generated method stub
super.onPause();

Toast.makeText(getActivity(),
"MyFragment2.onPause()",
Toast.LENGTH_LONG).show();
}

}


Download the files.

Monday, December 12, 2011

Dynamic change fragment using Java code

Last exercise show how to "Programmatically add fragment". Such that we can change fragment in run-time using using Java code.

Dynamic change fragment using Java code

Modify from the last exercise, keep MyFragment.java and fragmentlayout.xml no change.

Create a new /res/layout/fragmentlayout2.xml to define our second fragment.
<?xml version="1.0" encoding="utf-8"?>
<LinearLayout xmlns:android="http://schemas.android.com/apk/res/android"
android:layout_width="fill_parent"
android:layout_height="fill_parent"
android:orientation="vertical" >
<TextView
android:layout_width="match_parent"
android:layout_height="wrap_content"
android:text="It's Fragment 2" />
<ImageView
android:layout_width="match_parent"
android:layout_height="match_parent"
android:scaleType="center"
android:src="@drawable/ic_launcher"/>
</LinearLayout>


Create MyFragment2.java to implement our second fragment class.
package com.exercise.FragmentTest;

import android.app.Fragment;
import android.os.Bundle;
import android.view.LayoutInflater;
import android.view.View;
import android.view.ViewGroup;

public class MyFragment2 extends Fragment {

@Override
public View onCreateView(LayoutInflater inflater, ViewGroup container,
Bundle savedInstanceState) {
// TODO Auto-generated method stub
View myFragmentView = inflater.inflate(R.layout.fragmentlayout2, container, false);

return myFragmentView;
}

}


Modify main.xml, to add buttons to change fragment.
<?xml version="1.0" encoding="utf-8"?>
<LinearLayout xmlns:android="http://schemas.android.com/apk/res/android"
android:layout_width="fill_parent"
android:layout_height="fill_parent"
android:orientation="horizontal" >

<LinearLayout
android:layout_width="0px"
android:layout_weight="1"
android:layout_height="match_parent"
android:orientation="vertical" >
<TextView
android:layout_width="match_parent"
android:layout_height="wrap_content"
android:text="Select Fragment:" />
<Button
android:id="@+id/displayfragment1"
android:layout_width="match_parent"
android:layout_height="wrap_content"
android:text="Fragment 1" />
<Button
android:id="@+id/displayfragment2"
android:layout_width="match_parent"
android:layout_height="wrap_content"
android:text="Fragment 2" />
</LinearLayout>
<LinearLayout
android:id="@+id/myfragment"
android:layout_width="0px"
android:layout_weight="3"
android:layout_height="match_parent" />

</LinearLayout>


Modify main activity FragmentTestActivity.java to switch between fragments when button click. You should try to switch between fragments and the BACK key, to see how the fragment transaction work.
package com.exercise.FragmentTest;

import android.app.Activity;
import android.app.Fragment;
import android.app.FragmentManager;
import android.app.FragmentTransaction;
import android.os.Bundle;
import android.view.View;
import android.widget.Button;

public class FragmentTestActivity extends Activity{

Fragment fragment;
Button btnFragment1, btnFragment2;

/** Called when the activity is first created. */
@Override
public void onCreate(Bundle savedInstanceState) {
super.onCreate(savedInstanceState);
setContentView(R.layout.main);
btnFragment1 = (Button)findViewById(R.id.displayfragment1);
btnFragment2 = (Button)findViewById(R.id.displayfragment2);

// get an instance of FragmentTransaction from your Activity
FragmentManager fragmentManager = getFragmentManager();
FragmentTransaction fragmentTransaction = fragmentManager.beginTransaction();

//add a fragment
MyFragment myFragment = new MyFragment();
fragmentTransaction.add(R.id.myfragment, myFragment);
fragmentTransaction.commit();

btnFragment1.setOnClickListener(btnFragmentOnClickListener);
btnFragment2.setOnClickListener(btnFragmentOnClickListener);
}

Button.OnClickListener btnFragmentOnClickListener
= new Button.OnClickListener(){

@Override
public void onClick(View v) {
// TODO Auto-generated method stub
Fragment newFragment;

// Create new fragment
if(v == btnFragment1){
newFragment = new MyFragment();
}else{
newFragment = new MyFragment2();
}

// Create new transaction
FragmentTransaction transaction = getFragmentManager().beginTransaction();

// Replace whatever is in the fragment_container view with this fragment,
// and add the transaction to the back stack
transaction.replace(R.id.myfragment, newFragment);
transaction.addToBackStack(null);

// Commit the transaction
transaction.commit();
}};

}


Download the files.

Related article:
- Lifecycle of Fragment: onCreate(), onCreateView() and onPause().


Programmatically add fragment

Last post show how to inflate layout from XML. The Fragment is hard coded in layout XML, "fragment" element in main.xml. Alternatively, it can be specified as ViewGroup, LinearLayout in my example here. Then get an instance of FragmentTransaction and add the fragment in the ViewGroup Programmatically.

Programmatically add fragment

Modify the main layout, main.xml, to specify the fragment as LinearLayout instead of MyFragment.
<?xml version="1.0" encoding="utf-8"?>
<LinearLayout xmlns:android="http://schemas.android.com/apk/res/android"
android:layout_width="fill_parent"
android:layout_height="fill_parent"
android:orientation="horizontal" >

<TextView
android:layout_width="0px"
android:layout_weight="1"
android:layout_height="match_parent"
android:text="It's TextView in main Activity"
android:background="#555555"/>
<LinearLayout
android:id="@+id/myfragment"
android:layout_width="0px"
android:layout_weight="4"
android:layout_height="match_parent" />

</LinearLayout>


Modify onCreate() method of the main activity to get an instance of FragmentTransaction and add the fragment in the LinearLayout.
package com.exercise.FragmentTest;

import android.app.Activity;
import android.app.Fragment;
import android.app.FragmentManager;
import android.app.FragmentTransaction;
import android.os.Bundle;

public class FragmentTestActivity extends Activity{

Fragment fragment;

/** Called when the activity is first created. */
@Override
public void onCreate(Bundle savedInstanceState) {
super.onCreate(savedInstanceState);
setContentView(R.layout.main);

// get an instance of FragmentTransaction from your Activity
FragmentManager fragmentManager = getFragmentManager();
FragmentTransaction fragmentTransaction = fragmentManager.beginTransaction();

//add a fragment
MyFragment myFragment = new MyFragment();
fragmentTransaction.add(R.id.myfragment, myFragment);
fragmentTransaction.commit();

}

}


Both MyFragment.java and /res/layout/fragmentlayout.xml kept no change as last post.

MyFragment.java
package com.exercise.FragmentTest;

import android.app.Fragment;
import android.os.Bundle;
import android.view.LayoutInflater;
import android.view.View;
import android.view.ViewGroup;

public class MyFragment extends Fragment {

@Override
public View onCreateView(LayoutInflater inflater, ViewGroup container,
Bundle savedInstanceState) {
// TODO Auto-generated method stub
View myFragmentView = inflater.inflate(R.layout.fragmentlayout, container, false);

return myFragmentView;
}

}


/res/layout/fragmentlayout.xml
<?xml version="1.0" encoding="utf-8"?>
<LinearLayout xmlns:android="http://schemas.android.com/apk/res/android"
android:layout_width="fill_parent"
android:layout_height="fill_parent"
android:orientation="vertical" >
<TextView
android:layout_width="match_parent"
android:layout_height="wrap_content"
android:text="It's Fragment" />
<ImageView
android:layout_width="match_parent"
android:layout_height="match_parent"
android:src="@drawable/ic_launcher"/>
</LinearLayout>


Download the files.

next:
- Dynamic change fragment using Java code


Sunday, December 11, 2011

A simple exercise of Fragment, inflate layout from XML

A simple exercise of Fragment, inflate layout from XML

Create a new Android project target Android 3.0.

Modify layout, main.xml, to add a our fragment.
<?xml version="1.0" encoding="utf-8"?>
<LinearLayout xmlns:android="http://schemas.android.com/apk/res/android"
android:layout_width="fill_parent"
android:layout_height="fill_parent"
android:orientation="horizontal" >

<TextView
android:layout_width="0px"
android:layout_weight="1"
android:layout_height="match_parent"
android:text="It's TextView in main Activity"
android:background="#555555"/>
<fragment
class="com.exercise.FragmentTest.MyFragment"
android:id="@+id/myfragment"
android:layout_width="0px"
android:layout_weight="4"
android:layout_height="match_parent" />

</LinearLayout>

Implement /res/layout/fragmentlayout.xml, to define the layout of our fragment.
<?xml version="1.0" encoding="utf-8"?>
<LinearLayout xmlns:android="http://schemas.android.com/apk/res/android"
android:layout_width="fill_parent"
android:layout_height="fill_parent"
android:orientation="vertical" >
<TextView
android:layout_width="match_parent"
android:layout_height="wrap_content"
android:text="It's Fragment" />
<ImageView
android:layout_width="match_parent"
android:layout_height="match_parent"
android:src="@drawable/ic_launcher"/>
</LinearLayout>


Add a new class MyFragment extends Fragment. Inside onCreateView(), inflate R.layout.fragmentlayout to generate our view and return it.
package com.exercise.FragmentTest;

import android.app.Fragment;
import android.os.Bundle;
import android.view.LayoutInflater;
import android.view.View;
import android.view.ViewGroup;

public class MyFragment extends Fragment {

@Override
public View onCreateView(LayoutInflater inflater, ViewGroup container,
Bundle savedInstanceState) {
// TODO Auto-generated method stub
View myFragmentView = inflater.inflate(R.layout.fragmentlayout, container, false);

return myFragmentView;
}

}


Keep the main activity no change from the auto-generated version.

Related article:
- Programmatically add fragment


Friday, December 9, 2011

A simple exercise of Fragment

A simple exercise of Fragment

Create a new Android project target Android 3.0.

Modify layout, main.xml, to add a our fragment
<?xml version="1.0" encoding="utf-8"?>
<LinearLayout xmlns:android="http://schemas.android.com/apk/res/android"
android:layout_width="fill_parent"
android:layout_height="fill_parent"
android:orientation="horizontal" >

<TextView
android:layout_width="0px"
android:layout_weight="1"
android:layout_height="match_parent"
android:text="It's TextView in main Activity"
android:background="#555555"/>
<fragment
class="com.exercise.FragmentTest.MyFragment"
android:id="@+id/myfragment"
android:layout_width="0px"
android:layout_weight="4"
android:layout_height="match_parent" />

</LinearLayout>

Add a new class MyFragment extends Fragment.
package com.exercise.FragmentTest;

import android.app.Fragment;
import android.content.Context;
import android.os.Bundle;
import android.view.LayoutInflater;
import android.view.View;
import android.view.ViewGroup;
import android.widget.LinearLayout;
import android.widget.TextView;

public class MyFragment extends Fragment {

@Override
public View onCreateView(LayoutInflater inflater, ViewGroup container,
Bundle savedInstanceState) {
// TODO Auto-generated method stub
Context context = getActivity().getApplicationContext();
LinearLayout layout = new LinearLayout(context);
TextView text = new TextView(context);
text.setText("It's Fragment");
layout.addView(text);

return layout;
}

}


Modify the main activity to add our MyFragment.
package com.exercise.FragmentTest;

import android.app.Activity;
import android.app.Fragment;
import android.os.Bundle;

public class FragmentTestActivity extends Activity{

Fragment fragment;

/** Called when the activity is first created. */
@Override
public void onCreate(Bundle savedInstanceState) {
super.onCreate(savedInstanceState);
setContentView(R.layout.main);

}

}


Monday, December 5, 2011

Play Ring Tone in Ring Tone Text Transfer Language (RTTTL) format using MediaPlayer

Ring Tone Text Transfer Language (RTTTL) was developed by Nokia to be used to transfer ringtones to cellphone by Nokia, to know more please refer to Wikipedia - Ring Tone Transfer Language.

It's a example to play a single note in RTTTL format using MediaPlayer.

Play Ring Tone in Ring Tone Text Transfer Language (RTTTL) format using MediaPlayer

First, create a xml(/res/raw/a4.rtttl) to define a single note in RTTTL format.
<a4:d=4,o=5,b=250:a4;


Main Code:
package com.exercise.AndroidRTTTL;

import android.app.Activity;
import android.media.MediaPlayer;
import android.os.Bundle;
import android.view.View;
import android.widget.Button;

public class AndroidRTTTLActivity extends Activity {

Button buttonPlay;
MediaPlayer mediaPlayer;

/** Called when the activity is first created. */
@Override
public void onCreate(Bundle savedInstanceState) {
super.onCreate(savedInstanceState);
setContentView(R.layout.main);
buttonPlay = (Button)findViewById(R.id.play);
buttonPlay.setOnClickListener(buttonPlayOnClickListener);
}

Button.OnClickListener buttonPlayOnClickListener
= new Button.OnClickListener(){

@Override
public void onClick(View arg0) {
// TODO Auto-generated method stub
if(mediaPlayer != null)
{
mediaPlayer.release();
}

mediaPlayer = MediaPlayer.create(AndroidRTTTLActivity.this, R.raw.a4);
mediaPlayer.start();

}};
}


Layout, main.xml
<?xml version="1.0" encoding="utf-8"?>
<LinearLayout xmlns:android="http://schemas.android.com/apk/res/android"
android:layout_width="fill_parent"
android:layout_height="fill_parent"
android:orientation="vertical" >

<TextView
android:layout_width="fill_parent"
android:layout_height="wrap_content"
android:text="@string/hello" />
<Button
android:id="@+id/play"
android:layout_width="fill_parent"
android:layout_height="wrap_content"
android:text="Play" />

</LinearLayout>

Download the files.


Friday, December 2, 2011

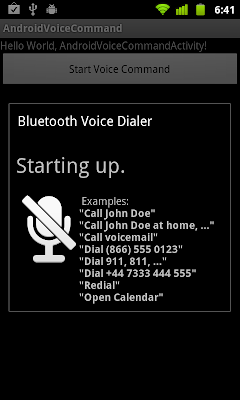
Start Voice Command using Intent of ACTION_VOICE_COMMAND

Start Voice Command using Intent of ACTION_VOICE_COMMAND

package com.exercise.AndroidVoiceCommand;

import android.app.Activity;
import android.content.Intent;
import android.os.Bundle;
import android.view.View;
import android.widget.Button;

public class AndroidVoiceCommandActivity extends Activity {
/** Called when the activity is first created. */
@Override
public void onCreate(Bundle savedInstanceState) {
super.onCreate(savedInstanceState);
setContentView(R.layout.main);

Button startVoiceCommand = (Button)findViewById(R.id.startvoicecommand);
startVoiceCommand.setOnClickListener(new Button.OnClickListener(){

@Override
public void onClick(View arg0) {
// TODO Auto-generated method stub
Intent intent = new Intent(Intent.ACTION_VOICE_COMMAND);
startActivity(intent);
}});
}
}

Thursday, December 1, 2011

Ice Cream Sandwich is available for Android-x86

Android-x86 is a project to port Android open source project to x86 platform. Android-x86-4.0-devel is available to run Android 4.0 Ice Cream Sandwich on machine of AMD Brazos platform, like MSI 110W. Please note that it's for developers, not all function implemented.

link: Android-x86 Project

Great Tutorial:
- Running Ice Cream Sandwich in Virtualbox
- Running Ice Cream Sandwich in Virtualbox Part II
- Experimenting with ICS (in Virtualbox, VMlite, VMware)

Implement Search interface

In this exercise, we will implement search interface on our activity, without actual searching function. When user press the Search button, a search dialog will be opened; then after user confirm search, the query will be passed to another activity (MySearch.java) for searching.

Implement Search interface

First we create our search activity, MySearch.java. Simple check if the intent equal to ACTION_SEARCH and display the query only.
package com.exercise.AndroidSearch;

import android.app.Activity;
import android.app.SearchManager;
import android.content.Intent;
import android.os.Bundle;
import android.widget.Toast;

public class MySearch extends Activity {

@Override
protected void onCreate(Bundle savedInstanceState) {
// TODO Auto-generated method stub
super.onCreate(savedInstanceState);

// Get the intent, verify the action and get the query
Intent intent = getIntent();
if (Intent.ACTION_SEARCH.equals(intent.getAction())) {
String query = intent.getStringExtra(SearchManager.QUERY);
Toast.makeText(MySearch.this,
query,
Toast.LENGTH_LONG).show();
}
}

}


Modify AndroidManifest.xml to add MySearch activity to handle intent of "android.intent.action.SEARCH", with meta-data with android:name="android.app.searchable" and android:resource="@xml/searchable". xml/searchable.xml is the searchable configuration, it will be created later.
Also add meta-data in the main activity AndroidSearchActivity, with android:name="android.app.default_searchable" and android:value=".MySearch". Where MySearch.java is the search activity we have just created.
<?xml version="1.0" encoding="utf-8"?>
<manifest xmlns:android="http://schemas.android.com/apk/res/android"
package="com.exercise.AndroidSearch"
android:versionCode="1"
android:versionName="1.0" >

<uses-sdk android:minSdkVersion="8" />

<application
android:icon="@drawable/ic_launcher"
android:label="@string/app_name" >
<activity
android:label="@string/app_name"
android:name=".AndroidSearchActivity" >
<intent-filter >
<action android:name="android.intent.action.MAIN" />
<category android:name="android.intent.category.LAUNCHER" />
</intent-filter>
<meta-data android:name="android.app.default_searchable"
android:value=".MySearch" />
</activity>
<activity android:name=".MySearch" >
<intent-filter>
<action android:name="android.intent.action.SEARCH" />
</intent-filter>
<meta-data android:name="android.app.searchable"
android:resource="@xml/searchable"/>
</activity>
</application>

</manifest>


Create /res/xml/searchable.xml to define our searchable configuration.
<?xml version="1.0" encoding="utf-8"?>
<searchable xmlns:android="http://schemas.android.com/apk/res/android"
android:label="@string/app_name" >
</searchable>


The main activity have no need to change in this exercise.

Download the files.


Experience Windows Phone on Android/iPhone...


Now you can experience Windows Phone's interface on Android/iPhone, by visiting http://aka.ms/wpdemo. This demo uses HTML 5 to show off Windows Phone's interface.