Saturday, July 27, 2013

Android Emulator error libGL.so: cannot open shared object file: No such file or directory

If you run Android Emulator with the error of "libGL.so: cannot open shared object file: No such file or directory", you have to make link for libGL.so.

My machine run Ubuntu 12.04. The following is my solution to fix it. (assume libGL is installed in somewhere in your system)

- Locate your installed libGL:
$locate libGL

- make link to installed libGL.so
$sudo ln -s /usr/lib/i386-linux-gnu/libGLU.so.1 /usr/lib/libGL.so

locate and ln libGL.so


Remark:
Thanks comment by Anonymous:
~ If your system is 64 bit one, you must link to the 64 bit libGL

Friday, July 26, 2013

Android Emulator now support Google Play services SDK

As in the beginning of the year "Google Play services is not supported on the Android emulator". With Android SDK updated, Google Play services SDK is now supported in Android Emulator with AVD that runs the Google APIs platform based on Android 4.2.2 or higher.

If you want to test your app on the emulator, run Android SDK Manager, expand the directory for Android 4.2.2 (API 17) or a higher version, select Google APIs, and install it. Then create a new AVD with Google APIs as the platform target.

Note: Only Android 4.2.2 and higher versions of the Google APIs platform include Google Play services.

Reference: Setup Google Play Services SDK

Remark: Unfortunately, I cannot run my Google Maps Android API V2 examples on Emulator caused by "Google Play services out of date..."!

Thursday, July 25, 2013

Make app with translucent background

To make your app with translucent background, apply the following code in your theme.

<item name="android:windowIsTranslucent">true</item>
<item name="android:windowBackground">@android:color/transparent</item>


For example, modify /res/values/styles.xml (the auto-generated style):
<resources>

    <!--
        Base application theme, dependent on API level. This theme is replaced
        by AppBaseTheme from res/values-vXX/styles.xml on newer devices.
    -->
    <style name="AppBaseTheme" parent="android:Theme.Light">
        <!--
            Theme customizations available in newer API levels can go in
            res/values-vXX/styles.xml, while customizations related to
            backward-compatibility can go here.
        -->
    </style>

    <!-- Application theme. -->
    <style name="AppTheme" parent="AppBaseTheme">
        <!-- All customizations that are NOT specific to a particular API-level can go here. -->
        
     <item name="android:windowIsTranslucent">true</item>
     <item name="android:windowBackground">@android:color/transparent</item>
        
    </style>

</resources>

Translucent background

Intro to ActionBarCompat Support Library

DevBytes: Intro to ActionBarCompat Support Library

An introduction to this new support library, which allows you to add a compatible Action Bar to your application, targeting Android v2.1 or newer. This DevByte covers integrating the library, from adding it as a dependency to modifying your resources and code. For more information you can visit - http://developer.android.com/guide/topics/ui/actionbar.html

Wednesday, July 24, 2013

Google Cast Developer Preview

Google Cast is a screen-sharing technology that lets a user send and control content like video from a small computing device like a phone, tablet, or laptop to a large display device like a television.

A sender application running on the sender device uses the Google Cast API appropriate to its operating system to discover and transmit to the receiver application running on the receiver device. You can use the sender APIs to enable your Android, iOS, or Chrome app to send content to a large display.

The receiver device runs a scaled-down Chrome browser with a receiver application that receives data over Internet Protocol and transmits it to the television via HDMI. The receiver API lets you customize the messaging between the sender and receiver applications for authentication and other scenarios.

Google Cast Developer Preview lets you experiment with this unique second-screen functionality in your applications.

You can develop sender applications for Android, iOS, and Chrome which "cast" their content to a receiver device connected to a large display (television), and you can develop a receiver app that extends the default receiver functionality.

Note: You may not publicly distribute or ship your Google Cast application without written permission from Google, per the terms of service described on the Downloads page.

The APIs in this preview release are subject to change. This preview supports the same three platforms that are intended for the released product: Android, iOS, and Chrome. If you are developing a Chrome application, Google will need to whitelist your website for development. This process usually takes only a few days.

Visit Google Cast Developers Site

Bluetooth Low Energy API in Android 4.3

With Android 4.3 comes the Bluetooth Low Energy API. In this DevBytes Fred Chung gives a brief overview of the technology, and how Android supports it at the platform level.


Google Chromecast HDMI Streaming Media Player available at Amazon, $35.00 only


  • Stream online video, music and more to your TV using your smartphone, tablet, or laptop
  • Supports Netflix, YouTube, Google Play, as well as anything on the web through Chrome browser
  • Works with Android, iOS, Chrome for Mac, and Chrome for Windows
  • Easy setup: Plug into any HDTV and connect to your home WiFi network
  • Box includes Chromecast, HDMI extender, USB power cable, and power adapter


Android 4.3 announced and Developer Tools updated

Android 4.3 of Jelly Bean announced, includes great new features for users and developers. Android 4.3 powers the new Nexus 7 tablet and it’s rolling out now as an update to Nexus 4, Nexus 7, Nexus 10, and Galaxy Nexus HSPA+ devices across the world.

For developers, Android 4.3 includes the latest performance enhancements to keep your apps fast, smooth, and efficient, together with new APIs and capabilities to use in your apps.

Know more: http://android-developers.blogspot.hk/2013/07/android-43-and-updated-developer-tools.html

Tuesday, July 23, 2013

Determine event source in event listener

Last example demonstrate a "Simple example of Button and OnClickListener", with individual OnClickListener for each View. Alternatively, we can have a common OnClickListener for more than one View, then determine event source in event listener, and perform the correspond operation accordingly.

Determine event source in event listener


package com.example.androidbutton;

import android.os.Bundle;
import android.app.Activity;
import android.view.View;
import android.view.View.OnClickListener;
import android.widget.Button;
import android.widget.ImageView;
import android.widget.LinearLayout;
import android.widget.TextView;
import android.widget.Toast;

public class MainActivity extends Activity implements OnClickListener{

 @Override
 protected void onCreate(Bundle savedInstanceState) {
  super.onCreate(savedInstanceState);
  setContentView(R.layout.activity_main);
  
  LinearLayout myBackGround = (LinearLayout)findViewById(R.id.mybackground);
  myBackGround.setOnClickListener(this);
  
  TextView myWeb = (TextView)findViewById(R.id.myweb);
  myWeb.setOnClickListener(this);
  
  Button button1 = (Button)findViewById(R.id.button1);
  button1.setOnClickListener(this);
  
  Button button2 = (Button)findViewById(R.id.button2);
  button2.setOnClickListener(this);
  
  ImageView myImage =(ImageView)findViewById(R.id.myimage);
  myImage.setOnClickListener(this);
 }

 @Override
 public void onClick(View v) {
  if(v.getClass() == TextView.class){
   Toast.makeText(getApplicationContext(), 
     "It's TextView:\n" + ((TextView)v).getText(), 
     Toast.LENGTH_SHORT).show();
  }else if(v.getClass() == Button.class){
   Toast.makeText(getApplicationContext(), 
     "It's Button:\n" + ((Button)v).getText(), 
     Toast.LENGTH_SHORT).show();
  }else if(v.getClass() == ImageView.class){
   Toast.makeText(getApplicationContext(), 
     "It's ImageView:", 
     Toast.LENGTH_SHORT).show();
   
   //setRotation require API Level 11
   float rot = ((ImageView)v).getRotation() + 90;
   ((ImageView)v).setRotation(rot);
   
  }else{
   Toast.makeText(getApplicationContext(), 
     "Background clicked", 
     Toast.LENGTH_SHORT).show();
  }
 }

}


<LinearLayout xmlns:android="http://schemas.android.com/apk/res/android"
    xmlns:tools="http://schemas.android.com/tools"
    android:layout_width="match_parent"
    android:layout_height="match_parent"
    android:paddingBottom="@dimen/activity_vertical_margin"
    android:paddingLeft="@dimen/activity_horizontal_margin"
    android:paddingRight="@dimen/activity_horizontal_margin"
    android:paddingTop="@dimen/activity_vertical_margin"
    android:orientation="vertical"
    tools:context=".MainActivity"
    android:id="@+id/mybackground" >

    <TextView
        android:id="@+id/myweb"
        android:layout_width="wrap_content"
        android:layout_height="wrap_content"
        android:text="android-er.blogspot.com" />
    
    <Button
        android:id="@+id/button1"
        android:layout_width="match_parent"
        android:layout_height="wrap_content"
        android:text="Button 1"/>
    <Button
        android:id="@+id/button2"
        android:layout_width="match_parent"
        android:layout_height="wrap_content"
        android:text="Button 2"/>
    <ImageView
        android:id="@+id/myimage"
        android:layout_width="wrap_content"
        android:layout_height="wrap_content"
        android:src="@drawable/ic_launcher"/>
    
</LinearLayout>


Monday, July 22, 2013

Simple example of Button and OnClickListener

Basic example of Button and OnClickListener to handle button click:

package com.example.androidbutton;

import android.os.Bundle;
import android.app.Activity;
import android.view.View;
import android.view.View.OnClickListener;
import android.widget.Button;
import android.widget.Toast;

public class MainActivity extends Activity {

 @Override
 protected void onCreate(Bundle savedInstanceState) {
  super.onCreate(savedInstanceState);
  setContentView(R.layout.activity_main);
  
  Button button1 = (Button)findViewById(R.id.button1);
  button1.setOnClickListener(new OnClickListener(){

   @Override
   public void onClick(View arg0) {
    Toast.makeText(getApplicationContext(), 
      "Button 1 clicked", 
      Toast.LENGTH_LONG).show();
   }});
  
  Button button2 = (Button)findViewById(R.id.button2);
  button2.setOnClickListener(button2OnClickListener);
 }

 OnClickListener button2OnClickListener =
   new OnClickListener(){

    @Override
    public void onClick(View v) {
     Toast.makeText(getApplicationContext(), 
       "Button 2 clicked", 
       Toast.LENGTH_LONG).show();
    }};

}


<LinearLayout xmlns:android="http://schemas.android.com/apk/res/android"
    xmlns:tools="http://schemas.android.com/tools"
    android:layout_width="match_parent"
    android:layout_height="match_parent"
    android:paddingBottom="@dimen/activity_vertical_margin"
    android:paddingLeft="@dimen/activity_horizontal_margin"
    android:paddingRight="@dimen/activity_horizontal_margin"
    android:paddingTop="@dimen/activity_vertical_margin"
    android:orientation="vertical"
    tools:context=".MainActivity" >

    <TextView
        android:layout_width="wrap_content"
        android:layout_height="wrap_content"
        android:text="android-er.blogspot.com" />
    
    <Button
        android:id="@+id/button1"
        android:layout_width="match_parent"
        android:layout_height="wrap_content"
        android:text="Button 1"/>
    <Button
        android:id="@+id/button2"
        android:layout_width="match_parent"
        android:layout_height="wrap_content"
        android:text="Button 2"/>

</LinearLayout>

Simple example of Button


Next:
- Determine event source in event listener

OpenWeatherMap - free weather data and forecast API

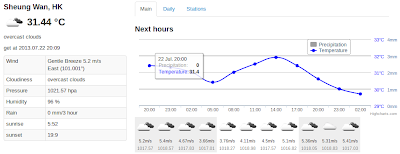
The OpenWeatherMap service provides free weather data and forecast API suitable for any cartographic services like web and smartphones applications. Ideology is inspired by OpenStreetMap and Wikipedia that make information free and available for everybody. OpenWeatherMap provides wide range of weather data such as map with current weather, week forecast, precipitation, wind, clouds, data from weather Stations and many others. Weather data is received from global Meteorological broadcast services and more than 40 000 weather stations.

OpenWeatherMap

Gradle Beyond the Basics - read online for FREE

Gradle Beyond the Basics

If you’re familiar with Gradle’s basics elements—possibly through the author’s previous O’Reilly book, Building and Testing with Gradle—this more advanced guide provides the recipes, techniques, and syntax to help you master this build automation tool. With clear, concise explanations and lots of ready-to-use code examples, you’ll explore four discrete areas of Gradle functionality: file operations, custom Gradle plugins, build lifecycle hooks, and dependency management.

Learn how to use Gradle’s rich set of APIs and Groovy-based Domain Specific Language to customize build software that actually conforms to your product. By using the techniques in this book, you’ll be able to write domain-specific builds that support every other line of code your team creates.


  • Examine Gradle’s file API, including copy tasks, pattern matching, content filtering, and the FileCollection interface
  • Understand the process for building and packaging a custom Gradle plug-in
  • Manage build complexity with hook methods and Gradle’s rule feature
  • Learn how Gradle handles dependency management natively and through customization
  • Explore Gradle’s core plug-ins as well as key examples from the Gradle community

read online: http://chimera.labs.oreilly.com/books/1234000001741

Saturday, July 20, 2013

Require more memory for App to run

To request more memory for App to run, you can specify android:largeHeap="true" in <application>. android:largeHeap specify Whether your application's processes should be created with a large Dalvik heap.

reference: http://developer.android.com/guide/topics/manifest/application-element.html#largeHeap

Thursday, July 18, 2013

Android Studio 0.2.1 Released with Gradle fix

Example to specify View with half width


<LinearLayout xmlns:android="http://schemas.android.com/apk/res/android"
    xmlns:tools="http://schemas.android.com/tools"
    android:layout_width="match_parent"
    android:layout_height="match_parent"
    android:paddingBottom="@dimen/activity_vertical_margin"
    android:paddingLeft="@dimen/activity_horizontal_margin"
    android:paddingRight="@dimen/activity_horizontal_margin"
    android:paddingTop="@dimen/activity_vertical_margin"
    android:orientation="vertical"
    tools:context=".MainActivity" >

    <TextView
        android:layout_width="wrap_content"
        android:layout_height="wrap_content"
        android:text="Hello"
        android:textStyle="bold|italic"
        android:layout_gravity="center_horizontal" />

    <LinearLayout 
        android:layout_width="match_parent"
        android:layout_height="wrap_content"
        android:orientation="horizontal">
        <TextView
            android:layout_width="0dp"
            android:layout_height="wrap_content"
            android:layout_weight="1"
            android:text="http://android-er.blogspot.com/"
            android:background="#D0D0D0" />
        <Button
            android:layout_width="0dp"
            android:layout_height="wrap_content"
            android:layout_weight="1"
            android:text="Button" />
    </LinearLayout>
    
    <LinearLayout 
        android:layout_width="match_parent"
        android:layout_height="wrap_content"
        android:orientation="horizontal">
        <Space
            android:layout_width="0dp"
            android:layout_height="wrap_content"
            android:layout_weight="1" />
        <TextView
            android:layout_width="0dp"
            android:layout_height="wrap_content"
            android:layout_weight="1"
            android:text="<Space> require API 14"
            android:background="#B0B0B0" />
    </LinearLayout>
    
    <LinearLayout 
        android:layout_width="match_parent"
        android:layout_height="wrap_content"
        android:orientation="horizontal"
        android:weightSum="1">
        <TextView
            android:layout_width="0dp"
            android:layout_height="wrap_content"
            android:layout_weight="0.5"
            android:text="Use weightSum and layout_weight"
            android:background="#909090" />
    </LinearLayout>
    
</LinearLayout>


Wednesday, July 17, 2013

50 Android Hacks


50 Android Hacks

The best programming techniques are often the shortest and simplest—the hacks. In this compact and infinitely useful book, Android expert Carlos Sessa delivers 50 hacks that will save you time, stretch your skills, and maybe even make you smile.

About this Book

Hacks. Clever programming techniques to solve thorny little problems. Ten lines of code that save you two days of work. The little gems you learn from the old guy in the next cube or from the geniuses on Stack Overflow. That's just what you'll find in this compact and useful book.
The name 50 Android Hacks says it all. Ranging from the mundane to the spectacular, each self-contained, fully illustrated hack is just a couple of pages long and includes annotated source code. These practical techniques are organized into twelve collections covering layout, animations, patterns, and more.

What's Inside
  • Hack 3 Creating a custom ViewGroup
  • Hack 8 Slideshow using the Ken Burns effect
  • Hack 20 The Model-View-Presenter pattern
  • Hack 23 The SyncAdapter pattern
  • Hack 31 Aspect-oriented programming in Android
  • Hack 34 Using Scala inside Android
  • Hack 43 Batching database operations
  • Plus 43 more hacks!
Most hacks work with Android 2.x and greater. Version-specific hacks are clearly marked.
Purchase of the print book includes a free eBook in PDF, Kindle, and ePub formats from Manning Publications.

About the Author


Carlos Sessa is a passionate professional Android developer. He's active on Stack Overflow and is an avid hack collector.

Table of Contents
  1. Working your way around layouts
  2. Creating cool animations
  3. View tips and tricks
  4. Tools
  5. Patterns
  6. Working with lists and adapters
  7. Useful libraries
  8. Interacting with other languages
  9. Ready-to-use snippets
  10. Beyond database basics
  11. Avoiding fragmentation
  12. Building tools

Apply animation on TextView

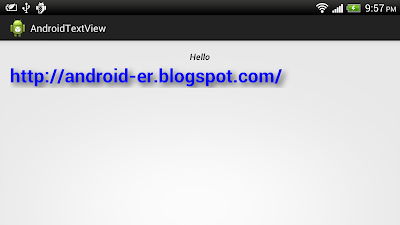
Apply animation on TextView


To create animation, create xml file to define animation in /res/anim/ folder, /res/anim/myanimation.xml.
<?xml version="1.0" encoding="utf-8"?>
<set xmlns:android="http://schemas.android.com/apk/res/android"
   android:interpolator="@android:anim/linear_interpolator">
   <scale
       android:fromXScale="1.0"
       android:toXScale="0.8"
       android:fromYScale="1.0"
       android:toYScale="1.2"
       android:pivotX="50%"
       android:pivotY="50%"
       android:duration="100"
       android:repeatCount="4"
       android:repeatMode="reverse" />
</set>


In Java code, create Animation of the anim resource file with AnimationUtils.loadAnimation() method, and start the animation with startAnimation() method of the target view.
package com.example.androidtextview;

import android.os.Bundle;
import android.view.View;
import android.view.View.OnClickListener;
import android.view.animation.Animation;
import android.view.animation.AnimationUtils;
import android.widget.TextView;
import android.app.Activity;

public class MainActivity extends Activity {
 
 Animation myAnimation;
 TextView myText;
 
 @Override
 protected void onCreate(Bundle savedInstanceState) {
  super.onCreate(savedInstanceState);
  setContentView(R.layout.activity_main);
  myText = (TextView)findViewById(R.id.mytext);
  
  myAnimation = AnimationUtils.loadAnimation(this, R.anim.myanimation);
  
  myText.setOnClickListener(new OnClickListener(){

   @Override
   public void onClick(View arg0) {
    myText.startAnimation(myAnimation);
   }});
 }

}


<LinearLayout xmlns:android="http://schemas.android.com/apk/res/android"
    xmlns:tools="http://schemas.android.com/tools"
    android:layout_width="match_parent"
    android:layout_height="match_parent"
    android:paddingBottom="@dimen/activity_vertical_margin"
    android:paddingLeft="@dimen/activity_horizontal_margin"
    android:paddingRight="@dimen/activity_horizontal_margin"
    android:paddingTop="@dimen/activity_vertical_margin"
    android:orientation="vertical"
    tools:context=".MainActivity" >

    <TextView
        android:layout_width="wrap_content"
        android:layout_height="wrap_content"
        android:text="Hello"
        android:textStyle="bold|italic"
        android:layout_gravity="center_horizontal" />

    <TextView
        android:id="@+id/mytext"
        android:layout_width="match_parent"
        android:layout_height="wrap_content"
        android:text="http://android-er.blogspot.com/"
        android:textStyle="bold"
        android:textSize="30sp"
        android:textColor="#0000ff" />

</LinearLayout>


Tuesday, July 16, 2013

Implement auto-running TextView


<LinearLayout xmlns:android="http://schemas.android.com/apk/res/android"
    xmlns:tools="http://schemas.android.com/tools"
    android:layout_width="match_parent"
    android:layout_height="match_parent"
    android:paddingBottom="@dimen/activity_vertical_margin"
    android:paddingLeft="@dimen/activity_horizontal_margin"
    android:paddingRight="@dimen/activity_horizontal_margin"
    android:paddingTop="@dimen/activity_vertical_margin"
    android:orientation="vertical"
    tools:context=".MainActivity" >

    <TextView
        android:layout_width="wrap_content"
        android:layout_height="wrap_content"
        android:text="Hello"
        android:textStyle="bold|italic"
        android:layout_gravity="center_horizontal" />

    <TextView
        android:id="@+id/shadowtext"
        android:layout_width="match_parent"
        android:layout_height="wrap_content"
        android:text="http://android-er.blogspot.com/"
        android:textStyle="bold"
        android:textSize="50sp"
        android:textColor="#0000ff"
        
        android:focusable="true"
        android:focusableInTouchMode="true"
        android:singleLine="true"
        android:scrollHorizontally="true"
        android:ellipsize="marquee"
        android:marqueeRepeatLimit ="marquee_forever" />

</LinearLayout>


Updated@2016-08-30:
Have to set the TextView selected also, refer "Auto scrolling (horizontal running) TextView".

Monday, July 15, 2013

Add shadow for TextView, using Java code.


To add shadow on TextView using Java code, call setShadowLayer() method.

package com.example.androidtextview;

import android.os.Bundle;
import android.app.Activity;
import android.widget.TextView;

public class MainActivity extends Activity {
 
 @Override
 protected void onCreate(Bundle savedInstanceState) {
  super.onCreate(savedInstanceState);
  setContentView(R.layout.activity_main);
  
  TextView shadowText = (TextView)findViewById(R.id.shadowtext);
  shadowText.setShadowLayer(30, 10, 10, 0xFF303030);

 }

}


<LinearLayout xmlns:android="http://schemas.android.com/apk/res/android"
    xmlns:tools="http://schemas.android.com/tools"
    android:layout_width="match_parent"
    android:layout_height="match_parent"
    android:paddingBottom="@dimen/activity_vertical_margin"
    android:paddingLeft="@dimen/activity_horizontal_margin"
    android:paddingRight="@dimen/activity_horizontal_margin"
    android:paddingTop="@dimen/activity_vertical_margin"
    android:orientation="vertical"
    tools:context=".MainActivity" >

    <TextView
        android:layout_width="wrap_content"
        android:layout_height="wrap_content"
        android:text="Hello"
        android:textStyle="bold|italic"
        android:layout_gravity="center_horizontal" />

    <TextView
        android:id="@+id/shadowtext"
        android:layout_width="match_parent"
        android:layout_height="wrap_content"
        android:text="http://android-er.blogspot.com/"
        android:textStyle="bold"
        android:textSize="30sp"
        android:textColor="#0000ff" />

</LinearLayout>


Related: compare to Add shadow for TextView, using XML.

Add shadow for TextView, using XML.

TextView with shadow

<LinearLayout xmlns:android="http://schemas.android.com/apk/res/android"
    xmlns:tools="http://schemas.android.com/tools"
    android:layout_width="match_parent"
    android:layout_height="match_parent"
    android:paddingBottom="@dimen/activity_vertical_margin"
    android:paddingLeft="@dimen/activity_horizontal_margin"
    android:paddingRight="@dimen/activity_horizontal_margin"
    android:paddingTop="@dimen/activity_vertical_margin"
    android:orientation="vertical"
    tools:context=".MainActivity" >

    <TextView
        android:layout_width="wrap_content"
        android:layout_height="wrap_content"
        android:text="Hello"
        android:textStyle="bold|italic"
        android:layout_gravity="center_horizontal" />

    <TextView
        android:layout_width="match_parent"
        android:layout_height="wrap_content"
        android:text="http://android-er.blogspot.com/"
        android:textStyle="bold"
        android:textSize="30sp"
        android:textColor="#0000ff"
        android:shadowColor="#303030"
        android:shadowDx="10"
        android:shadowDy="10"
        android:shadowRadius="30" />

</LinearLayout>


Related: compare with Add shadow for TextView, using Java code.


Sunday, July 14, 2013

Example to implement shape of oval with gradient color

shape of oval

To implement shape using "oval", create /res/drawable/myshape.xml to define the shape.
<shape 
    xmlns:android="http://schemas.android.com/apk/res/android" 
    android:shape="oval" >
    <solid 
        android:color="#e0e0e0" />
    <stroke 
        android:width="5dip" 
        android:color="#505050"/>
    <gradient 
        android:startColor="#FFFF0000" 
        android:endColor="#800000FF"
        android:angle="45"/>
</shape>


Apply the shape on layout background, modify /res/layout/activity_main.xml.
<LinearLayout xmlns:android="http://schemas.android.com/apk/res/android"
    xmlns:tools="http://schemas.android.com/tools"
    android:layout_width="match_parent"
    android:layout_height="match_parent"
    android:paddingBottom="@dimen/activity_vertical_margin"
    android:paddingLeft="@dimen/activity_horizontal_margin"
    android:paddingRight="@dimen/activity_horizontal_margin"
    android:paddingTop="@dimen/activity_vertical_margin"
    android:orientation="vertical"
    tools:context=".MainActivity" >

    <TextView
        android:layout_width="wrap_content"
        android:layout_height="wrap_content"
        android:text="Hello"
        android:textStyle="bold|italic"
        android:layout_gravity="center_horizontal"
        android:background="#B0B0B0" />
    <ImageView
        android:layout_width="match_parent"
        android:layout_height="wrap_content"
        android:src="@drawable/ic_launcher"
        android:gravity="center_horizontal"
        android:background="@drawable/myshape"
        android:layout_marginTop="5dp"
        android:layout_marginBottom="5dp" />
    <TextView
        android:layout_width="match_parent"
        android:layout_height="match_parent"
        android:text="http://android-er.blogspot.com/"
        android:textStyle="bold"
        android:textColor="@android:color/black"
        android:gravity="center"
        android:background="@drawable/myshape" />

</LinearLayout>


Friday, July 12, 2013

Android Security: Attacks and Defenses


Android Security: Attacks and Defenses is for anyone interested in learning about the strengths and weaknesses of the Android platform from a security perspective. Starting with an introduction to Android OS architecture and application programming, it will help readers get up to speed on the basics of the Android platform and its security issues.

Explaining the Android security model and architecture, the book describes Android permissions, including Manifest permissions, to help readers analyze applications and understand permission requirements. It also rates the Android permissions based on security implications and covers JEB Decompiler.

The authors describe how to write Android bots in JAVA and how to use reversing tools to decompile any Android application. They also cover the Android file system, including import directories and files, so readers can perform basic forensic analysis on file system and SD cards. The book includes access to a wealth of resources on its website: www.androidinsecurity.com. It explains how to crack SecureApp.apk discussed in the text and also makes the application available on its site.

The book includes coverage of advanced topics such as reverse engineering and forensics, mobile device pen-testing methodology, malware analysis, secure coding, and hardening guidelines for Android. It also explains how to analyze security implications for Android mobile devices/applications and incorporate them into enterprise SDLC processes.

The book’s site includes a resource section where readers can access downloads for applications, tools created by users, and sample applications created by the authors under the Resource section. Readers can easily download the files and use them in conjunction with the text, wherever needed. Visit www.androidinsecurity.com for more information.

Thursday, July 11, 2013

Tuesday, July 9, 2013

Implement custom shape for background

custom shape for background


To implement our custom shape, create xml file to define our shape in res/drawable/ folder, /res/drawable/myshape.xml.
<shape 
    xmlns:android="http://schemas.android.com/apk/res/android" 
    android:shape="rectangle" >
    <solid 
        android:color="#e0e0e0" />
    <stroke 
        android:width="5dip" 
        android:color="#505050"/>
</shape>


Apply the shape on view with android:background="@drawable/myshape" in layout xml file.
<LinearLayout xmlns:android="http://schemas.android.com/apk/res/android"
    xmlns:tools="http://schemas.android.com/tools"
    android:layout_width="match_parent"
    android:layout_height="match_parent"
    android:paddingBottom="@dimen/activity_vertical_margin"
    android:paddingLeft="@dimen/activity_horizontal_margin"
    android:paddingRight="@dimen/activity_horizontal_margin"
    android:paddingTop="@dimen/activity_vertical_margin"
    android:orientation="vertical"
    tools:context=".MainActivity" >

    <TextView
        android:layout_width="wrap_content"
        android:layout_height="wrap_content"
        android:text="Hello"
        android:textStyle="bold|italic"
        android:layout_gravity="center_horizontal"
        android:background="#B0B0B0" />
    <ImageView
        android:layout_width="match_parent"
        android:layout_height="wrap_content"
        android:src="@drawable/ic_launcher"
        android:gravity="center_horizontal"
        android:background="@drawable/myshape"
        android:layout_marginTop="5dp"
        android:layout_marginBottom="5dp" />
    <TextView
        android:layout_width="match_parent"
        android:layout_height="match_parent"
        android:text="http://android-er.blogspot.com/"
        android:textStyle="bold"
        android:textColor="@android:color/black"
        android:gravity="center"
        android:background="@drawable/myshape" />

</LinearLayout>


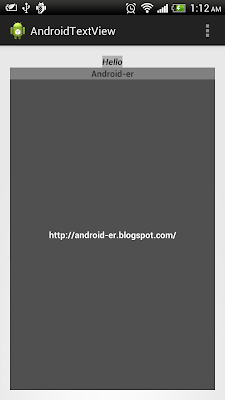
Implement vertical TextView by calling setRotation()

API Level 11 provide setRotation(float rotation) method to rotate a View. We can call the method of TextView object to make it display in vertical.

vertical TextView

Layout:
<LinearLayout xmlns:android="http://schemas.android.com/apk/res/android"
    xmlns:tools="http://schemas.android.com/tools"
    android:layout_width="match_parent"
    android:layout_height="match_parent"
    android:paddingBottom="@dimen/activity_vertical_margin"
    android:paddingLeft="@dimen/activity_horizontal_margin"
    android:paddingRight="@dimen/activity_horizontal_margin"
    android:paddingTop="@dimen/activity_vertical_margin"
    android:orientation="vertical"
    tools:context=".MainActivity" >

    <TextView
        android:layout_width="wrap_content"
        android:layout_height="wrap_content"
        android:text="Hello"
        android:textStyle="bold|italic"
        android:layout_gravity="center_horizontal"
        android:background="#B0B0B0" />
    <LinearLayout 
        android:layout_width="match_parent"
        android:layout_height="match_parent"
        android:orientation="horizontal">
        
        <TextView
            android:id="@+id/verticaltextview"
            android:layout_width="wrap_content"
            android:layout_height="wrap_content"
            android:text="Android-er"
            android:textStyle="bold"
            android:textColor="#00FF00"
            android:layout_gravity="center"
            android:background="#808080" />
        <TextView
            android:layout_width="match_parent"
            android:layout_height="match_parent"
            android:text="http://android-er.blogspot.com/"
            android:textStyle="bold"
            android:textColor="@android:color/white"
            android:gravity="center"
            android:background="#505050" />
        
    </LinearLayout>

</LinearLayout>


Java code, call setRotation() to display the TextView (verticalTextView) in vertical.
package com.example.androidtextview;

import android.os.Bundle;
import android.app.Activity;
import android.widget.TextView;

public class MainActivity extends Activity {
 
 TextView verticalTextView;

 @Override
 protected void onCreate(Bundle savedInstanceState) {
  super.onCreate(savedInstanceState);
  setContentView(R.layout.activity_main);
  
  verticalTextView = (TextView)findViewById(R.id.verticaltextview);
  verticalTextView.setRotation(90);
 }


}


remark: Have to modify AndroidManifest.xml to set android:minSdkVersion="11" or higher.

Monday, July 8, 2013

GPS / Database ANDROID Programming


This book is a step-by-step guide for developing 'gps', a full-fledged Android app. It also can be used as an intro book on Android programming. 

The gps app:
• locates the user's position on the map
• e-mails the location in a URL form that positions the location on the Google Maps Web page
• inserts the current location of the user into the SQLite database
• retrieves locations from the database and places them in a list view. The user then chooses to view locations from the list on the map.
• allows the user to tap on the screen to place markers and find the latitude, longitude pair of the point pressed
• translates the name of a city or place to latitude, longitude and marks the location on the map

Topics covered are:
• Basics of the Eclipse IDE 
• XML and Java Programming 
• Screen layouts
• Global Positioning System (GPS)
• Google Maps
• SQLite Database development
• Marker and Overlays design
• App installation on the smartphone device

The book Includes complete source code commentary and a companion site for downloading the .java, .xml and .png files and the gps.apk.

Sunday, July 7, 2013

Examples to center TextView

Examples to center TextView with XML:

Examples to center TextView


<LinearLayout xmlns:android="http://schemas.android.com/apk/res/android"
    xmlns:tools="http://schemas.android.com/tools"
    android:layout_width="match_parent"
    android:layout_height="match_parent"
    android:paddingBottom="@dimen/activity_vertical_margin"
    android:paddingLeft="@dimen/activity_horizontal_margin"
    android:paddingRight="@dimen/activity_horizontal_margin"
    android:paddingTop="@dimen/activity_vertical_margin"
    android:orientation="vertical"
    tools:context=".MainActivity" >

    <TextView
        android:layout_width="wrap_content"
        android:layout_height="wrap_content"
        android:text="Hello"
        android:textStyle="bold|italic"
        android:layout_gravity="center_horizontal"
        android:background="#B0B0B0" />
    <TextView
        android:layout_width="match_parent"
        android:layout_height="wrap_content"
        android:text="Android-er"
        android:textStyle="bold"
        android:gravity="center_horizontal"
        android:background="#808080" />
    <TextView
        android:layout_width="match_parent"
        android:layout_height="match_parent"
        android:text="http://android-er.blogspot.com/"
        android:textStyle="bold"
        android:textColor="@android:color/white"
        android:gravity="center"
        android:background="#505050" />

</LinearLayout>


Saturday, July 6, 2013

VirtualBox 4.2.16 released with Windows 8.1 Preview supported

VirtualBox 4.2.16 released with Windows 8.1 Preview supported.

See the changelog for what has changed.

eBook: Android 4 App Development Essentials

Android 4 App Development Essentials

The goal of this book is to teach the skills necessary to develop Android based applications using the Eclipse Integrated Development Environment (IDE) and the Android 4.2 Software Development Kit (SDK).

Beginning with the basics, this book provides an outline of the steps necessary to set up an Android development and testing environment. An introduction to the architecture of Android is followed by an in-depth look at the design of Android applications and user interfaces. More advanced topics such as database management, content providers, intents and services are also covered, as are touch screen handling, gesture recognition, camera access and the playback and recording of both video and audio.

In addition to covering general Android development techniques, the book also includes Google Play specific topics such as using the Google Play In-App Billing API, implementing maps using the Google Maps Android API and submitting apps to the Google Play Developer Console.

Assuming you already have some Java programming experience, are ready to download Eclipse and the Android SDK, have access to a Windows, Mac or Linux system and ideas for some apps to develop, you are ready to get started.

Table of Contents

  • Setting up an Android Development Environment
  • Creating an Android Virtual Device (AVD)
  • Creating an Example Android Application
  • Testing Android Applications on a Physical Android Device with ADB
  • An Overview of the Android Architecture
  • The Anatomy of an Android Application
  • Understanding Android Application and Activity Lifecycles
  • Handling Android Activity State Changes
  • Android Activity State Changes – An Example Application
  • Saving and Restoring the User Interface State of an Android Activity
  • Understanding Android Views, View Groups and Layouts
  • Designing an Android User Interface using the Graphical Layout Tool
  • Creating an Android User Interface in Java Code
  • Using the Android GridLayout Manager in the Graphical Layout Tool
  • Working with the Android GridLayout in XML Layout Resources
  • An Overview and Example of Android Event Handling
  • Detecting Common Gestures using the Android Gesture Detector Class
  • Implementing Android Custom Gesture and Pinch Recognition
  • An Introduction to Android Fragments
  • Using Fragments in Android – A Worked Example
  • An Android Master/Detail Flow Tutorial
  • Creating and Managing Overflow Menus on Android
  • An Overview of Android Intents
  • Android Explicit Intents – A Worked Example
  • Android Implicit Intents – A Worked Example
  • Android Broadcast Intents and Broadcast Receivers
  • A Basic Overview of Android Threads and Thread handlers
  • An Overview of Android Started and Bound Services
  • Implementing an Android Started Service – A Worked Example
  • Android Local Bound Services – A Worked Example
  • Android Remote Bound Services – A Worked Example
  • An Overview of Android SQLite Databases
  • An Android TableLayout and TableRow Tutorial
  • An Android SQLite Database Tutorial
  • Understanding Android Content Providers
  • An Android Content Provider Tutorial
  • Implementing Video Playback on Android using the VideoView and MediaController Classes
  • Video Recording and Image Capture on Android using Camera Intents
  • Android Audio Recording and Playback using MediaPlayer and MediaRecorder
  • Working with the Google Maps Android API
  • Handling Different Android Devices and Displays
  • Signing and Preparing an Android Application for Release
  • Integrating Google Play In-app Billing into an Android Application . A Tutorial

  • Read online for free: Android 4 App Development Essentials

    Thursday, July 4, 2013

    Boot to Qt - SDK Demonstation


    This is a demonstration of the Boot to Qt SDK. It shows how to configure Qt Creator for hardware development and how to run applications in both the emulator and on embedded hardware.

    Boot to Qt is a light-weight UI stack based on the Qt Framework. It is built on top of a a minimal Android baselayer. Boot to Qt is a commercial offering by Digia, including ready-made images for several hardware types, Single-click deploy from the Qt Creator IDE, a device emulator. For more information see qt.digia.com.

    Qt 5 Everywhere

    Qt 5 Everywhere Demo


    Qt is a cross-platform complete development framework with tools designed to streamline the creation of stunning native applications and amazing user interfaces for desktop, embedded and mobile platforms.

    Application demonstrated in the video contains several Qt Quick 2 applications which you can launch by tapping the devices. This application highlights the versatility of Qt technology in bringing different user interface styles in several platforms and device types with one source code. 

    For more information about Qt, please refer to http://qt.digia.com/

    Wednesday, July 3, 2013

    Qt 5.1 Released, with Qt for Android & iOS Technology Previews


    Qt 5.1 is now available

    In addition to that our work to bring Qt to mobile operating systems is showing great results. Even though Qt for Android and Qt for iOS are not yet final, and are marked as technology previews in this release, they are already very usable for a large number of use cases.

    Qt for Android supports all Qt modules that are part of 5.1 with the exception of Qt Serialport, Qt WebKit and parts of Qt Multimedia. Qt for Android also comes with a great integration into Qt Creator that allows you to do almost all your development until the point where you want to upload the application to Google Play.

    Qt for iOS also already supports the same Qt modules as Android does, with the exception of Qt Quick 2. This is due to limitations in iOS that make it impossible to use V8 as the JavaScript engine on this operating system. We will provide full Qt Quick support on iOS with Qt 5.2.

    You can install some demo applications that show Qt on iOS and Android from the App Store and Google Play. For Android we have a new Qt Everywhere demo as well as the Qt 5 launch demo available in Google Play. The blog post about Google Play contains more details about publishing Qt applications in Google Play. For iOS, we have Sub Attack, a small Qt based game and Qt Quicksand published in the app store.

    As with any release also this one contains a few issues that we know about and probably some more we haven’t yet found. All of these will be collected on the Known Issues page in our wiki.

    Source: Qt Blog


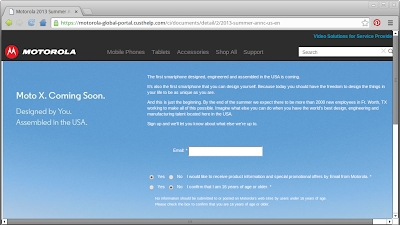
    Moto X Coming soon

    Moto X. is coming soon, The first smartphone designed, engineered and assembled in the USA is coming. It’s also the first smartphone that you can design yourself. Because today you should have the freedom to design the things in your life to be as unique as you are.

    sign-up to receive the update information HERE.

    Moto X. Coming soon

    Tuesday, July 2, 2013

    YouTube API Video Tutorials, by YouTube for Developers

    YouTube API Video Tutorials: This playlist features short video tutorials demonstrating how to use the YouTube APIs.


    Look for YouTube Android Player API? read my posts: YouTube Android Player API step-by-step

    Monday, July 1, 2013

    Android Studio 0.1.9 Released

    Android Studio 0.1.9 released, to fix the top crash reports from version 0.1.8, along with the following improvements:
    • Much faster Gradle builds within the IDE, particularly for projects with multiple modules. The build performance should be roughly the same as running gradle on the command line.
    • Instrumentation test support, which was added in 0.1.8, now also supports debugging instrumentation tests
    • Various bug fixes

    Details: http://tools.android.com/recent/androidstudio019released

    Load specified YouTube playlist

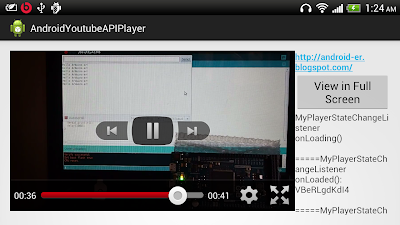
    To load specified YouTube playlist in YouTube Android Player, simple call cuePlaylist(PlayList_ID) method of YouTubePlayer object, instead of cueVideo(VIDEO_ID) method.

    Load specified YouTube playlist

    Modify onInitializationSuccess(Provider provider, YouTubePlayer player, boolean wasRestored) method in MainActivity.java from last exercise "Example to use YouTubePlayerFragment of YouTube Android Player API".

     public static final String PlayList_ID = "PLP7qPet500dfglA7FFTxBmB_snxCaMHDJ";
    
     @Override
     public void onInitializationSuccess(Provider provider, YouTubePlayer player,
       boolean wasRestored) {
      
      youTubePlayer = player;
      
      Toast.makeText(getApplicationContext(), 
        "YouTubePlayer.onInitializationSuccess()", 
        Toast.LENGTH_LONG).show();
      
      youTubePlayer.setPlayerStateChangeListener(myPlayerStateChangeListener);
      youTubePlayer.setPlaybackEventListener(myPlaybackEventListener);
      
      if (!wasRestored) {
       //player.cueVideo(VIDEO_ID);
       player.cuePlaylist(PlayList_ID);
      }
    
     }


    download filesDownload the files.

    Download APK to try on your device.


    The tutorial: YouTube Android Player API step-by-step