Friday, January 29, 2016

Java code to listing Network Interface Addresses, run on Windows 10

One of the most useful pieces of information you can get from a network interface is the list of IP addresses that are assigned to it. You can obtain this information from a NetworkInterface instance by using one of two methods. The first method, getInetAddresses(), returns an Enumeration of InetAddress. The other method, getInterfaceAddresses(), returns a list of java.net.InterfaceAddress instances. This method is used when you need more information about an interface address beyond its IP address. For example, you might need additional information about the subnet mask and broadcast address when the address is an IPv4 address, and a network prefix length in the case of an IPv6 address. ~ https://docs.oracle.com/javase/tutorial/networking/nifs/listing.html

The following example program lists all the network interfaces and their addresses on a machine (tested on PC running Windows 10):
package javalistinetaddress;

import java.net.InetAddress;
import java.net.NetworkInterface;
import java.net.SocketException;
import java.util.Collections;
import java.util.Enumeration;

public class JavaListInetAddress {

    public static void main(String[] args) throws SocketException {
        Enumeration<NetworkInterface> nets = NetworkInterface.getNetworkInterfaces();
        for (NetworkInterface netint : Collections.list(nets))
            displayInterfaceInformation(netint);
    }
    
    static void displayInterfaceInformation(NetworkInterface netint) throws SocketException {
        System.out.printf("Display name: %s\n", netint.getDisplayName());
        System.out.printf("Name: %s\n", netint.getName());
        Enumeration<InetAddress> inetAddresses = netint.getInetAddresses();
        for (InetAddress inetAddress : Collections.list(inetAddresses)) {
            System.out.printf("InetAddress: %s\n", inetAddress);
        }
        System.out.printf("\n");
     }
    
}


Related:
Java code to listing Network Interface Addresses, run on Raspberry Pi/Raspbian Jessie

Wednesday, January 27, 2016

Android 6 for Programmers: An App-Driven Approach (3rd Edition) (Deitel Developer Series)

Android 6 for Programmers: An App-Driven Approach (3rd Edition) (Deitel Developer Series)

The professional programmer’s Deitel® guide to smartphone and tablet app development using Android™ 6 and Android Studio Billions of apps have been downloaded from Google Play™! This book gives you everything you need to start developing great apps quickly and getting them published on Google Play™. The book uses an app-driven approach–each new technology is discussed in the context of eight fully coded and tested Android apps, complete with syntax shading, code highlighting, code walkthroughs and sample outputs. Apps you’ll develop include:
  • Welcome App
  • Cannon Game
  • Tip Calculator
  • Weather Viewer
  • Flag Quiz
  • Twitter® Searches
  • Doodlz
  • Address Book
Practical, Example-Rich Coverage of:
  • Android 6, Android Studio: Gradle™, Vector Asset Studio, Theme Editor
  • Material Design App Templates and Themes
  • AppCompat Library, Android Design Support Library, RecyclerView, FloatingActionButton, TextInputLayout
  • Material Design Elevation and Icons
  • REST Web Services/JSON, Threading, SQLite™ Database, Android 6 Permissions
  • Cursors, Loaders, ContentProviders
  • Supporting Various Screen Sizes/Resolutions
  • Accessibility, Internationalization 
  • Activities, Fragments, Intents, Preferences
  • GUIs, Layouts, Menus, Resource Files, Events, Touch/Gesture Processing, Images, Audio, Graphics, Animation
  • Immersive Mode, PrintHelper 
  • Google Play™ Store, App Publishing, Pricing, Marketing, In-App Advertising, In-App Billing, Virtual Goods and more
Visit www.deitel.com
  • Download code examples
  • For info on Deitel’s Dive Into® Series programming training courses, visit www.deitel.com/training or write to deitel@deitel.com
  • Follow the Deitels on Facebook® at facebook.com/DeitelFan, Twitter® at @deitel, Google+™ at google.com/+DeitelFan, LinkedIn® at bit.ly/DeitelLinkedIn, YouTube™ at youtube.com/DeitelTV
  • Subscribe to the Deitel ® Buzz e-mail newsletter at www.deitel.com/newsletter/ subscribe.html
About This Book
The first-generation Android phones were released in October 2008. As of June 2015, Android had 82.8% of the global smartphone market share, compared to 13.9% for Apple and 2.6% for Microsoft (http:// www.idc.com/prodserv/smartphone-os-market-share.jsp). Billions of apps have been downloaded from Google Play and more than one billion Android devices were shipped worldwide in 2014 (http://www.cnet.com/news/android-shipments-exceed- 1-billion-for-first-time-in-2014/). The opportunities for Android app developers are enormous.

This book presents leading-edge computing technologies for professional software developers. At the heart of the book is the Deitel app-driven approach–concepts are presented in the context of complete working Android apps, rather than using code snippets. The introduction and app test drives at the beginning of each chapter show one or more sample executions. The book’s source code is available at http://www.deitel.com/books/AndroidFP3.

The apps in this book were carefully designed to introduce you to key Android features and APIs. You’ll quickly learn everything you need to start building Android apps–beginning with a test-drive of the Tip Calculator app in Chapter 1, then building one new app in each of Chapters 2 through 9. By the time you reach Chapter 10, you’ll be ready to create your own apps for submission to Google Play and other app marketplaces. You’ll master the Google Play submission process, including uploading your apps. You’ll decide whether to sell your apps or offer them for free, and learn how to market them via social media and monetize them with in-app advertising, in-app billing, virtual goods and more.

Tuesday, January 26, 2016

Wearable Android: Android Wear and Google FIT App Development

Build "Wearable" Applications on the Android Wear and Google Fit Platforms

Wearable Android: Android Wear and Google FIT App Development

This book covers wearable computing and wearable application development particularly for Android Wear (smartwatches) and Google Fit (fitness sensors). It provides relevant history, background and core concepts of wearable computing and ubiquitous computing, as a foundation for designing/developing applications for the Android Wear and Google Fit platforms. This book is intended for Android wearable enthusiasts, technologists and software developers.
  • Gain insight into  “wearables” in the modern consumer ecosystem of a multitude of devices, ubiquitous computing, cloud computing and intelligent personal assistants
  • Learn the Android Wear and Google Fit APIs and jump-start hands-on development including: setting up an Android development environment suitable for Android Wear and Google Fit , setting up smartwatch and fitness devices for development and debugging , writing applications that install and execute on Android Wear (smartwatch) devices , and  applications that run on your handheld Android devices and find and connect to fitness sensors and access fitness data, and more
  • Catch up with the new Android 5.0 “Lollipop”, Android Studio and the gradle based build system

Thursday, January 21, 2016

Android NDK Game Development Cookbook

Android NDK Game Development Cookbook

For C++ developers, this is the book that can swiftly propel you into the potentially profitable world of Android games. The 70+ step-by-step recipes using Android NDK will give you the wide-ranging knowledge you need.

Overview
  • Tips and tricks for developing and debugging mobile games on your desktop
  • Enhance your applications by writing multithreaded code for audio playback, network access, and asynchronous resource loading
  • Enhance your game development skills by using modern OpenGL ES and develop applications without using an IDE
  • Features two ready-to-run Android games
In Detail

Android NDK is used for multimedia applications which require direct access to a system's resources. Android NDK is also the key for portability, which in turn provides a reasonably comfortable development and debugging process using familiar tools such as GCC and Clang toolchains. If your wish to build Android games using this amazing framework, then this book is a must-have.

This book provides you with a number of clear step-by-step recipes which will help you to start developing mobile games with Android NDK and boost your productivity debugging them on your computer. This book will also provide you with new ways of working as well as some useful tips and tricks that will demonstrably increase your development speed and efficiency.

This book will take you through a number of easy-to-follow recipes that will help you to take advantage of the Android NDK as well as some popular C++ libraries. It presents Android application development in C++ and shows you how to create a complete gaming application.

You will learn how to write portable multithreaded C++ code, use HTTP networking, play audio files, use OpenGL ES, to render high-quality text, and how to recognize user gestures on multi-touch devices. If you want to leverage your C++ skills in mobile development and add performance to your Android applications, then this is the book for you.

What you will learn from this book
  • Port popular C++ libraries to Android
  • Write portable multithreaded code
  • Play audio with OpenAL
  • Implement gesture recognition
  • Render text with FreeType
  • Use OpenGL ES to port and abstract APIs from the game code to develop games on a desktop PC
  • Debug mobile applications on your desktop
  • Access Flickr and Picasa web services from C++
  • Extract resources from APK archives
  • Develop Android applications without an IDE
Approach

A systematic guide consisting of over 70 recipes which focus on helping you build portable mobile games and aims to enhance your game development skills with clear instructions.

Who this book is written for

If you are a C++ developer who wants to jump into the world of Android game development and who wants to use the power of existing C++ libraries in your existing Android Java applications, then this book is for you. You need to have basic knowledge of C or C++ including pointer manipulation, multithreading, and object-oriented programming concepts as well as some experience developing applications without using an IDE.

Wednesday, January 20, 2016

Implement checkable items in OptionsMenu of Toolbar

Example to implement checkable items in OptionsMenu of Toolbar, modify from last example"Set image on Toolbar".

Modify menu/menu_main.xml, to add checkable items:
<?xml version="1.0" encoding="utf-8"?>
<menu xmlns:android="http://schemas.android.com/apk/res/android"
    xmlns:app="http://schemas.android.com/apk/res-auto">
    <item
        android:id="@+id/item_checkable1"
        android:orderInCategory="100"
        android:title="Checkable opt 1"
        android:checkable="true"
        android:checked="true"/>
    <item
        android:id="@+id/item_checkable2"
        android:orderInCategory="100"
        android:title="Checkable opt 2"
        android:checkable="true"
        android:checked="false"/>
    <item
        android:id="@+id/item_normal"
        android:orderInCategory="100"
        android:title="Normal item"/>

</menu>

Modify MainActivity.java, modify onOptionsItemSelected() to handle the item click.
package com.blogspot.android_er.androidtoolbar;

import android.os.Bundle;
import android.support.v7.app.AppCompatActivity;
import android.support.v7.widget.Toolbar;
import android.view.Menu;
import android.view.MenuItem;
import android.widget.Toast;

public class MainActivity extends AppCompatActivity {

    @Override
    protected void onCreate(Bundle savedInstanceState) {
        super.onCreate(savedInstanceState);
        setContentView(R.layout.activity_main);
        Toolbar toolbar = (Toolbar)findViewById(R.id.toolbar);
        setSupportActionBar(toolbar);

        getSupportActionBar().setTitle("Toolbar example");
        toolbar.setSubtitle("Android-er.blogspot.com");
        toolbar.setLogo(android.R.drawable.ic_menu_info_details);
    }

    @Override
    public boolean onCreateOptionsMenu(Menu menu) {
        getMenuInflater().inflate(R.menu.menu_main, menu);
        return super.onCreateOptionsMenu(menu);
    }

    @Override
    public boolean onOptionsItemSelected(MenuItem item) {

        Toast.makeText(this, item.getTitle(), Toast.LENGTH_LONG).show();

        int item_id = item.getItemId();
        switch(item_id){
            case R.id.item_checkable1:
                if(item.isChecked()){
                    item.setChecked(false);
                }else{
                    item.setChecked(true);
                }
                break;
            case R.id.item_checkable2:
                if(item.isChecked()){
                    item.setChecked(false);
                }else{
                    item.setChecked(true);
                }
                break;
        }

        return super.onOptionsItemSelected(item);
    }
}


Next:
Add button inside Toolbar

Custom Spinner with text color

Modify from old post "Custom ArrayAdapter for Spinner, with custom icons", change to make the custom Spinner with selected text color.


Add a custom spinner in layout, layout/activity_main.xml.
<?xml version="1.0" encoding="utf-8"?>
<LinearLayout xmlns:android="http://schemas.android.com/apk/res/android"
    xmlns:tools="http://schemas.android.com/tools"
    android:layout_width="match_parent"
    android:layout_height="match_parent"
    android:padding="16dp"
    android:orientation="vertical"
    tools:context="com.blogspot.android_er.androidcustomspinner.MainActivity">

    <TextView
        android:layout_width="wrap_content"
        android:layout_height="wrap_content"
        android:layout_gravity="center_horizontal"
        android:autoLink="web"
        android:text="http://android-er.blogspot.com/"
        android:textStyle="bold" />
    <Spinner
        android:id="@+id/spinner"
        android:layout_width="match_parent"
        android:layout_height="wrap_content" />
</LinearLayout>


layout/row.xml
<?xml version="1.0" encoding="utf-8"?>
<LinearLayout xmlns:android="http://schemas.android.com/apk/res/android"
    android:layout_width="fill_parent"
    android:layout_height="wrap_content"
    android:orientation="horizontal">

    <ImageView
        android:id="@+id/icon"
        android:layout_width="wrap_content"
        android:layout_height="wrap_content"
        android:src="@mipmap/ic_launcher" />

    <TextView
        android:id="@+id/weekofday"
        android:layout_width="wrap_content"
        android:layout_height="wrap_content"
        android:textSize="20dp"
        android:textStyle="bold"
        android:textColor="#0000F0"/>
</LinearLayout>

MainActivity.java
package com.blogspot.android_er.androidcustomspinner;

import android.content.Context;
import android.os.Bundle;
import android.support.v7.app.AppCompatActivity;
import android.view.LayoutInflater;
import android.view.View;
import android.view.ViewGroup;
import android.widget.ArrayAdapter;
import android.widget.Spinner;
import android.widget.TextView;

public class MainActivity extends AppCompatActivity {

    String[] DayOfWeek = {"Sunday", "Monday", "Tuesday",
            "Wednesday", "Thursday", "Friday", "Saturday"};

    @Override
    protected void onCreate(Bundle savedInstanceState) {
        super.onCreate(savedInstanceState);
        setContentView(R.layout.activity_main);
        Spinner mySpinner = (Spinner)findViewById(R.id.spinner);
        mySpinner.setAdapter(new MyCustomAdapter(MainActivity.this, R.layout.row, DayOfWeek));
    }

    public class MyCustomAdapter extends ArrayAdapter<String> {

        public MyCustomAdapter(Context context, int textViewResourceId,
                               String[] objects) {
            super(context, textViewResourceId, objects);
        }

        @Override
        public View getDropDownView(int position, View convertView,
                                    ViewGroup parent) {
            return getCustomView(position, convertView, parent);
        }

        @Override
        public View getView(int position, View convertView, ViewGroup parent) {
            return getCustomView(position, convertView, parent);
        }

        public View getCustomView(int position, View convertView, ViewGroup parent) {
            LayoutInflater inflater=getLayoutInflater();
            View row=inflater.inflate(R.layout.row, parent, false);
            TextView label=(TextView)row.findViewById(R.id.weekofday);
            label.setText(DayOfWeek[position]);

            if(position == 0){
                label.setTextColor(0xFFF00000);
            }

            return row;
        }
    }
}


Tuesday, January 19, 2016

Set image on Toolbar

This post show how to set image on Toolbar:

Modify from last post "Add OptionsMenu to Toolbar".

To set background image of Toolbar, edit layout/activity_main.xml to set android:background of <android.support.v7.widget.Toolbar>
<?xml version="1.0" encoding="utf-8"?>
<LinearLayout xmlns:android="http://schemas.android.com/apk/res/android"
    xmlns:tools="http://schemas.android.com/tools"
    android:layout_width="match_parent"
    android:layout_height="match_parent"
    android:paddingBottom="@dimen/activity_vertical_margin"
    android:paddingLeft="@dimen/activity_horizontal_margin"
    android:paddingRight="@dimen/activity_horizontal_margin"
    android:paddingTop="@dimen/activity_vertical_margin"
    android:orientation="vertical"
    tools:context="com.blogspot.android_er.androidtoolbar.MainActivity">

    <android.support.v7.widget.Toolbar
        android:id="@+id/toolbar"
        android:layout_width="match_parent"
        android:layout_height="56dp"
        android:background="@mipmap/ic_launcher"/>
    <TextView
        android:layout_width="wrap_content"
        android:layout_height="wrap_content"
        android:text="Hello World!" />
</LinearLayout>


Another method, add ImageView inside <android.support.v7.widget.Toolbar>
<?xml version="1.0" encoding="utf-8"?>
<LinearLayout xmlns:android="http://schemas.android.com/apk/res/android"
    xmlns:tools="http://schemas.android.com/tools"
    android:layout_width="match_parent"
    android:layout_height="match_parent"
    android:paddingBottom="@dimen/activity_vertical_margin"
    android:paddingLeft="@dimen/activity_horizontal_margin"
    android:paddingRight="@dimen/activity_horizontal_margin"
    android:paddingTop="@dimen/activity_vertical_margin"
    android:orientation="vertical"
    tools:context="com.blogspot.android_er.androidtoolbar.MainActivity">

    <android.support.v7.widget.Toolbar
        android:id="@+id/toolbar"
        android:layout_width="match_parent"
        android:layout_height="56dp"
        android:background="#FFA000">
        <ImageView
            android:id="@+id/toolbarimage"
            android:layout_width="wrap_content"
            android:layout_height="wrap_content"
            android:src="@mipmap/ic_launcher"/>
    </android.support.v7.widget.Toolbar>
    <TextView
        android:layout_width="wrap_content"
        android:layout_height="wrap_content"
        android:text="Hello World!" />
</LinearLayout>


In this examples, also modify menu/menu_main.xml to set all app:showAsAction="ifRoom".
<?xml version="1.0" encoding="utf-8"?>
<menu xmlns:android="http://schemas.android.com/apk/res/android"
    xmlns:app="http://schemas.android.com/apk/res-auto">
    <item
        android:id="@+id/menu_camera"
        android:icon="@android:drawable/ic_menu_camera"
        android:orderInCategory="100"
        android:title="camera"
        app:showAsAction="ifRoom"/>
    <item
        android:id="@+id/menu_compass"
        android:icon="@android:drawable/ic_menu_compass"
        android:orderInCategory="100"
        android:title="compass"
        app:showAsAction="ifRoom"/>
    <item
        android:id="@+id/menu_agenda"
        android:icon="@android:drawable/ic_menu_agenda"
        android:orderInCategory="100"
        android:title="agenda"
        app:showAsAction="ifRoom"/>
    <item
        android:id="@+id/menu_gallery"
        android:icon="@android:drawable/ic_menu_gallery"
        android:orderInCategory="100"
        android:title="gallery"
        app:showAsAction="ifRoom"/>
    <item
        android:id="@+id/menu_calendar"
        android:icon="@android:drawable/ic_menu_my_calendar"
        android:orderInCategory="100"
        android:title="calendar"
        app:showAsAction="ifRoom"/>
</menu>

Next:
- Implement checkable items in OptionsMenu of Toolbar

Monday, January 18, 2016

Add OptionsMenu to Toolbar


Modify from last example of "Set title, subtitle and logo of Toolbar", to add OptionsMenu to Toolbar.


Create /res/menu/menu_main.xml to define our OptionsMenu.
<?xml version="1.0" encoding="utf-8"?>
<menu xmlns:android="http://schemas.android.com/apk/res/android"
    xmlns:app="http://schemas.android.com/apk/res-auto">
    <item
        android:id="@+id/menu_camera"
        android:icon="@android:drawable/ic_menu_camera"
        android:orderInCategory="100"
        android:title="camera"
        app:showAsAction="always"/>
    <item
        android:id="@+id/menu_compass"
        android:icon="@android:drawable/ic_menu_compass"
        android:orderInCategory="100"
        android:title="compass"
        app:showAsAction="always"/>
    <item
        android:id="@+id/menu_agenda"
        android:icon="@android:drawable/ic_menu_agenda"
        android:orderInCategory="100"
        android:title="agenda"
        app:showAsAction="always"/>
    <item
        android:id="@+id/menu_gallery"
        android:icon="@android:drawable/ic_menu_gallery"
        android:orderInCategory="100"
        android:title="gallery"
        app:showAsAction="always"/>
    <item
        android:id="@+id/menu_calendar"
        android:icon="@android:drawable/ic_menu_my_calendar"
        android:orderInCategory="100"
        android:title="calendar"
        app:showAsAction="always"/>
</menu>

Modify MainActivity.java, override onCreateOptionsMenu() and onOptionsItemSelected().
package com.blogspot.android_er.androidtoolbar;

import android.os.Bundle;
import android.support.v7.app.AppCompatActivity;
import android.support.v7.widget.Toolbar;
import android.view.Menu;
import android.view.MenuItem;
import android.widget.Toast;

public class MainActivity extends AppCompatActivity {

    @Override
    protected void onCreate(Bundle savedInstanceState) {
        super.onCreate(savedInstanceState);
        setContentView(R.layout.activity_main);
        Toolbar toolbar = (Toolbar)findViewById(R.id.toolbar);
        setSupportActionBar(toolbar);

        getSupportActionBar().setTitle("Toolbar example");
        toolbar.setSubtitle("Android-er.blogspot.com");
        toolbar.setLogo(android.R.drawable.ic_menu_info_details);

    }

    @Override
    public boolean onCreateOptionsMenu(Menu menu) {
        getMenuInflater().inflate(R.menu.menu_main, menu);
        return super.onCreateOptionsMenu(menu);
    }

    @Override
    public boolean onOptionsItemSelected(MenuItem item) {
        Toast.makeText(this, item.getTitle(), Toast.LENGTH_LONG).show();
        return super.onOptionsItemSelected(item);
    }
}


Next:
Set image on Toolbar

Get WiFi link speed and frequency

Example show how to get WiFi link speed and frequency:


When WiFi OFF


package com.blogspot.android_er.androidwifispeedfrequency;

import android.content.Context;
import android.net.wifi.WifiInfo;
import android.net.wifi.WifiManager;
import android.os.Build;
import android.os.Bundle;
import android.support.v7.app.AppCompatActivity;
import android.widget.TextView;

public class MainActivity extends AppCompatActivity {

    @Override
    protected void onCreate(Bundle savedInstanceState) {
        super.onCreate(savedInstanceState);
        setContentView(R.layout.activity_main);

        TextView textInfo = (TextView)findViewById(R.id.info);
        TextView textSpeed = (TextView)findViewById(R.id.speed);
        TextView textFreq = (TextView)findViewById(R.id.frequency);

        WifiManager wifiManager = (WifiManager) getSystemService(Context.WIFI_SERVICE);
        if(wifiManager!=null){
            textInfo.setText(wifiManager.toString());
            WifiInfo wifiInfo = wifiManager.getConnectionInfo();
            textSpeed.setText("Link Speed: " + wifiInfo.getLinkSpeed() + wifiInfo.LINK_SPEED_UNITS);
            if (Build.VERSION.SDK_INT >= Build.VERSION_CODES.LOLLIPOP) {
                textFreq.setText("Freuency: " + wifiInfo.getFrequency() + wifiInfo.FREQUENCY_UNITS);
            }
        }else{
            textInfo.setText("wifiManager == null!");
        }
    }
}


<?xml version="1.0" encoding="utf-8"?>
<LinearLayout xmlns:android="http://schemas.android.com/apk/res/android"
    xmlns:tools="http://schemas.android.com/tools"
    android:layout_width="match_parent"
    android:layout_height="match_parent"
    android:padding="16dp"
    android:orientation="vertical"
    tools:context="com.blogspot.android_er.androidwifispeedfrequency.MainActivity">

    <TextView
        android:layout_width="wrap_content"
        android:layout_height="wrap_content"
        android:layout_gravity="center_horizontal"
        android:autoLink="web"
        android:text="http://android-er.blogspot.com/"
        android:textStyle="bold" />

    <TextView
        android:id="@+id/info"
        android:layout_width="match_parent"
        android:layout_height="wrap_content"
        android:textStyle="italic"/>
    <TextView
        android:id="@+id/speed"
        android:layout_width="match_parent"
        android:layout_height="wrap_content"
        android:textStyle="bold"
        android:textSize="30dp"/>
    <TextView
        android:id="@+id/frequency"
        android:layout_width="match_parent"
        android:layout_height="wrap_content"
        android:textStyle="bold"
        android:textSize="30dp"/>

</LinearLayout>


uses-permission of "android.permission.ACCESS_WIFI_STATE" is needed in AndroidManifest.xml.

Set title, subtitle and logo of Toolbar


Last post show how to "Replace ActionBar with Toolbar". Here show how to set title subtitle and logo of Toolbar.


Edit MainActivity.java
package com.blogspot.android_er.androidtoolbar;

import android.os.Bundle;
import android.support.v7.app.AppCompatActivity;
import android.support.v7.widget.Toolbar;

public class MainActivity extends AppCompatActivity {

    @Override
    protected void onCreate(Bundle savedInstanceState) {
        super.onCreate(savedInstanceState);
        setContentView(R.layout.activity_main);
        Toolbar toolbar = (Toolbar)findViewById(R.id.toolbar);
        setSupportActionBar(toolbar);

        getSupportActionBar().setTitle("Toolbar example");
        toolbar.setSubtitle("Android-er.blogspot.com");
        toolbar.setLogo(android.R.drawable.ic_menu_info_details);

    }
}


In the example, also modify layout/activity_main.xml to use LinearLayout.
<?xml version="1.0" encoding="utf-8"?>
<LinearLayout xmlns:android="http://schemas.android.com/apk/res/android"
    xmlns:tools="http://schemas.android.com/tools"
    android:layout_width="match_parent"
    android:layout_height="match_parent"
    android:paddingBottom="@dimen/activity_vertical_margin"
    android:paddingLeft="@dimen/activity_horizontal_margin"
    android:paddingRight="@dimen/activity_horizontal_margin"
    android:paddingTop="@dimen/activity_vertical_margin"
    android:orientation="vertical"
    tools:context="com.blogspot.android_er.androidtoolbar.MainActivity">

    <android.support.v7.widget.Toolbar
        android:id="@+id/toolbar"
        android:layout_width="match_parent"
        android:layout_height="56dp"
        android:background="#FFA000"/>
    <TextView
        android:layout_width="wrap_content"
        android:layout_height="wrap_content"
        android:text="Hello World!" />
</LinearLayout>


Next:
Add OptionsMenu to Toolbar

Sunday, January 17, 2016

Replace ActionBar with android.support.v7.widget.Toolbar

A Toolbar is a generalization of action bars for use within application layouts. While an action bar is traditionally part of an Activity's opaque window decor controlled by the framework, a Toolbar may be placed at any arbitrary level of nesting within a view hierarchy. An application may choose to designate a Toolbar as the action bar for an Activity using the setSupportActionBar() method.

This example show how to replace ActionBar with android.support.v7.widget.Toolbar.


- Create a new project with Minimum SDK of API 16, select template of Empty Activity.

- Edit res/values/styles.xml to use style of "Theme.AppCompat.Light.NoActionBar".
<resources>

    <!-- Base application theme. -->
    <style name="AppTheme" parent="Theme.AppCompat.Light.NoActionBar">
        <!-- Customize your theme here. -->
        <item name="colorPrimary">@color/colorPrimary</item>
        <item name="colorPrimaryDark">@color/colorPrimaryDark</item>
        <item name="colorAccent">@color/colorAccent</item>
    </style>

</resources>

- Add <android.support.v7.widget.Toolbar> to /res/layout/activity_main.xml
<?xml version="1.0" encoding="utf-8"?>
<RelativeLayout xmlns:android="http://schemas.android.com/apk/res/android"
    xmlns:tools="http://schemas.android.com/tools"
    android:layout_width="match_parent"
    android:layout_height="match_parent"
    android:paddingBottom="@dimen/activity_vertical_margin"
    android:paddingLeft="@dimen/activity_horizontal_margin"
    android:paddingRight="@dimen/activity_horizontal_margin"
    android:paddingTop="@dimen/activity_vertical_margin"
    tools:context="com.blogspot.android_er.androidtoolbar.MainActivity">

    <android.support.v7.widget.Toolbar
        android:id="@+id/toolbar"
        android:layout_width="match_parent"
        android:layout_height="56dp"
        android:background="#FFA000"/>
    <TextView
        android:layout_width="wrap_content"
        android:layout_height="wrap_content"
        android:text="Hello World!" />
</RelativeLayout>


- Edit MainActivity.java to call setSupportActionBar(toolbar) method.
package com.blogspot.android_er.androidtoolbar;

import android.os.Bundle;
import android.support.v7.app.AppCompatActivity;
import android.support.v7.widget.Toolbar;

public class MainActivity extends AppCompatActivity {

    @Override
    protected void onCreate(Bundle savedInstanceState) {
        super.onCreate(savedInstanceState);
        setContentView(R.layout.activity_main);
        Toolbar toolbar = (Toolbar)findViewById(R.id.toolbar);
        setSupportActionBar(toolbar);
    }
}


- To make the Toolbar fill the width of the layout, edit /res/values/dimens.xml to set both "activity_horizontal_margin" and "activity_vertical_margin" to 0dp.
<resources>
    <!-- Default screen margins, per the Android Design guidelines. -->
    <dimen name="activity_horizontal_margin">0dp</dimen>
    <dimen name="activity_vertical_margin">0dp</dimen>
</resources>


This video show how-to in Android Studio, and how it shown on Android Emulator of API 16 and 23.


More:
Set title, subtitle and logo of Toolbar
Add OptionsMenu to Toolbar
Set image on Toolbar
- Implement checkable items in OptionsMenu of Toolbar
Add button inside Toolbar
Implement transparent status bar for android.support.v7.widget.Toolbar
- ToolBar with ProgressBar (with video show the steps to place ToolBar using Android Studio graphical Design Tool)


Saturday, January 16, 2016

Android Studio Game Development: Concepts and Design

Android Studio Game Development: Concepts and Design

This one of a kind short book walks any Android developer through the process of creating mobile games using the new Android Studio IDE. Android Studio offers a myriad of tools for developers such as enhanced intellisense and device emulation. This book provides a quick and easy to read format; introduces the reader to these key tools and gives them the knowledge they need to develop games in Android Studio.

What You’ll Learn
  • How to create projects in Android Studio
  • How to use the SDK manager to keep your Android SDK current
  • How to commit and get projects to and from Git hub
  • How to use OpenGL ES to load images
  • How to react to player input
  • How to debug your games using Android Studio
Audience

This book is for those who may be new to game development who have some experience with Android Studio IDE and Android.  To learn about Android Studio, check out Learn Android Studio IDE by Gerber and Craig (Apress).

Thursday, January 14, 2016

Beginning Hybrid Mobile Application Development

Beginning Hybrid Mobile Application Development

Today, a mobile device user prefers installed application over browsing internet; e.g. booking cab, buying movie tickets, watching you tube videos etc. Market share of mobile devices based on android, iOS & Windows Phone is considerable. Creating an installable application targeting these multiple devices involves too much of pain because of expertise required e.g. Java for android, Objective C for iOS and DotNET for Windows Phone. Shortcomings of this development approach are - more development time, it requires different expertise & involves less reusability of the code.

A solution to this problem is HTML 5, JQuery, CSS 3 based - Hybrid Mobile Applications .

These hybrid applications needs to be created once but after packaging can be deployed on multiple mobile devices like Android, iOS & Windows Phone. This kind of application development has edge over native application development.

Beginning Hybrid Mobile Application Development by Panhale can help each entity involved in mobile application development. With availability of multiple coding and packaging platforms; HMAD has even become more easy. Since HMAD happens in HTML & Javascript it's even possible that with small effort conditionally; existing web application can be converted into mobile based application. HMAD can give larger audience for many web applications by making it available as mobile application.

This book covers:
  • Basics of Hybrid Application Development
  • Platforms, Frameworks used for Hybrid Application Development
Internals of how hybrid applications work
  • Hybrid Application Development using available APIs
  • Accessing data in hybrid application
  • Role of JSON over XML in hybrid application
  • Code Security
This book will change the paradigm of mobile application development as the efforts are less, learning curve is small, success ratio is high and monetary benefit is on higher side!

Sunday, January 10, 2016

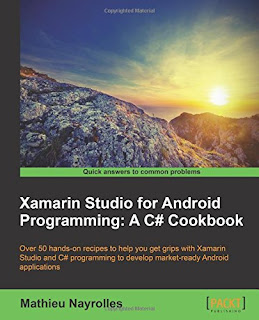
Xamarin Studio for Android Programming: A C# Cookbook

Over 50 hands-on recipes to help you get grips with Xamarin Studio and C# programming to develop market-ready Android applications

Xamarin Studio for Android Programming: A C# Cookbook

About This Book
  • Create Android applications with C# and Xamarin
  • Reuse your Android application to develop iOS and Windows Phone applications
  • Leverage the easy-to-succeed recipes to exploit the latest Android releases and develop new applications
Who This Book Is For
If you have already developed an Android applications with Java and you now intend to use C# and Xamarin Studio's capabilities, or if you have never taken the dive into mobiles, then this book is for you. It would be helpful to have some C# experience so you follow the recipes in this book, though knowledge of Android is not required.

What You Will Learn
  • Build a GUI for your Android applications
  • Explore Android activities and understand configuration changes
  • Manage multiscreens, icons, and multimedia in your applications
  • Start and bind Android services and create notifications
  • Create beautiful applications using the camera and animations
  • Effectively couple your phone's hardware with applications
  • Integrate advertisements and select the right advertisement providers for your applications
In Detail
Multiplatform applications have taken the development world by storm. This has revolutionized the selection of the right tools for the efficient development and deployment of applications. Xamarin studio is emerging as the preferred choice among .NET/C# developers. It enables them to design cross-platform applications using their favorite language and IDE. Xamarin studio is supported by the Mac OS and Windows platforms, and you can develop your own applications for iOS, Windows, or Android with its help.

This book takes you through all the stages of application development, right from getting started with Xamarin and developing a GUI to putting up your application on the store. The recipes will help you in acquiring sufficient knowledge to go about creating applications.

Starting with introducing Xamarin studio, its underlying technologies, and the Android ecosystem, the book goes on to cover the graphical aspects of creating Android applications. Moving on, you will learn more about data management with Android services. This is followed by techniques on how to interact with the Android OS and the phone's hardware, before finally concluding with mobile advertisements and Google Play. By the end of this book, you will have discovered all the specialties related to developing Android application with Xamarin Studio.

Style and approach
This book is organized around hands-on and practical recipes that focus on the development of Android applications using C# and Xamarin. Each recipe is easy to follow to help you progress efficiently through the book.

Saturday, January 9, 2016

Determine number of processor cores

Runtime.availableProcessors() returns the number of processor cores available to the VM, at least 1. Traditionally this returned the number currently online, but many mobile devices are able to take unused cores offline to save power, so releases newer than Android 4.2 (Jelly Bean) return the maximum number of cores that could be made available if there were no power or heat constraints.

Example:
package com.blogspot.android_er.androidnumberofcores;

import android.support.v7.app.AppCompatActivity;
import android.os.Bundle;
import android.widget.TextView;

public class MainActivity extends AppCompatActivity {

    @Override
    protected void onCreate(Bundle savedInstanceState) {
        super.onCreate(savedInstanceState);
        setContentView(R.layout.activity_main);

        int availableCores = Runtime.getRuntime().availableProcessors();
        TextView textViewNumOfCores = (TextView)findViewById(R.id.numofcore);
        textViewNumOfCores.setText("Available Processors: " + availableCores);
    }
}


<?xml version="1.0" encoding="utf-8"?>
<LinearLayout xmlns:android="http://schemas.android.com/apk/res/android"
    xmlns:tools="http://schemas.android.com/tools"
    android:layout_width="match_parent"
    android:layout_height="match_parent"
    android:padding="16dp"
    android:orientation="vertical"
    tools:context="com.blogspot.android_er.androidnumberofcores.MainActivity">

    <TextView
        android:layout_width="wrap_content"
        android:layout_height="wrap_content"
        android:layout_gravity="center_horizontal"
        android:autoLink="web"
        android:text="http://android-er.blogspot.com/"
        android:textStyle="bold" />

    <TextView
        android:id="@+id/numofcore"
        android:layout_width="match_parent"
        android:layout_height="wrap_content" />
</LinearLayout>


4 cores on Xiaomi Redmi 2

single core on Android Emulator

Xamarin Mobile Development for Android Cookbook

Over 80 hands-on recipes to unleash full potential for Xamarin in development and monetization of feature-packed, real-world Android apps

Xamarin Mobile Development for Android Cookbook

About This Book
  • Create a number of Android applications using the Xamarin Android platform
  • Extensively integrate your Android devices with other Android devices to enhance your app creation experience
  • A comprehensive guide packed with real-world scenarios and pro-level practices and techniques to help you build successful Android apps
Who This Book Is For
If you are a Xamarin developer who wants to create complete Android applications with Xamarin, then this book is ideal for you. No prior knowledge of Android development is needed, however a basic knowledge of C# and .NET would be useful.

What You Will Learn
  • Install and use Xamarin.Android with Xamarin Studio and Visual Studio
  • Design an app's user interface for multiple device configurations
  • Store and protect data in databases, files, and on the cloud
  • Utilize lists and collections to present data to the user
  • Communicate across the network using NFC or Bluetooth
  • Perform tasks in the background and update the user with notifications
  • Capture and play multimedia, such as video and audio, with the camera
  • Implement In-App Billing and Expansion Files and deploy to the store
In Detail
Xamarin is used by developers to write native iOS, Android, and Windows apps with native user interfaces and share code across multiple platforms not just on mobile devices, but on Windows, Mac OS X, and Linux.

Developing apps with Xamarin.Android allows you to use and re-use your code and your skills on different platforms, making you more productive in any development. Although it's not a write-once-run-anywhere framework, Xamarin provides native platform integration and optimizations. There is no middleware; Xamarin.Android talks directly to the system, taking your C# and F# code directly to the low levels.

This book will provide you with the necessary knowledge and skills to be part of the mobile development era using C#. Covering a wide range of recipes such as creating a simple application and using device features effectively, it will be your companion to the complete application development cycle.

Starting with installing the necessary tools, you will be guided on everything you need to develop an application ready to be deployed. You will learn the best practices for interacting with the device hardware, such as GPS, NFC, and Bluetooth. Furthermore, you will be able to manage multimedia resources such as photos and videos captured with the device camera, and so much more! By the end of this book, you will be able to create Android apps as a result of learning and implementing pro-level practices, techniques, and solutions. This book will ascertain a seamless and successful app building experience.

Style and approach
This book employs a step-by-step approach to Android app creation, explained in a conversational and easy-to-follow style. A wide range of examples are listed to ensure a complete understanding of how to deploy competent apps on the Android market.

Thursday, January 7, 2016

List supported ABIs

Example list Android devices SUPPORTED_ABIS, SUPPORTED_32_BIT_ABIS and SUPPORTED_64_BIT_ABIS.

Run on Emulator with Intel x86_64

Run on device, Nexus 7, with 32-bit ARM CPU
MainActivity.java
package com.blogspot.android_er.androidsupportedabis;

import android.os.Build;
import android.support.v7.app.AppCompatActivity;
import android.os.Bundle;
import android.widget.TextView;

public class MainActivity extends AppCompatActivity {

    @Override
    protected void onCreate(Bundle savedInstanceState) {
        super.onCreate(savedInstanceState);
        setContentView(R.layout.activity_main);

        TextView textSupportedABIs = (TextView)findViewById(R.id.supportedabis);

        textSupportedABIs.setText("Build.SUPPORTED_ABIS:\n");
        String[] SUPPORTED_ABIS = Build.SUPPORTED_ABIS;
        for(String abi : SUPPORTED_ABIS){
            textSupportedABIs.append(abi + "\n");
        }
        textSupportedABIs.append("\n");

        textSupportedABIs.append("Build.SUPPORTED_32_BIT_ABIS:\n");
        String[] SUPPORTED_32_BIT_ABIS = Build.SUPPORTED_32_BIT_ABIS;
        for(String abi32 : SUPPORTED_32_BIT_ABIS){
            textSupportedABIs.append(abi32 + "\n");
        }
        textSupportedABIs.append("\n");

        textSupportedABIs.append("Build.SUPPORTED_64_BIT_ABIS:\n");
        String[] SUPPORTED_64_BIT_ABIS = Build.SUPPORTED_64_BIT_ABIS;
        for(String abi64 : SUPPORTED_64_BIT_ABIS){
            textSupportedABIs.append(abi64 + "\n");
        }
        textSupportedABIs.append("\n");
    }
}


<?xml version="1.0" encoding="utf-8"?>
<LinearLayout xmlns:android="http://schemas.android.com/apk/res/android"
    xmlns:tools="http://schemas.android.com/tools"
    android:layout_width="match_parent"
    android:layout_height="match_parent"
    android:padding="16dp"
    android:orientation="vertical"
    tools:context="com.blogspot.android_er.androidsupportedabis.MainActivity">

    <TextView
        android:layout_width="wrap_content"
        android:layout_height="wrap_content"
        android:layout_gravity="center_horizontal"
        android:autoLink="web"
        android:text="http://android-er.blogspot.com/"
        android:textStyle="bold" />

    <TextView
        android:id="@+id/supportedabis"
        android:layout_width="match_parent"
        android:layout_height="wrap_content" />
</LinearLayout>


Related:
Display ABI using "adb shell getprop ro.product.cpu.abi" command

Display ABI using "adb shell getprop ro.product.cpu.abi" command


Different Android handsets use different CPUs, which in turn support different instruction sets. Each combination of CPU and instruction sets has its own Application Binary Interface, or ABI. The ABI defines, with great precision, how an application's machine code is supposed to interact with the system at runtime.

~ reference: http://developer.android.com/ndk/guides/abis.html


To identify the android device is 32-bit or 64-bit 

Android is going to support 64-bit, but there are so many android devices, how do developer know current device is 32-bit  or 64-bit  ?

Let's begin from  this command:

adb shell getprop ro.product.cpu.abi

getprop is an android utility to retrieve a property via the android property service.

~ referene: https://software.intel.com/en-us/blogs/2014/12/16/how-to-identify-the-image-is-32-bit-or-64-bit-user-space


This video show how the command "adb shell getprop ro.product.cpu.abi" run on device and emulator.


Related:
List supported ABIs programmatically

Learning Material Design

Learning Material Design

Key Features
  • Master the highly acclaimed Material Design paradigm and give your apps and pages the look that everyone is talking about
  • Get a mix of key theoretical concepts combined with enough practical examples to put each theory into practice so you can create elegant material interfaces with Android Studio and Polymer
  • Written by Kyle Mew, successful author with over a decade of mobile and web development experience, this book has both the touch of a developer as well as an experienced writer
Book Description
Google's Material Design language has taken the web development and design worlds by storm. Now available on many more platforms than Android, Material Design uses color, light, and movements to not only generate beautiful interfaces, but to provide intuitive navigation for the user.

Learning Material Design will teach you the fundamental theories of Material Design using code samples to put these theories into practice.

Focusing primarily on Android Studio, you'll create mobile interfaces using the most widely used and powerful material components, such as sliding drawers and floating action buttons. Each section will introduce the relevant Java classes and APIs required to implement these components. With the rules regarding structure, layout, iconography, and typography covered, we then move into animation and transition, possibly Material Design's most powerful concept, allowing complex hierarchies to be displayed simply and stylishly.

With all the basic technologies and concepts mastered, the book concludes by showing you how these skills can be applied to other platforms, in particular web apps, using the powerful Polymer library.

What you will learn
  • Implement Material Design on both mobile and web platforms that work on older handsets and browsers
  • Design stylish layouts with the Material Theme
  • Create and manage cards, lists, and grids
  • Design and implement sliding drawers for seamless navigation
  • Coordinate components to work together
  • Animate widgets and create transitions and animation program flow
  • Use Polymer to bring Material Design to your web pages
About the Author
Kyle Mew has been programming since the early eighties and has written for several technology websites. He has also written three radio plays and two other books on Android development.

Table of Contents
  • Getting Started with Material Design
  • Building a Mobile Layout
  • Common Components
  • Sliding Drawers and Navigation
  • Lists, Cards, and Data
  • Animations and Transitions
  • Material on Other Devices
  • Material Web Frameworks
  • The Materialize Framework
  • Material Design Lite


Wednesday, January 6, 2016

Mastering Android Application Development

Learn how to do more with the Android SDK with this advanced Android Application guide which shows you how to make even better Android apps that users will love

Mastering Android Application Development

About This Book
  • Learn how to design and build better Android apps to reach new users
  • Explore the latest features and tools in the Android SDK that will help you become a better developer
  • From concurrency to testing through to adding adverts and billing, this book ties together every element to help you deliver a high-quality Android application on Google Play
Who This Book Is For
Mastering Android Application Development is intended for Android developers that want insight on and guidance through the steps they need to take to give their creations the edge in a competitive market.

What You Will Learn
  • Create an Android project with Android M features
  • Design the basic navigation for our app using the UI components
  • Set up a cloud-based platform and store data on it
  • Implement programming patterns such as Singleton and Observer to maintain your project code for future use
  • Display lists and grids using Android RecyclerView
  • Implement user interface components and make your app look professional
  • Handle, download, and store images along with memory management
  • Create the database and content providers to perform read-write operations
  • Add notifications to the app and analytics to track the user's usage
  • Show a Google map view on your app
  • Configure minify to obfuscate the code
  • Add adverts and create products for purchase in your app
In Detail
There are millions of Android apps out there for people to download how do you make sure yours has the edge? It's not always about innovation and ideas the most successful apps are those that are able to satisfy customer demands they're the ones that look the best, the fastest, and the easiest and most intuitive to use.

This book shows you how to create Android applications that do precisely that it has been designed help you consider and answer those questions throughout the development process, so you can create applications that stand out against the crowd. Learn how to create exemplary UIs that contribute to a satisfying user experience through the lens of Material Design, and explore how to harness the range of features within the Android SDK to help you. Dive deeper into complex programming concepts and discover how to leverage concurrency and navigate memory management and image handling. You'll also find further guidance on testing and debugging so you can guarantee that your application is reliable and robust for users.

Beyond this you'll find out how to extend your app and add greater functionality, including notifications, location services, adverts and app billing (essential if you want to properly monetize your creation!). To make sure you have confidence at every stage in the process, the book also shows you how to release your app to the Play store to make sure your maximising your efforts to create a popular Android application!

Style and approach
This is a step-by-step guide where theory and practice are merged in a way that helps you to put a new concept into practice with ease. By helping to focus on the end result, and showing all the technical steps you need to get there, you will be poised for development success!

Monday, January 4, 2016

Android Studio Cookbook

Design, test, and debug your apps using Android Studio

Android Studio Cookbook

About This Book
  • See what Material design is about and how to apply it your apps
  • Explore the possibilities to develop apps that works on any type of device
  • A step-by-step practical guide that will help you build improved applications, change their look, and debug them
Who This Book Is For
This book is for developers that are already familiar with programming concepts and have already started creating apps for the Android platform, for example, by using the Eclipse IDE. It is for developers who intend to use Android Studio as their primary IDE or want to use Android Studio more efficiently.

What You Will Learn
  • Develop Android Studio applications using Genymotion
  • Apply the concepts of Material design to your applications
  • Use memory monitoring tools to tweak performance
  • Build applications for Android Wearable
  • Capture images, video, or audio within your Android app
  • Use content providers to display data
  • Build apps with a cloud-based backend
  • Create media-related apps that will run on phones, phablets, tablets, and TVs
In Detail
This book starts with an introduction of Android Studio and why you should use this IDE rather than Eclipse. Moving ahead, it teaches you to build a simple app that requires no backend setup but uses Google Cloud or Parse instead. After that, you will learn how to create an Android app that can send and receive text and images using Google Cloud or Parse as a backend. It explains the concepts of Material design and how to apply them to an Android app. Also, it shows you how to build an app that runs on an Android wear device.

Later, it explains how to build an app that takes advantage of the latest Android SDK while still supporting older Android versions. It also demonstrates how the performance of an app can be improved and how memory management tools that come with the Android Studio IDE can help you achieve this.

By the end of the book, you will be able to develop high quality apps with a minimum amount of effort using the Android Studio IDE.

Style and approach
This is a practical guide full of challenges and many real-world examples that demonstrate interesting development concepts. Besides smartphones and tablets, it also covers Android wearable devices and Android TV. Although strongly recommended, it is not necessary to own any Android device yourself.

Sunday, January 3, 2016

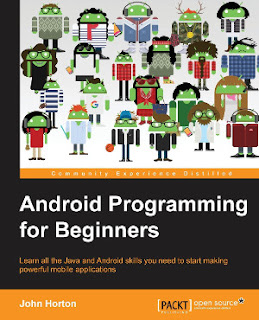
Android Programming for Beginners

Learn all the Java and Android skills you need to start making powerful mobile applications

Android Programming for Beginners

About This Book
  • Kick-start your Android programming career, or just have fun publishing apps to the Google Play marketplace
  • A first-principles introduction to Java, via Android, which means you'll be able to start building your own applications from scratch
  • Learn by example and build three real-world apps and over 40 mini apps throughout the book
Who This Book Is For
Are you trying to start a career in programming, but haven't found the right way in? Do you have a great idea for an app, but don't know how to make it a reality? Or maybe you're just frustrated that "to learn Android, you must know Android." If so, Android Programming for Beginners is for you. You don't need any programming experience to follow along with this book, just a computer and a sense of adventure.

What You Will Learn
  • Master the fundamentals of coding Java for Android
  • Install and set up your Android development environment
  • Build functional user interfaces with the Android Studio visual designer
  • Add user interaction, data captures, sound, and animation to your apps
  • Manage your apps' data using the built-in Android SQLite database
  • Find out about the design patterns used by professionals to make top-grade applications
  • Build, deploy, and publish real Android applications to the Google Play marketplace
In Detail
Android is the most popular OS in the world. There are millions of devices accessing tens of thousands of applications. It is many people's entry point into the world of technology; it is an operating system for everyone. Despite this, the entry-fee to actually make Android applications is usually a computer science degree, or five years' worth of Java experience.

Android Programming for Beginners will be your companion to create Android applications from scratch-whether you're looking to start your programming career, make an application for work, be reintroduced to mobile development, or are just looking to program for fun. We will introduce you to all the fundamental concepts of programming in an Android context, from the Java basics to working with the Android API. All examples are created from within Android Studio, the official Android development environment that helps supercharge your application development process.

After this crash-course, we'll dive deeper into Android programming and you'll learn how to create applications with a professional-standard UI through fragments, make location-aware apps with Google Maps integration, and store your user's data with SQLite. In addition, you'll see how to make your apps multilingual, capture images from a device's camera, and work with graphics, sound, and animations too.

By the end of this book, you'll be ready to start building your own custom applications in Android and Java.

Friday, January 1, 2016

List installed app and location using adb shell


To list all installed app and their installed location, enter the adb command:
adb shell pm list packages -f