Tuesday, January 31, 2012

Tween animation: rotate

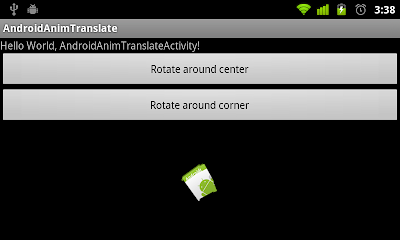
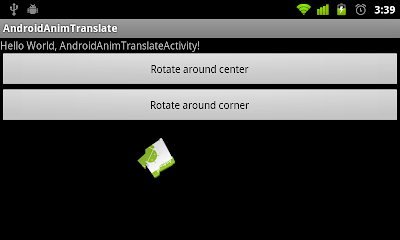
Implement tween animation of rotating

Rotate around center
Rotate around corner


Create /res/anim/rotate_center.xml for animation of rotating around center
<?xml version="1.0" encoding="utf-8"?>
<set xmlns:android="http://schemas.android.com/apk/res/android"
android:interpolator="@android:anim/linear_interpolator">
<rotate
android:fromDegrees="0"
android:toDegrees="360"
android:pivotX="50%"
android:pivotY="50%"
android:duration="2000"
android:startOffset="0"/>
</set>


Create /res/anim/rotate_corner.xml for animation of rotating around the upper-left corner
<?xml version="1.0" encoding="utf-8"?>
<set xmlns:android="http://schemas.android.com/apk/res/android"
android:interpolator="@android:anim/linear_interpolator">
<rotate
android:fromDegrees="0"
android:toDegrees="360"
android:pivotX="0%"
android:pivotY="0%"
android:duration="2000"
android:startOffset="0"/>
</set>


main.xml
<?xml version="1.0" encoding="utf-8"?>
<LinearLayout xmlns:android="http://schemas.android.com/apk/res/android"
android:layout_width="fill_parent"
android:layout_height="fill_parent"
android:orientation="vertical" >

<TextView
android:layout_width="fill_parent"
android:layout_height="wrap_content"
android:text="@string/hello" />
<Button
android:id="@+id/rotatecenter"
android:layout_width="fill_parent"
android:layout_height="wrap_content"
android:text="Rotate around center"/>
<Button
android:id="@+id/rotatecorner"
android:layout_width="fill_parent"
android:layout_height="wrap_content"
android:text="Rotate around corner"/>
<LinearLayout
android:layout_width="fill_parent"
android:layout_height="fill_parent"
android:orientation="vertical"
android:gravity="center">

<ImageView
android:id="@+id/floatingimage"
android:layout_width="wrap_content"
android:layout_height="wrap_content"
android:src="@drawable/ic_launcher" />

</LinearLayout>

</LinearLayout>


main activity
package com.exercise.AndroidAnimTranslate;

import android.app.Activity;
import android.os.Bundle;
import android.view.View;
import android.view.animation.Animation;
import android.view.animation.AnimationUtils;
import android.widget.Button;
import android.widget.ImageView;

public class AndroidAnimTranslateActivity extends Activity {
/** Called when the activity is first created. */
@Override
public void onCreate(Bundle savedInstanceState) {
super.onCreate(savedInstanceState);
setContentView(R.layout.main);

Button buttonRotateCenter = (Button)findViewById(R.id.rotatecenter);
Button buttonRotateCorner = (Button)findViewById(R.id.rotatecorner);
final ImageView floatingImage = (ImageView)findViewById(R.id.floatingimage);

final Animation animationRotateCenter = AnimationUtils.loadAnimation(this, R.anim.rotate_center);
buttonRotateCenter.setOnClickListener(new Button.OnClickListener(){

@Override
public void onClick(View arg0) {
// TODO Auto-generated method stub
floatingImage.startAnimation(animationRotateCenter);
}});

final Animation animationRotateCorner = AnimationUtils.loadAnimation(this, R.anim.rotate_corner);
buttonRotateCorner.setOnClickListener(new Button.OnClickListener(){

@Override
public void onClick(View arg0) {
// TODO Auto-generated method stub
floatingImage.startAnimation(animationRotateCorner);
}});
}
}


Download the files.

Related article:
- Animate falling action using Animation of translate
- Animate Fade In/Fade Out by changing Alpha
- Animation of Scale

Monday, January 30, 2012

Android Developers page on Google+


Google are launching the +Android Developers page on Google+! A place for Android developers everywhere to meet, share, and connect with the people behind the Android developer experience.

Google will be posting development tips, discussing updates to the SDK and developer tools, highlighting new Android training classes, and posting video and pics from Android developer events around the world.


Animate falling action using Animation of translate

It's a effect of Tweening. To move view from one position to another position.

Animate falling action using Animation of translate


Firstly, make a XML to define the animation, /res/anim/falling.xml.
<?xml version="1.0" encoding="utf-8"?>
<set xmlns:android="http://schemas.android.com/apk/res/android"
android:interpolator="@android:anim/linear_interpolator">
<translate
android:fromYDelta="-100%p"
android:toYDelta="0"
android:duration="2000"/>
</set>


Modify main.xml
<?xml version="1.0" encoding="utf-8"?>
<LinearLayout xmlns:android="http://schemas.android.com/apk/res/android"
android:layout_width="fill_parent"
android:layout_height="fill_parent"
android:orientation="vertical" >

<TextView
android:layout_width="fill_parent"
android:layout_height="wrap_content"
android:text="@string/hello" />
<Button
android:id="@+id/starttranslate"
android:layout_width="wrap_content"
android:layout_height="wrap_content"
android:text="Start Translate"/>
<LinearLayout
android:layout_width="fill_parent"
android:layout_height="fill_parent"
android:orientation="vertical"
android:gravity="bottom">

<ImageView
android:id="@+id/floatingimage"
android:layout_width="wrap_content"
android:layout_height="wrap_content"
android:src="@drawable/ic_launcher" />

</LinearLayout>

</LinearLayout>


Main activity
package com.exercise.AndroidAnimTranslate;

import android.app.Activity;
import android.os.Bundle;
import android.view.View;
import android.view.animation.Animation;
import android.view.animation.AnimationUtils;
import android.widget.Button;
import android.widget.ImageView;

public class AndroidAnimTranslateActivity extends Activity {
/** Called when the activity is first created. */
@Override
public void onCreate(Bundle savedInstanceState) {
super.onCreate(savedInstanceState);
setContentView(R.layout.main);

Button buttonStartTranslate = (Button)findViewById(R.id.starttranslate);
final ImageView floatingImage = (ImageView)findViewById(R.id.floatingimage);

final Animation animationFalling = AnimationUtils.loadAnimation(this, R.anim.falling);

buttonStartTranslate.setOnClickListener(new Button.OnClickListener(){

@Override
public void onClick(View arg0) {
// TODO Auto-generated method stub
floatingImage.startAnimation(animationFalling);
}});
}
}


Download the files.

Related article:
- Tween animation: rotate
- Animate Fade In/Fade Out by changing Alpha
- Animation of Scale
Saturday, January 28, 2012

Create ActionBar using XML

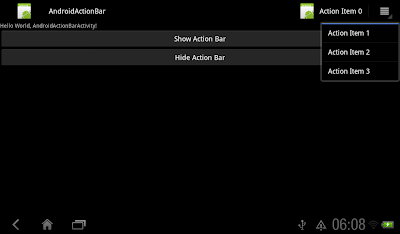
In the article "Show Action Item with icon and text", it was shown how to create ActionBar using Java code. The items of ActionBar can be defined using XML also.

Create ActionBar using XML

Modify from the article "Show Action Item with icon and text".

- Create a XML file /res/menu/menu.xml to define the menu items of the ActionBar.
<menu xmlns:android="http://schemas.android.com/apk/res/android">
    <item android:id="@+id/itemid_0"
        android:title="Action Item 0"
        android:icon="@drawable/ic_launcher"
        android:orderInCategory="0"
        android:showAsAction="ifRoom|withText" />
    <item android:id="@+id/itemid_1"
        android:title="Action Item 1"
        android:orderInCategory="0" />
    <item android:id="@+id/itemid_2"
        android:title="Action Item 2"
        android:orderInCategory="0" />
    <item android:id="@+id/itemid_3"
        android:title="Action Item 3"
        android:orderInCategory="0" />
</menu>


- Modify onCreateOptionsMenu() to inflate the XML file. Also modify onOptionsItemSelected() to change the itemId(s) accordingly.
package com.exercise.AndroidActionBar;

import android.app.ActionBar;
import android.app.Activity;
import android.os.Bundle;
import android.view.Menu;
import android.view.MenuInflater;
import android.view.MenuItem;
import android.view.View;
import android.widget.Button;
import android.widget.Toast;

public class AndroidActionBarActivity extends Activity {
    /** Called when the activity is first created. */
    @Override
    public void onCreate(Bundle savedInstanceState) {
        super.onCreate(savedInstanceState);
        setContentView(R.layout.main);
        
        Button showActionBar = (Button)findViewById(R.id.showactionbar);
        Button hideActionBar = (Button)findViewById(R.id.hideactionbar);
        
        showActionBar.setOnClickListener(new Button.OnClickListener(){

   @Override
   public void onClick(View arg0) {
    ActionBar actionBar = getActionBar();
    actionBar.show();
   }});
        
        hideActionBar.setOnClickListener(new Button.OnClickListener(){

   @Override
   public void onClick(View arg0) {
    ActionBar actionBar = getActionBar();
    actionBar.hide();
   }});
        
        
    }

 @Override
 public boolean onCreateOptionsMenu(Menu menu) {
  MenuInflater menuInflater = getMenuInflater();
        menuInflater.inflate(R.menu.menu, menu);

        return super.onCreateOptionsMenu(menu);
 }

 @Override
 public boolean onOptionsItemSelected(MenuItem item) {
  
  switch(item.getItemId()){
  case R.id.itemid_0:
   Toast.makeText(AndroidActionBarActivity.this, 
     "Action Item 0 selected!", 
     Toast.LENGTH_LONG).show();
   return true;
  case R.id.itemid_1:
   Toast.makeText(AndroidActionBarActivity.this, 
     "Action Item 1 selected!", 
     Toast.LENGTH_LONG).show();
   return true;
  case R.id.itemid_2:
   Toast.makeText(AndroidActionBarActivity.this, 
     "Action Item 2 selected!", 
     Toast.LENGTH_LONG).show();
   return true;
  case R.id.itemid_3:
   Toast.makeText(AndroidActionBarActivity.this, 
     "Action Item 3 selected!", 
     Toast.LENGTH_LONG).show();
   return true;
  default:
   return false;
  
  }
  
 }
}


Download the files.

Related:
- Split Action Bar for Android 4


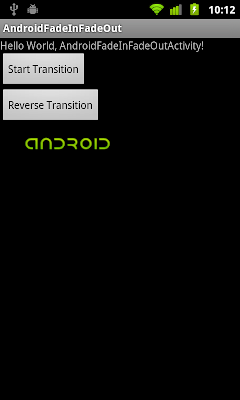
Implement Fade-Out transition effect using TransitionDrawable.reverseTransition()

Modify from last exercise "Implement Fade-In transition effect" to add Fade-Out transition effect when button pressed.

Implement Fade-Out transition effect using TransitionDrawable.reverseTransition()

Modify main.xml to add a button to start reverse transition.
<?xml version="1.0" encoding="utf-8"?>
<LinearLayout xmlns:android="http://schemas.android.com/apk/res/android"
android:layout_width="fill_parent"
android:layout_height="fill_parent"
android:orientation="vertical" >

<TextView
android:layout_width="fill_parent"
android:layout_height="wrap_content"
android:text="@string/hello" />
<Button
android:id="@+id/starttransition"
android:layout_width="wrap_content"
android:layout_height="wrap_content"
android:text="Start Transition" />
<Button
android:id="@+id/reversetransition"
android:layout_width="wrap_content"
android:layout_height="wrap_content"
android:text="Reverse Transition" />
<ImageView
android:id="@+id/mytransition"
android:layout_width="wrap_content"
android:layout_height="wrap_content"
android:src="@anim/fadein" />
</LinearLayout>


Modify activity java code to call myTransitionDrawable.reverseTransition(1000) when button pressed.
package com.exercise.AndroidFadeInFadeOut;

import android.app.Activity;
import android.graphics.drawable.TransitionDrawable;
import android.os.Bundle;
import android.view.View;
import android.widget.Button;
import android.widget.ImageView;

public class AndroidFadeInFadeOutActivity extends Activity {
/** Called when the activity is first created. */
@Override
public void onCreate(Bundle savedInstanceState) {
super.onCreate(savedInstanceState);
setContentView(R.layout.main);

ImageView myImage = (ImageView)findViewById(R.id.mytransition);
final TransitionDrawable myTransitionDrawable = (TransitionDrawable)myImage.getDrawable();

Button startTransition = (Button)findViewById(R.id.starttransition);
startTransition.setOnClickListener(new Button.OnClickListener(){

@Override
public void onClick(View arg0) {
// TODO Auto-generated method stub
myTransitionDrawable.startTransition(1000);
}});

Button reverseTransition = (Button)findViewById(R.id.reversetransition);
reverseTransition.setOnClickListener(new Button.OnClickListener(){

@Override
public void onClick(View arg0) {
// TODO Auto-generated method stub
myTransitionDrawable.reverseTransition(1000);
}});

}
}


Download the files.

Thursday, January 26, 2012

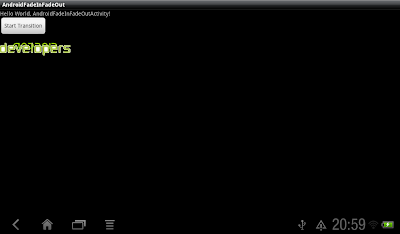
Implement Fade-In transition effect


- Download and copy the graphs to /res/drawable.


Create /res/anim/fadein.xml
<?xml version="1.0" encoding="utf-8"?>
<transition
xmlns:android="http://schemas.android.com/apk/res/android">
<item android:drawable="@drawable/android" />
<item android:drawable="@drawable/developer" />
</transition>


Modify main.xml
<?xml version="1.0" encoding="utf-8"?>
<LinearLayout xmlns:android="http://schemas.android.com/apk/res/android"
android:layout_width="fill_parent"
android:layout_height="fill_parent"
android:orientation="vertical" >

<TextView
android:layout_width="fill_parent"
android:layout_height="wrap_content"
android:text="@string/hello" />
<Button
android:id="@+id/starttransition"
android:layout_width="wrap_content"
android:layout_height="wrap_content"
android:text="Start Transition" />
<ImageView
android:id="@+id/mytransition"
android:layout_width="wrap_content"
android:layout_height="wrap_content"
android:src="@anim/fadein" />
</LinearLayout>


AndroidFadeInFadeOutActivity.java
package com.exercise.AndroidFadeInFadeOut;

import android.app.Activity;
import android.graphics.drawable.TransitionDrawable;
import android.os.Bundle;
import android.view.View;
import android.widget.Button;
import android.widget.ImageView;

public class AndroidFadeInFadeOutActivity extends Activity {
/** Called when the activity is first created. */
@Override
public void onCreate(Bundle savedInstanceState) {
super.onCreate(savedInstanceState);
setContentView(R.layout.main);

ImageView myImage = (ImageView)findViewById(R.id.mytransition);
final TransitionDrawable myTransitionDrawable = (TransitionDrawable)myImage.getDrawable();

Button startTransition = (Button)findViewById(R.id.starttransition);
startTransition.setOnClickListener(new Button.OnClickListener(){

@Override
public void onClick(View arg0) {
// TODO Auto-generated method stub
myTransitionDrawable.startTransition(1000);
}});
}
}


Download the files.

next:
- Implement Fade-Out transition effect using TransitionDrawable.reverseTransition()

Wednesday, January 25, 2012

Create AnimationDrawable using Java code

In previous exercises, the AnimationDrawable was created using XML. It can be created using Java code also.

Create AnimationDrawable using Java code

Same as previous exercise, you have to copy some graphic in /res/drawable folder, refer to the post "Create frame animation with AnimationDrawable".

Modify main.xml, add a ImageView with predefined layout_width and android:layout_height.
<?xml version="1.0" encoding="utf-8"?>
<LinearLayout xmlns:android="http://schemas.android.com/apk/res/android"
android:layout_width="fill_parent"
android:layout_height="fill_parent"
android:orientation="vertical" >

<TextView
android:layout_width="fill_parent"
android:layout_height="wrap_content"
android:text="@string/hello" />
<TextView
android:layout_width="fill_parent"
android:layout_height="wrap_content"
android:text="Set Alpha" />
<SeekBar
android:id="@+id/setalpha"
android:layout_width="fill_parent"
android:layout_height="wrap_content"
android:progress="255"
android:max="255" />
<Button
android:id="@+id/startanimation"
android:layout_width="fill_parent"
android:layout_height="wrap_content"
android:text="Start Animation" />
<Button
android:id="@+id/stopanimation"
android:layout_width="fill_parent"
android:layout_height="wrap_content"
android:text="Stop Animation" />
<ImageView
android:id="@+id/myanimation"
android:layout_width="114dp"
android:layout_height="16dp"
/>
</LinearLayout>


Modify the code of the activity.
package com.exercise.AndroidAnimation;

import android.app.Activity;
import android.graphics.drawable.AnimationDrawable;
import android.os.Bundle;
import android.view.View;
import android.widget.Button;
import android.widget.ImageView;
import android.widget.SeekBar;

public class AndroidAnimationActivity extends Activity {
/** Called when the activity is first created. */
@Override
public void onCreate(Bundle savedInstanceState) {
super.onCreate(savedInstanceState);
setContentView(R.layout.main);

ImageView myAnimation = (ImageView)findViewById(R.id.myanimation);

//Create a new AnimationDrawable
final AnimationDrawable myAnimationDrawable
= createAnimationDrawable();

//apply the new AnimationDrawable
myAnimation.setImageDrawable(myAnimationDrawable);

SeekBar setAnimationAlpha = (SeekBar)findViewById(R.id.setalpha);
Button startAnimation = (Button)findViewById(R.id.startanimation);
Button stopAnimation = (Button)findViewById(R.id.stopanimation);

startAnimation.setOnClickListener(new Button.OnClickListener(){

@Override
public void onClick(View arg0) {
// TODO Auto-generated method stub
if(!myAnimationDrawable.isRunning()){
myAnimationDrawable.start();
}
}});

stopAnimation.setOnClickListener(new Button.OnClickListener(){

@Override
public void onClick(View arg0) {
// TODO Auto-generated method stub
if(myAnimationDrawable.isRunning()){
myAnimationDrawable.stop();
}
}});

setAnimationAlpha.setOnSeekBarChangeListener(new SeekBar.OnSeekBarChangeListener(){

@Override
public void onProgressChanged(SeekBar seekBar, int progress,
boolean fromUser) {
myAnimationDrawable.setAlpha(progress);
}

@Override
public void onStartTrackingTouch(SeekBar seekBar) {
// TODO Auto-generated method stub

}

@Override
public void onStopTrackingTouch(SeekBar seekBar) {
// TODO Auto-generated method stub

}});

}

private AnimationDrawable createAnimationDrawable(){

AnimationDrawable newAnim = new AnimationDrawable();

newAnim.addFrame(getResources().getDrawable(R.drawable.android_1), 500);
newAnim.addFrame(getResources().getDrawable(R.drawable.android_2), 500);
newAnim.addFrame(getResources().getDrawable(R.drawable.android_3), 500);
newAnim.addFrame(getResources().getDrawable(R.drawable.android_4), 500);
newAnim.addFrame(getResources().getDrawable(R.drawable.android_5), 500);
newAnim.addFrame(getResources().getDrawable(R.drawable.android_6), 500);
newAnim.addFrame(getResources().getDrawable(R.drawable.android_7), 500);
newAnim.setOneShot(false);

return newAnim;
}

}


Download the files.

Tuesday, January 24, 2012

Creaete AnimationDrawable and copy frames from another AnimationDrawable

Modify from ast exercise "Set alpha of AnimationDrawable", we are going to create a new AnimationDrawable, copy frame from the original myAnimationDrawable, and re-arrange frame order in reverse.

Creaete AnimationDrawable and copy frames from another AnimationDrawable

Modify main.xml to add a ImageView for the new animation.
<?xml version="1.0" encoding="utf-8"?>
<LinearLayout xmlns:android="http://schemas.android.com/apk/res/android"
android:layout_width="fill_parent"
android:layout_height="fill_parent"
android:orientation="vertical" >

<TextView
android:layout_width="fill_parent"
android:layout_height="wrap_content"
android:text="@string/hello" />
<TextView
android:layout_width="fill_parent"
android:layout_height="wrap_content"
android:text="Set Alpha" />
<SeekBar
android:id="@+id/setalpha"
android:layout_width="fill_parent"
android:layout_height="wrap_content"
android:progress="255"
android:max="255" />
<Button
android:id="@+id/startanimation"
android:layout_width="fill_parent"
android:layout_height="wrap_content"
android:text="Start Animation" />
<Button
android:id="@+id/stopanimation"
android:layout_width="fill_parent"
android:layout_height="wrap_content"
android:text="Stop Animation" />
<ImageView
android:id="@+id/myanimation"
android:layout_width="wrap_content"
android:layout_height="wrap_content"
android:src="@anim/anim_android"
/>
<ImageView
android:id="@+id/myanimation2"
android:layout_width="fill_parent"
android:layout_height="fill_parent"
/>
</LinearLayout>


Modify the Java code, implement a new method copyReversedAnim(). It return the new AnimationDrawable. Then set it the ImageDrawable of the ImageView.

package com.exercise.AndroidAnimation;

import android.app.Activity;
import android.graphics.drawable.AnimationDrawable;
import android.os.Bundle;
import android.view.View;
import android.widget.Button;
import android.widget.ImageView;
import android.widget.SeekBar;
import android.widget.Toast;

public class AndroidAnimationActivity extends Activity {
/** Called when the activity is first created. */
@Override
public void onCreate(Bundle savedInstanceState) {
super.onCreate(savedInstanceState);
setContentView(R.layout.main);

ImageView myAnimation = (ImageView)findViewById(R.id.myanimation);
ImageView myAnimation2 = (ImageView)findViewById(R.id.myanimation2);
final AnimationDrawable myAnimationDrawable
= (AnimationDrawable)myAnimation.getDrawable();

//Copy a new AnimationDrawable in reversed order
final AnimationDrawable reversedAnimationDrawable = copyReversedAnim(myAnimationDrawable);
//apply the new AnimationDrawable
myAnimation2.setImageDrawable(reversedAnimationDrawable);

SeekBar setAnimationAlpha = (SeekBar)findViewById(R.id.setalpha);
Button startAnimation = (Button)findViewById(R.id.startanimation);
Button stopAnimation = (Button)findViewById(R.id.stopanimation);

startAnimation.setOnClickListener(new Button.OnClickListener(){

@Override
public void onClick(View arg0) {
// TODO Auto-generated method stub
if(!reversedAnimationDrawable.isRunning()){
myAnimationDrawable.start();
reversedAnimationDrawable.start();
}
}});

stopAnimation.setOnClickListener(new Button.OnClickListener(){

@Override
public void onClick(View arg0) {
// TODO Auto-generated method stub
if(reversedAnimationDrawable.isRunning()){
myAnimationDrawable.stop();
reversedAnimationDrawable.stop();
}
}});

setAnimationAlpha.setOnSeekBarChangeListener(new SeekBar.OnSeekBarChangeListener(){

@Override
public void onProgressChanged(SeekBar seekBar, int progress,
boolean fromUser) {
myAnimationDrawable.setAlpha(progress);
reversedAnimationDrawable.setAlpha(progress);

}

@Override
public void onStartTrackingTouch(SeekBar seekBar) {
// TODO Auto-generated method stub

}

@Override
public void onStopTrackingTouch(SeekBar seekBar) {
// TODO Auto-generated method stub

}});

}

private AnimationDrawable copyReversedAnim(AnimationDrawable src){

AnimationDrawable newAnim = new AnimationDrawable();

int numberOfFrame = src.getNumberOfFrames();

for(int i = 0; i < numberOfFrame; i++){
newAnim.addFrame(
src.getFrame(numberOfFrame - i - 1),
src.getDuration(numberOfFrame - i - 1));
}
newAnim.setOneShot(false);

return newAnim;
}
}


Download the files.

Monday, January 23, 2012

Set alpha of AnimationDrawable

Alpha of a AnimationDrawable can be changed using setAlpha(int alpha), Specify an alpha value for the AnimationDrawable. 0 means fully transparent, and 255 means fully opaque.

Set alpha of AnimationDrawable

Modify from last exercise "Start and Stop frame animation with AnimationDrawable", add a SeekBar to set alpha of the animation.

main.xml
<?xml version="1.0" encoding="utf-8"?>
<LinearLayout xmlns:android="http://schemas.android.com/apk/res/android"
android:layout_width="fill_parent"
android:layout_height="fill_parent"
android:orientation="vertical" >

<TextView
android:layout_width="fill_parent"
android:layout_height="wrap_content"
android:text="@string/hello" />
<TextView
android:layout_width="fill_parent"
android:layout_height="wrap_content"
android:text="Set Alpha" />
<SeekBar
android:id="@+id/setalpha"
android:layout_width="fill_parent"
android:layout_height="wrap_content"
android:progress="255"
android:max="255" />
<Button
android:id="@+id/startanimation"
android:layout_width="fill_parent"
android:layout_height="wrap_content"
android:text="Start Animation" />
<Button
android:id="@+id/stopanimation"
android:layout_width="fill_parent"
android:layout_height="wrap_content"
android:text="Stop Animation" />
<ImageView
android:id="@+id/myanimation"
android:layout_width="wrap_content"
android:layout_height="wrap_content"
android:src="@anim/anim_android"
/>

</LinearLayout>


Modify the code of the actiity
package com.exercise.AndroidAnimation;

import android.app.Activity;
import android.graphics.drawable.AnimationDrawable;
import android.os.Bundle;
import android.view.View;
import android.widget.Button;
import android.widget.ImageView;
import android.widget.SeekBar;

public class AndroidAnimationActivity extends Activity {
/** Called when the activity is first created. */
@Override
public void onCreate(Bundle savedInstanceState) {
super.onCreate(savedInstanceState);
setContentView(R.layout.main);

ImageView myAnimation = (ImageView)findViewById(R.id.myanimation);
final AnimationDrawable myAnimationDrawable
= (AnimationDrawable)myAnimation.getDrawable();

SeekBar setAnimationAlpha = (SeekBar)findViewById(R.id.setalpha);
Button startAnimation = (Button)findViewById(R.id.startanimation);
Button stopAnimation = (Button)findViewById(R.id.stopanimation);

startAnimation.setOnClickListener(new Button.OnClickListener(){

@Override
public void onClick(View arg0) {
// TODO Auto-generated method stub
if(!myAnimationDrawable.isRunning()){
myAnimationDrawable.start();
}
}});

stopAnimation.setOnClickListener(new Button.OnClickListener(){

@Override
public void onClick(View arg0) {
// TODO Auto-generated method stub
if(myAnimationDrawable.isRunning()){
myAnimationDrawable.stop();
}
}});

setAnimationAlpha.setOnSeekBarChangeListener(new SeekBar.OnSeekBarChangeListener(){

@Override
public void onProgressChanged(SeekBar seekBar, int progress,
boolean fromUser) {
myAnimationDrawable.setAlpha(progress);

}

@Override
public void onStartTrackingTouch(SeekBar seekBar) {
// TODO Auto-generated method stub

}

@Override
public void onStopTrackingTouch(SeekBar seekBar) {
// TODO Auto-generated method stub

}});

}
}


Download the files.


Next:
- Creaete AnimationDrawable and copy frames from another AnimationDrawable

Sunday, January 22, 2012

Start and Stop frame animation with AnimationDrawable

Modify from the last exercise "Create frame animation with AnimationDrawable", add two buttons top start and stop frame animation by calling AnimationDrawable.start() and AnimationDrawable.stop()

Start and Stop frame animation with AnimationDrawable

package com.exercise.AndroidAnimation;

import android.app.Activity;
import android.graphics.drawable.AnimationDrawable;
import android.os.Bundle;
import android.view.View;
import android.widget.Button;
import android.widget.ImageView;

public class AndroidAnimationActivity extends Activity {
/** Called when the activity is first created. */
@Override
public void onCreate(Bundle savedInstanceState) {
    super.onCreate(savedInstanceState);
    setContentView(R.layout.main);

    ImageView myAnimation = (ImageView)findViewById(R.id.myanimation);
    final AnimationDrawable myAnimationDrawable
     = (AnimationDrawable)myAnimation.getDrawable();

    Button startAnimation = (Button)findViewById(R.id.startanimation);
    Button stopAnimation = (Button)findViewById(R.id.stopanimation);

    startAnimation.setOnClickListener(new Button.OnClickListener(){

   @Override
   public void onClick(View arg0) {
    // TODO Auto-generated method stub
    if(!myAnimationDrawable.isRunning()){
     myAnimationDrawable.start();
    }
   }});

    stopAnimation.setOnClickListener(new Button.OnClickListener(){

   @Override
   public void onClick(View arg0) {
    // TODO Auto-generated method stub
    if(myAnimationDrawable.isRunning()){
     myAnimationDrawable.stop();
    }
   }});
}
}


main.xml
<?xml version="1.0" encoding="utf-8"?>
<LinearLayout xmlns:android="http://schemas.android.com/apk/res/android"
android:layout_width="fill_parent"
android:layout_height="fill_parent"
android:orientation="vertical" >

<TextView
    android:layout_width="fill_parent"
    android:layout_height="wrap_content"
    android:text="@string/hello" />
<Button
    android:id="@+id/startanimation"
    android:layout_width="fill_parent"
    android:layout_height="wrap_content"
    android:text="Start Animation" />
<Button
    android:id="@+id/stopanimation"
    android:layout_width="fill_parent"
    android:layout_height="wrap_content"
    android:text="Stop Animation" />
<ImageView
    android:id="@+id/myanimation"
    android:layout_width="wrap_content"
    android:layout_height="wrap_content"
    android:src="@anim/anim_android"
    />

</LinearLayout>


Download the files.


next:
- Set alpha of AnimationDrawable
Detect AnimationDrawable.isRunning() to toggle start/stop animation

Wednesday, January 18, 2012

Create frame animation with AnimationDrawable


Before we start coding for our frame animation, we have to prepare some .png graph for our frames, named android_1.png ~ android_7.png. Copy all graphs to /res/drawable folder.


Create a file /res/anim/anim_android.xml
<?xml version="1.0" encoding="utf-8"?>
<animation-list xmlns:android="http://schemas.android.com/apk/res/android"
android:oneshot="false"
>
<item
android:drawable="@drawable/android_1"
android:duration="100"/>
<item
android:drawable="@drawable/android_2"
android:duration="100"/>
<item
android:drawable="@drawable/android_3"
android:duration="100"/>
<item
android:drawable="@drawable/android_4"
android:duration="100"/>
<item
android:drawable="@drawable/android_5"
android:duration="100"/>
<item
android:drawable="@drawable/android_6"
android:duration="100"/>
<item
android:drawable="@drawable/android_7"
android:duration="100"/>
</animation-list>


Modify main.xml, add a ImageView with android:src="@anim/anim_android".
<?xml version="1.0" encoding="utf-8"?>
<LinearLayout xmlns:android="http://schemas.android.com/apk/res/android"
android:layout_width="fill_parent"
android:layout_height="fill_parent"
android:orientation="vertical" >

<TextView
android:layout_width="fill_parent"
android:layout_height="wrap_content"
android:text="@string/hello" />
<ImageView
android:id="@+id/myanimation"
android:layout_width="wrap_content"
android:layout_height="wrap_content"
android:src="@anim/anim_android"
/>

</LinearLayout>


Modify our activity:
package com.exercise.AndroidAnimation;

import android.app.Activity;
import android.graphics.drawable.AnimationDrawable;
import android.os.Bundle;
import android.widget.ImageView;

public class AndroidAnimationActivity extends Activity {
/** Called when the activity is first created. */
@Override
public void onCreate(Bundle savedInstanceState) {
super.onCreate(savedInstanceState);
setContentView(R.layout.main);

ImageView myAnimation = (ImageView)findViewById(R.id.myanimation);
final AnimationDrawable myAnimationDrawable
= (AnimationDrawable)myAnimation.getDrawable();

myAnimation.post(
new Runnable(){

  @Override
  public void run() {
   myAnimationDrawable.start();
  }
});
}
}


Download the files.

Next:
- Start and Stop frame animation with AnimationDrawable
Handle end of animation for AnimationDrawable

Related:
- Create AnimationDrawable using Java code

Tuesday, January 17, 2012

English-language Wikipedia will black out for 24 hours!

The Wikipedia community announced its decision to black out the English-language Wikipedia for 24 hours, worldwide, beginning at 05:00 UTC on Wednesday, January 18 (you can read the statement from the Wikimedia Foundation here). The blackout is a protest against proposed legislation in the United States—the Stop Online Piracy Act (SOPA) in the U.S. House of Representatives, and the PROTECT IP Act (PIPA) in the U.S. Senate—that, if passed, would seriously damage the free and open Internet, including Wikipedia.

Monday, January 16, 2012

Delete Android system file data/system/batterystats.bin cannot help in battery life!

Recently, somebody said that delete the file data/system/batterystats.bin in Android system can improve the battery life!

Android Framework Engineer, Dianne Hackborn have a post in Google+, stated that This file is used to maintain, across reboots, low-level data about the kinds of operations the device and your apps are doing between battery changes. That is, it is solely used to compute the blame for battery usage shown in the "Battery Use" UI in settings...It has no impact on your battery life.

Read the full post: https://plus.google.com/105051985738280261832/posts/FV3LVtdVxPT

Delete Android system file data/system/batterystats.bin cannot help in battery life!

Sunday, January 15, 2012

ListFragment

ListFragment (for API Level 11, Android 3.0, or higher) hosts a ListView object that can be bound to different data sources, typically either an array or a Cursor holding query results. Binding, screen layout, and row layout are discussed in the following sections.

ListFragment

Create a new /res/layout/listfragment1.xml file, it's the layout of out ListFragment.
(If the list is empty, the TextView empty will be shown.)
<?xml version="1.0" encoding="utf-8"?>
 <LinearLayout xmlns:android="http://schemas.android.com/apk/res/android"
         android:orientation="vertical"
         android:layout_width="match_parent"
         android:layout_height="match_parent"
         android:paddingLeft="8dp"
         android:paddingRight="8dp">

     <ListView android:id="@id/android:list"
               android:layout_width="match_parent"
               android:layout_height="match_parent"
               android:layout_weight="1"
               android:drawSelectorOnTop="false"/>

     <TextView android:id="@id/android:empty"
               android:layout_width="match_parent"
               android:layout_height="match_parent"
               android:text="No data"/>
 </LinearLayout>


Create a new MyListFragment1.java class, extends com.exercise.AndroidListFragment. Override onCreate(), onCreateView() and onListItemClick() methods.
package com.exercise.AndroidListFragment;

import android.app.ListFragment;
import android.os.Bundle;
import android.view.LayoutInflater;
import android.view.View;
import android.view.ViewGroup;
import android.widget.ArrayAdapter;
import android.widget.ListAdapter;
import android.widget.ListView;
import android.widget.Toast;

public class MyListFragment1 extends ListFragment {
 
 String[] month ={
   "January", 
   "February", 
   "March", 
   "April",
   "May", 
   "June", 
   "July", 
   "August",
   "September", 
   "October", 
   "November", 
   "December"
 };
 
 @Override
 public void onCreate(Bundle savedInstanceState) {
  super.onCreate(savedInstanceState);
  ListAdapter myListAdapter = new ArrayAdapter<String>(
    getActivity(),
    android.R.layout.simple_list_item_1,
    month);
  setListAdapter(myListAdapter);
 }

 @Override
 public View onCreateView(LayoutInflater inflater, ViewGroup container,
   Bundle savedInstanceState) {
  return inflater.inflate(R.layout.listfragment1, container, false);
 }

 @Override
 public void onListItemClick(ListView l, View v, int position, long id) {
  // TODO Auto-generated method stub
  Toast.makeText(
    getActivity(), 
    getListView().getItemAtPosition(position).toString(), 
    Toast.LENGTH_LONG).show();
 }
}


Add another dummy Fragment.

Create a new /res/layout/fragment2.xml, the layout of the second Fragment.
<?xml version="1.0" encoding="utf-8"?>
<LinearLayout xmlns:android="http://schemas.android.com/apk/res/android"
    android:layout_width="match_parent"
    android:layout_height="match_parent"
    android:orientation="vertical" >
    
    <TextView
        android:id="@+id/fragment2text"
        android:layout_width="match_parent"
        android:layout_height="wrap_content"
        android:text="Hello! It's Fragment2" />
</LinearLayout>


Fragment2.java, extends android.app.Fragment. Override onCreateView() method.
package com.exercise.AndroidListFragment;

import android.app.Fragment;
import android.os.Bundle;
import android.view.LayoutInflater;
import android.view.View;
import android.view.ViewGroup;

public class Fragment2 extends Fragment {

 @Override
 public View onCreateView(LayoutInflater inflater, ViewGroup container,
   Bundle savedInstanceState) {
  // TODO Auto-generated method stub
  return inflater.inflate(R.layout.fragment2, container, false);
 }

}


Modify main.xml to include both Fragments
<?xml version="1.0" encoding="utf-8"?>
<LinearLayout xmlns:android="http://schemas.android.com/apk/res/android"
    android:layout_width="fill_parent"
    android:layout_height="fill_parent"
    android:orientation="horizontal" >

  <fragment
      android:name="com.exercise.AndroidListFragment.MyListFragment1"
      android:id="@+id/fragment1"
      android:layout_weight="1"
      android:layout_width="0px"
      android:layout_height="match_parent" />
  <fragment
      android:name="com.exercise.AndroidListFragment.Fragment2"
      android:id="@+id/fragment2"
      android:layout_weight="2"
      android:layout_width="0px"
      android:layout_height="match_parent" />

</LinearLayout>


Download the files.

Next:
- Implement custom ArrayAdapter to display icon on ListFragment
ListFragment with multiple choice

Friday, January 13, 2012

Texas Instruments first-ever OMAP 5 reference Design Demo


Texas Instruments promised us a new helping of OMAP right around a year ago, and sure enough, OMAP 5 processors will be sampling to partners as early as next week. Texas Instruments' Remi El-Ouazzane (VP of OMAP) just debuted an OMAP 5-based reference design (or "development platform," if you will) on our CES stage, a solid four years after OMAP 3 debuted on a nondescript Archos tablet. OMAP 5 brings along a pair of cores and plenty of power savings, a dual-GPU architecture and more raw horsepower than the average simpleton is used to handling in a single palm. We saw quite a bit of swiping through Android 4.0.1, and as you'd expect, everything looked decidedly snappy. 720p video at 30 frames per second is no real chore, with the platform capable of pushing 1080p material at 64 frames per second (130 frames per second without screen refresh limitations). Of course, with everything being hardware accelerated, we can't feign surprise about its future on netbooks and laptops.

Thursday, January 12, 2012

Google release Android Design Site


Google are introducing Android Design for developers to learn about principles, building blocks, and patterns for creating world-class Android user interfaces. Whether you’re a UI professional or a developer playing that role, these docs show you how to make good design decisions, big and small. In the coming months, it will be expanded with more in-depth content.

- Android Design

Always Innovating OMAP4 HDMI Dongle


Always Innovating fits the Texas Instruments OMAP4 motherboard with all the needed features for a Desktop, Set-top-box and 3D home console into a USB stick sized device that connects to the HDMI port of your HDTV and gets power from USB. It has Bluetooth for Bluetooth keyboards and game controllers. Its USB can do USB host.

DialogFragment

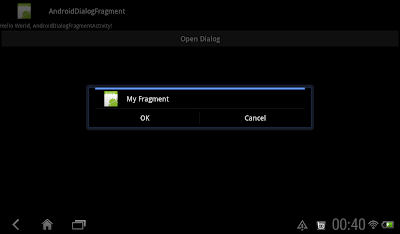
android.app.DialogFragment, was introduced from API Level 11 (Android 3.0), displays a dialog window, floating on top of its activity's window.

DialogFragment

- Create a new MyDialogFragment.java class extends android.app.DialogFragment.
package com.exercise.AndroidDialogFragment;

import android.app.AlertDialog;
import android.app.Dialog;
import android.app.DialogFragment;
import android.content.DialogInterface;
import android.os.Bundle;

public class MyDialogFragment extends DialogFragment {

static MyDialogFragment newInstance() {

String title = "My Fragment";

MyDialogFragment f = new MyDialogFragment();
Bundle args = new Bundle();
args.putString("title", title);
f.setArguments(args);
return f;
}

@Override
public Dialog onCreateDialog(Bundle savedInstanceState) {
String title = getArguments().getString("title");
Dialog myDialog = new AlertDialog.Builder(getActivity())
.setIcon(R.drawable.ic_launcher)
.setTitle(title)
.setPositiveButton("OK",
new DialogInterface.OnClickListener() {

@Override
public void onClick(DialogInterface dialog, int which) {
((AndroidDialogFragmentActivity)getActivity()).okClicked();
}
})
.setNegativeButton("Cancel",
new DialogInterface.OnClickListener() {

@Override
public void onClick(DialogInterface dialog, int which) {
((AndroidDialogFragmentActivity)getActivity()).cancelClicked();
}
})
.create();

return myDialog;
}

}


- Modify main.xml layout to add a button to open the dialog.
<?xml version="1.0" encoding="utf-8"?>
<LinearLayout xmlns:android="http://schemas.android.com/apk/res/android"
android:layout_width="fill_parent"
android:layout_height="fill_parent"
android:orientation="vertical" >

<TextView
android:layout_width="fill_parent"
android:layout_height="wrap_content"
android:text="@string/hello" />
<Button
android:id="@+id/opendialog"
android:layout_width="fill_parent"
android:layout_height="wrap_content"
android:text="Open Dialog" />

</LinearLayout>


- Main activity, AndroidDialogFragmentActivity.java
package com.exercise.AndroidDialogFragment;

import android.app.Activity;
import android.os.Bundle;
import android.view.View;
import android.widget.Button;
import android.widget.Toast;

public class AndroidDialogFragmentActivity extends Activity {
/** Called when the activity is first created. */
@Override
public void onCreate(Bundle savedInstanceState) {
super.onCreate(savedInstanceState);
setContentView(R.layout.main);


Button buttonOpenDialog = (Button)findViewById(R.id.opendialog);
buttonOpenDialog.setOnClickListener(new Button.OnClickListener(){

@Override
public void onClick(View arg0) {
OpenDialog();
}});

}

void OpenDialog(){
MyDialogFragment myDialogFragment = MyDialogFragment.newInstance();
myDialogFragment.show(getFragmentManager(), "myDialogFragment");
}

public void okClicked() {
Toast.makeText(AndroidDialogFragmentActivity.this,
"OK Clicked!",
Toast.LENGTH_LONG).show();
}

public void cancelClicked() {
Toast.makeText(AndroidDialogFragmentActivity.this,
"Cancel Clicked!",
Toast.LENGTH_LONG).show();
}
}


Download the files.

Wednesday, January 11, 2012

Monday, January 9, 2012

Event handler of VideoView - OnCompletion, OnPrepared and OnError

Refer to the old exercise "Displays video in VideoView", we can play video on VideoView easily. We can also implement our own event handlers and register with our VideoView using the methods setOnCompletionListener(), setOnPreparedListener() and setOnErrorListener().

Event handler of VideoView

Main code, AndroidVideoViewActivity.java
package com.exercise.AndroidVideoView;

import android.app.Activity;
import android.media.MediaPlayer;
import android.net.Uri;
import android.os.Bundle;
import android.widget.MediaController;
import android.widget.Toast;
import android.widget.VideoView;

public class AndroidVideoViewActivity extends Activity {
/** Called when the activity is first created. */
@Override
public void onCreate(Bundle savedInstanceState) {
super.onCreate(savedInstanceState);
setContentView(R.layout.main);

VideoView myVideoView = (VideoView)findViewById(R.id.videoview);

String viewSource ="rtsp://v5.cache1.c.youtube.com/CjYLENy73wIaLQklThqIVp_AsxMYESARFEIJbXYtZ29vZ2xlSARSBWluZGV4YIvJo6nmx9DvSww=/0/0/0/video.3gp";

myVideoView.setVideoURI(Uri.parse(viewSource));
myVideoView.setMediaController(new MediaController(this));

myVideoView.setOnCompletionListener(myVideoViewCompletionListener);
myVideoView.setOnPreparedListener(MyVideoViewPreparedListener);
myVideoView.setOnErrorListener(myVideoViewErrorListener);

myVideoView.requestFocus();
myVideoView.start();
}

MediaPlayer.OnCompletionListener myVideoViewCompletionListener
= new MediaPlayer.OnCompletionListener(){

@Override
public void onCompletion(MediaPlayer arg0) {
Toast.makeText(AndroidVideoViewActivity.this,
"End of Video",
Toast.LENGTH_LONG).show();
}};

MediaPlayer.OnPreparedListener MyVideoViewPreparedListener
= new MediaPlayer.OnPreparedListener(){

@Override
public void onPrepared(MediaPlayer arg0) {
Toast.makeText(AndroidVideoViewActivity.this,
"Media file is loaded and ready to go",
Toast.LENGTH_LONG).show();

}};

MediaPlayer.OnErrorListener myVideoViewErrorListener
= new MediaPlayer.OnErrorListener(){

@Override
public boolean onError(MediaPlayer arg0, int arg1, int arg2) {
Toast.makeText(AndroidVideoViewActivity.this,
"Error!!!",
Toast.LENGTH_LONG).show();
return true;
}};
}


Layout, main.xml
<?xml version="1.0" encoding="utf-8"?>
<LinearLayout xmlns:android="http://schemas.android.com/apk/res/android"
android:orientation="vertical"
android:layout_width="fill_parent"
android:layout_height="fill_parent"
>
<TextView
android:layout_width="fill_parent"
android:layout_height="wrap_content"
android:text="@string/hello"
/>
<VideoView
android:id="@+id/videoview"
android:layout_width="fill_parent"
android:layout_height="fill_parent"
/>
</LinearLayout>


Download the files.

Sunday, January 8, 2012

Show Action Item with icon and text

Refer to last exercise "Show as Action Item with icon"; to show action item with icon and text, call setShowAsAction() method with MenuItem.SHOW_AS_ACTION_IF_ROOM|MenuItem.SHOW_AS_ACTION_WITH_TEXT.

 @Override
public boolean onCreateOptionsMenu(Menu menu) {
super.onCreateOptionsMenu(menu);

/*
* menu.add(int groupId, int itemId, int order, CharSequence title);
*/
MenuItem menu0 = menu.add(0, 0, 0, "Action Item 0");
{
menu0.setIcon(R.drawable.ic_launcher);
menu0.setShowAsAction(
MenuItem.SHOW_AS_ACTION_IF_ROOM
|MenuItem.SHOW_AS_ACTION_WITH_TEXT);
}
menu.add(0, 1, 1, "Action Item 1");
menu.add(0, 2, 2, "Action Item 2");
menu.add(0, 3, 3, "Action Item 3");
menu.add(0, 4, 4, "Action Item 4");

return true;
}


Show Action Item with icon and text

Related article: Create ActionBar using XML

Show as Action Item with icon

Modify from last article "Add and respond Action Items on Action Bar", we can display individual item seperately on with icon, instead of within the overflow action item.

Show as Action Item with icon

Notice the the code of menu0 in onCreateOptionsMenu() method:
package com.exercise.AndroidActionBar;

import android.app.ActionBar;
import android.app.Activity;
import android.os.Bundle;
import android.view.Menu;
import android.view.MenuItem;
import android.view.View;
import android.widget.Button;
import android.widget.Toast;

public class AndroidActionBarActivity extends Activity {
/** Called when the activity is first created. */
@Override
public void onCreate(Bundle savedInstanceState) {
super.onCreate(savedInstanceState);
setContentView(R.layout.main);

Button showActionBar = (Button)findViewById(R.id.showactionbar);
Button hideActionBar = (Button)findViewById(R.id.hideactionbar);

showActionBar.setOnClickListener(new Button.OnClickListener(){

@Override
public void onClick(View arg0) {
ActionBar actionBar = getActionBar();
actionBar.show();
}});

hideActionBar.setOnClickListener(new Button.OnClickListener(){

@Override
public void onClick(View arg0) {
ActionBar actionBar = getActionBar();
actionBar.hide();
}});
}

@Override
public boolean onCreateOptionsMenu(Menu menu) {
super.onCreateOptionsMenu(menu);

/*
* menu.add(int groupId, int itemId, int order, CharSequence title);
*/
MenuItem menu0 = menu.add(0, 0, 0, "Action Item 0");
{
menu0.setIcon(R.drawable.ic_launcher);
menu0.setShowAsAction(MenuItem.SHOW_AS_ACTION_IF_ROOM);
}
menu.add(0, 1, 1, "Action Item 1");
menu.add(0, 2, 2, "Action Item 2");
menu.add(0, 3, 3, "Action Item 3");
menu.add(0, 4, 4, "Action Item 4");

return true;
}

@Override
public boolean onOptionsItemSelected(MenuItem item) {

switch(item.getItemId()){
case 0:
Toast.makeText(AndroidActionBarActivity.this,
"Action Item 0 selected!",
Toast.LENGTH_LONG).show();
return true;
case 1:
Toast.makeText(AndroidActionBarActivity.this,
"Action Item 1 selected!",
Toast.LENGTH_LONG).show();
return true;
case 2:
Toast.makeText(AndroidActionBarActivity.this,
"Action Item 2 selected!",
Toast.LENGTH_LONG).show();
return true;
case 3:
Toast.makeText(AndroidActionBarActivity.this,
"Action Item 3 selected!",
Toast.LENGTH_LONG).show();
return true;
case 4:
Toast.makeText(AndroidActionBarActivity.this,
"Action Item 4 selected!",
Toast.LENGTH_LONG).show();
return true;
default:
return false;

}

}
}


next:
- Show Action Item with icon and text

Saturday, January 7, 2012

Easter egg@Android.com - a Snowman

A funny Easter egg, it's a snowman game at Android.com.


Browser to http://www.android.com/, scroll-down to bottom. Click on the green Android on the bottom-left will start the game:)

Thursday, January 5, 2012

Add and respond Action Items on Action Bar

We can override onCreateOptionsMenu() and onOptionsItemSelected() to add and respond Action Items on Action Bar.

Example:
Action Items on Action Bar
package com.exercise.AndroidActionBar;

import android.app.ActionBar;
import android.app.Activity;
import android.os.Bundle;
import android.view.Menu;
import android.view.MenuItem;
import android.view.View;
import android.widget.Button;
import android.widget.Toast;

public class AndroidActionBarActivity extends Activity {
/** Called when the activity is first created. */
@Override
public void onCreate(Bundle savedInstanceState) {
super.onCreate(savedInstanceState);
setContentView(R.layout.main);

Button showActionBar = (Button)findViewById(R.id.showactionbar);
Button hideActionBar = (Button)findViewById(R.id.hideactionbar);

showActionBar.setOnClickListener(new Button.OnClickListener(){

@Override
public void onClick(View arg0) {
ActionBar actionBar = getActionBar();
actionBar.show();
}});

hideActionBar.setOnClickListener(new Button.OnClickListener(){

@Override
public void onClick(View arg0) {
ActionBar actionBar = getActionBar();
actionBar.hide();
}});
}

@Override
public boolean onCreateOptionsMenu(Menu menu) {
super.onCreateOptionsMenu(menu);

/*
* menu.add(int groupId, int itemId, int order, CharSequence title);
*/
menu.add(0, 0, 0, "Action Item 0");
menu.add(0, 1, 1, "Action Item 1");
menu.add(0, 2, 2, "Action Item 2");
menu.add(0, 3, 3, "Action Item 3");
menu.add(0, 4, 4, "Action Item 4");

return true;
}

@Override
public boolean onOptionsItemSelected(MenuItem item) {

switch(item.getItemId()){
case 0:
Toast.makeText(AndroidActionBarActivity.this,
"Action Item 0 selected!",
Toast.LENGTH_LONG).show();
return true;
case 1:
Toast.makeText(AndroidActionBarActivity.this,
"Action Item 1 selected!",
Toast.LENGTH_LONG).show();
return true;
case 2:
Toast.makeText(AndroidActionBarActivity.this,
"Action Item 2 selected!",
Toast.LENGTH_LONG).show();
return true;
case 3:
Toast.makeText(AndroidActionBarActivity.this,
"Action Item 3 selected!",
Toast.LENGTH_LONG).show();
return true;
case 4:
Toast.makeText(AndroidActionBarActivity.this,
"Action Item 4 selected!",
Toast.LENGTH_LONG).show();
return true;
default:
return false;

}

}
}


next:
- Show as Action Item with icon

Turn On/Off Action Bar

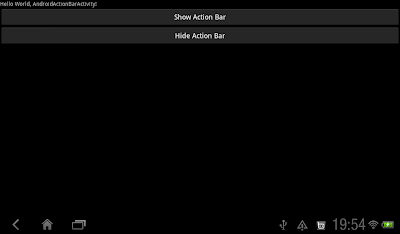
ActionBar on Android 3.0 (API level 11) is a window feature that identifies the application and user location, and provides user actions and navigation modes.

To turn it on/off programmatically, call ActionBar.show() and ActionBar.hide().

Example:
Action Bar On
Action Bar Off

package com.exercise.AndroidActionBar;

import android.app.ActionBar;
import android.app.Activity;
import android.os.Bundle;
import android.view.View;
import android.widget.Button;

public class AndroidActionBarActivity extends Activity {
/** Called when the activity is first created. */
@Override
public void onCreate(Bundle savedInstanceState) {
super.onCreate(savedInstanceState);
setContentView(R.layout.main);

Button showActionBar = (Button)findViewById(R.id.showactionbar);
Button hideActionBar = (Button)findViewById(R.id.hideactionbar);

showActionBar.setOnClickListener(new Button.OnClickListener(){

@Override
public void onClick(View arg0) {
ActionBar actionBar = getActionBar();
actionBar.show();
}});

hideActionBar.setOnClickListener(new Button.OnClickListener(){

@Override
public void onClick(View arg0) {
ActionBar actionBar = getActionBar();
actionBar.hide();
}});
}
}


<?xml version="1.0" encoding="utf-8"?>
<LinearLayout xmlns:android="http://schemas.android.com/apk/res/android"
android:layout_width="fill_parent"
android:layout_height="fill_parent"
android:orientation="vertical" >

<TextView
android:layout_width="fill_parent"
android:layout_height="wrap_content"
android:text="@string/hello" />
<Button
android:id="@+id/showactionbar"
android:layout_width="fill_parent"
android:layout_height="wrap_content"
android:text="Show Action Bar" />
<Button
android:id="@+id/hideactionbar"
android:layout_width="fill_parent"
android:layout_height="wrap_content"
android:text="Hide Action Bar" />

</LinearLayout>


Related Article:
- Add and respond Action Items on Action Bar