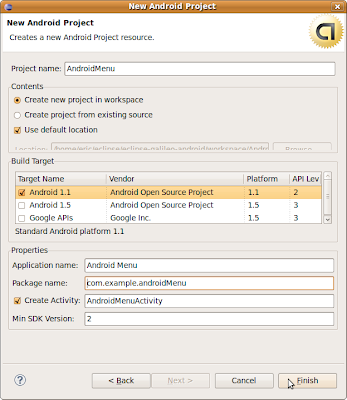
Create a new Android Application with the following setting:
Project name: AndroidMenu
Application name: Android Menu
Package name: com.example.androidMenu
Create Activity: AndroidMenuActivity
Min SDK Version: 2
Use the technique described in the article, Tips and Tricks in using Eclipse: Override a method from a base class, to insert methods onCreateOptionsMenu and onOptionsItemSelected.
Right click on the Source Code Editor and invoke Source > Override/Implement Methods.
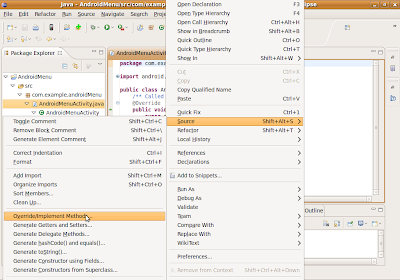
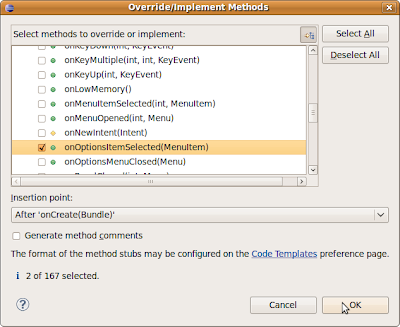
Find and select onCreateOptionsMenu and onOptionsItemSelected, select the insertion position, and click OK.
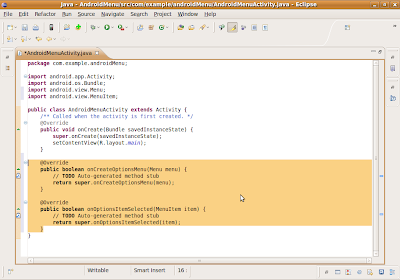
The selected methods will be inserted with dummy code, the need files, android.view.Menu and android.view.MenuItem, will be imported also.
We have to add string constane in the string.xml file.
Modify R.string in res>values>string.xml, add the items:
<string name="app_about">About Me</string>
<string name="str_exit">Exit</string>
<string name="app_about_message">Android Menu</string>
<string name="str_ok">OK</string>
<string name="app_exit">Exit</string>
<string name="app_exit_message">Exit?</string>
<string name="str_no">No</string>
Modify onCreateOptionsMenu(Menu menu), onOptionsItemSelected(MenuItem item) and implement openOptionsDialog() and exitOptionsDialog().
@Override
public boolean onCreateOptionsMenu(Menu menu) {
// TODO Auto-generated method stub
menu.add(0, 0, 0, R.string.app_about);
menu.add(0, 1, 1, R.string.str_exit);
return super.onCreateOptionsMenu(menu);
}
@Override
public boolean onOptionsItemSelected(MenuItem item) {
// TODO Auto-generated method stub
super.onOptionsItemSelected(item);

switch(item.getItemId())
{
case 0:
openOptionsDialog();
break;
case 1:
exitOptionsDialog();
break;
}
return true;
}
private void openOptionsDialog()
{
new AlertDialog.Builder(this)
.setTitle(R.string.app_about)
.setMessage(R.string.app_about_message)
.setPositiveButton(R.string.str_ok,
new DialogInterface.OnClickListener()
{
public void onClick(DialogInterface dialoginterface, int i)
{
}
})
.show();
}
private void exitOptionsDialog()
{
new AlertDialog.Builder(this)
.setTitle(R.string.app_exit)
.setMessage(R.string.app_exit_message)
.setNegativeButton(R.string.str_no,
new DialogInterface.OnClickListener()
{
public void onClick(DialogInterface dialoginterface, int i)
{}
})
.setPositiveButton(R.string.str_ok,
new DialogInterface.OnClickListener()
{
public void onClick(DialogInterface dialoginterface, int i)
{
 finish();
}
})
.show();
}
In order to use AlertDialog, DialogInterface, two more classes have to be imported:
import android.app.AlertDialog;
import android.content.DialogInterface;
Run the application, click the MENU button, two Menu Option, About Me and Exit, will be displayed.
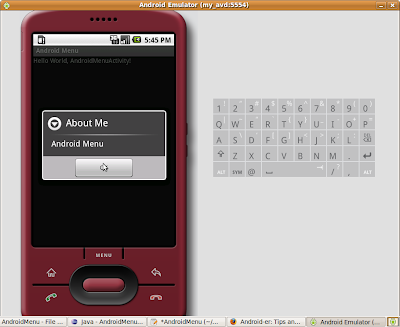
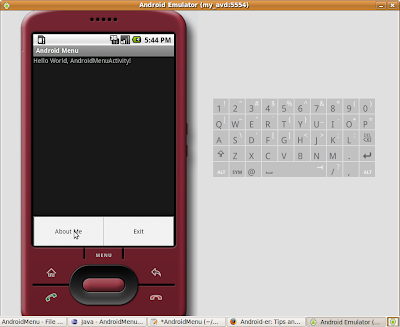 Click About Me will show the About Me dialog
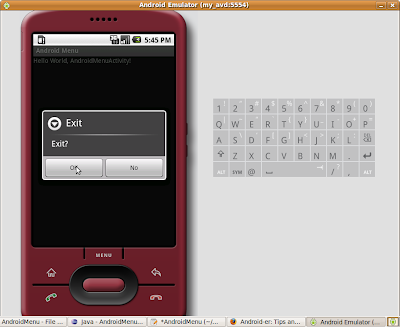
 Click Exit will show a Exit dialog asking to confirm exit.
1 comment:
Thanks. Very easy.
Post a Comment